

Creating a Hollywood action army in 6mm
Last year I finallly started a 6mm WW2 project after several years of collecting and painting 6mm Napoleonics. I like grand scale battles. I bought armies for the Blitzkrieg Commander II ruleset. When browsing for 6mm-pictures and painting guides I often found quite similar, relatively dark armies. On many internet paint blog pictures it was hard too see the difference between a 6mm Axis and an Allied unit.
Besides, WW2-basing looked static, Napoleonic in fact: the miniatures are centered or evenly spread out on a base, and standing in line. In Hollywood and my favorite video games, soldiers run for cover.
I don’t want to sound derogatory. If you want your miniatures to ‘blend in’ I understand. But I respectfully disagree. I want my 6mm-miniatures to stand out, even in this camouflage war. Recognizable – just as my 6mm-Old Guard or my Black Brunswickers.
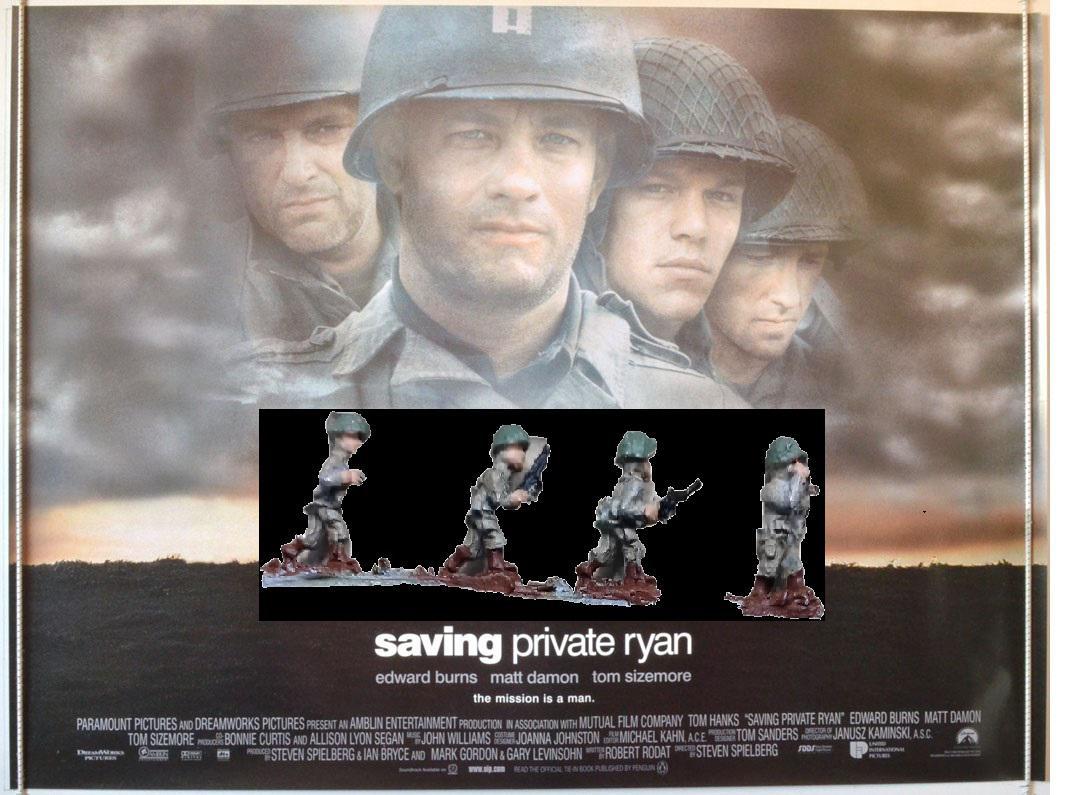
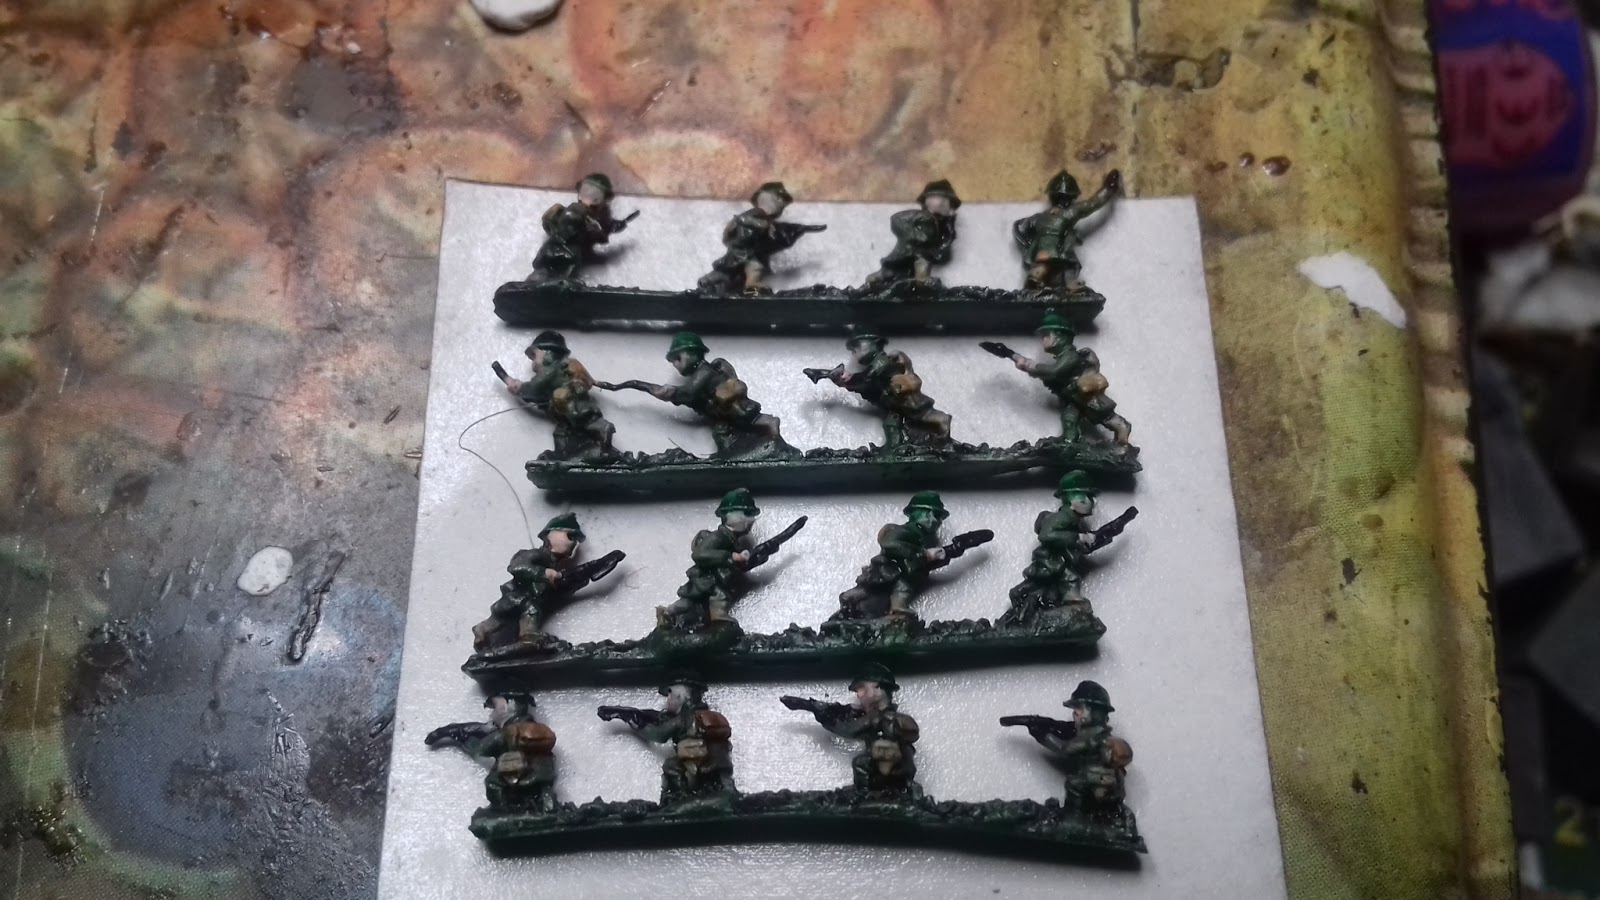
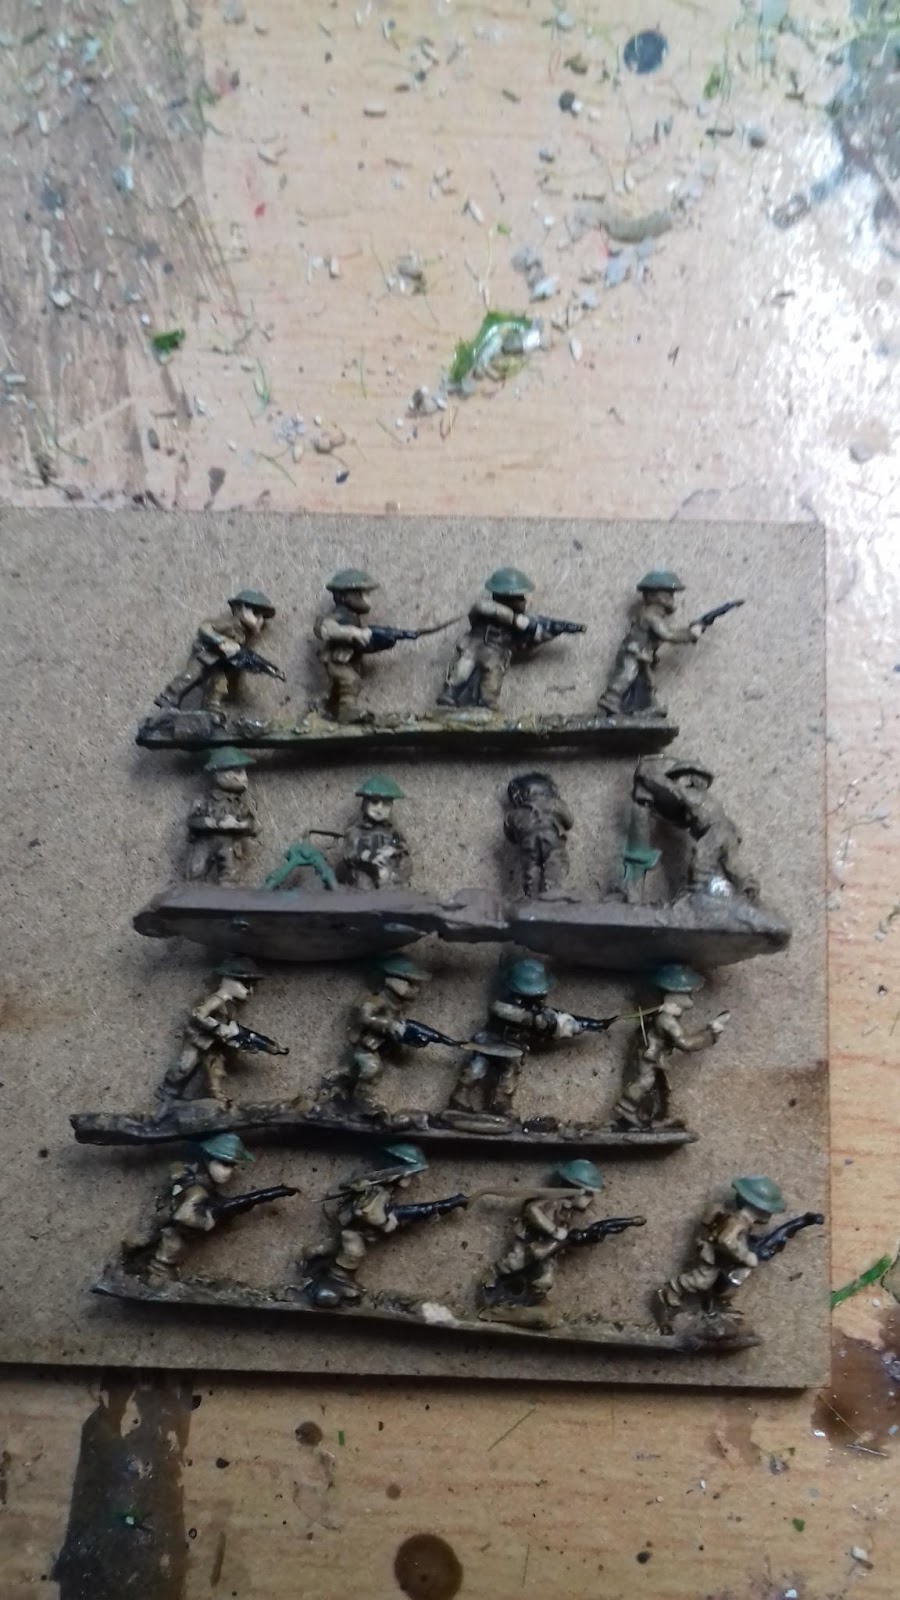
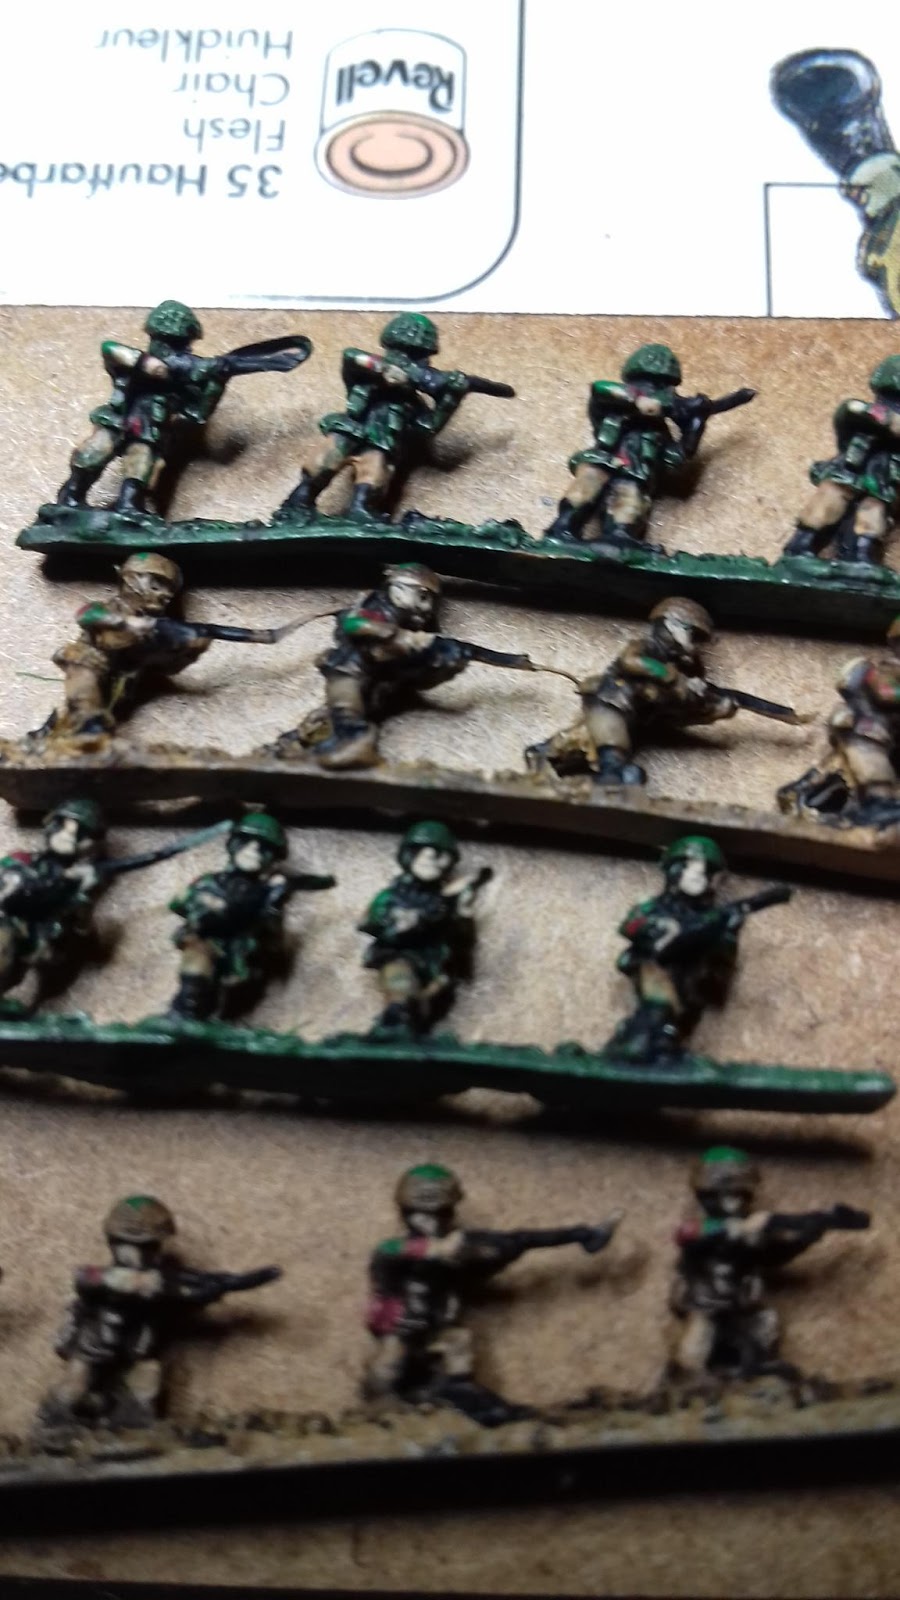
So instead of a more conventional approach I experimented with brighter-than-normal earth colours, as much colour distinction between the uniforms as historically possible, and a scenic ‘cinematic’ basing. My 6mm soldiers kneel, hide and run behind scenery. I use signs and of course decals. I made diorama bases to get a gritty Band of Brothers/Saving Private Ryan/Return to Castle Wolfenstein-look, clearly visible from a meter distance, like below.
Finally I wrote this instructable. Content:
- which vehicles to buy: GHQ or something cheaper?
- which infantry to buy?
- basing system; why you should use a logical universal basing system for 6mm?
- painting: how to exaggerate the minimal uniform colour differences
- decals: tedious, but don’t hesitate, Just Do It!!
- Spielbergian basing: how to make more individual bases with miniatures hiding between ruins, houses, oil drums and walls with propaganda posters
- final words: difference between 6mm Napoleonic an WW2 painting projects
A Hussar Painter Moves To The 2nd World War
I have loved Napoleonic miniature painting since I was a boy and WW2 always lagged behind. WW2 is so monotonous. A big block blue French Old Guard is an attractive view in 6mm and totally different from the shining red British line infantry, even from a meter distance. Units have flags and are instantly recognizable, if painted well. For example, a block of British hussars (not mine), below.

(courtesy of painter papayankee at mywargaminglife.com)
WW2 miniatures are dull grey, brown, green: fifty shades of grey without the sex.
I have a long running Napoleonic 6mm painting project, but for a change I bought 6mm WW2 last year. With, however, the same ambitious goals: distinctive armies, realistic but DISsimilar, with the same ‘wow-is that possible in 6mm’-effect as massed 6mm Napoleonic regiments have. Yes, Brutus says that I’m ambitious – and Brutus is an honourable man. Here’s what I did.
Choice of miniatures: Irregular vehicles and planes
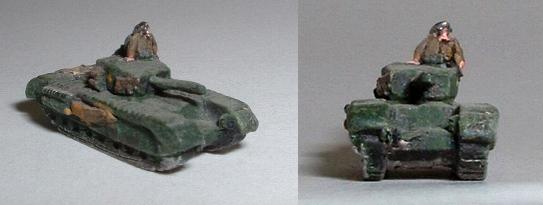
The prevailing opinion is that GHQ has the best 6mm WW2 miniatures, at least the vehicles. This is GHQ, two German tanks.

Beautiful miniatures. Wonderful pictures. With a good painter and good photographer any 6mm miniature can look as impressive as any 28mm miniature.
But the price! 12 dollars/9 pound or 10 euro for a pack with 5 miniatures = 2,50 dollar/plus/ minus 2 pound or euro per miniature! Yes, I’m ambitious. I would sure buy GHQ if I had the money. But I’m an honourable man :-).
Other manufacturers are cheaper and not too bad. Below, Heroics & Ros, 55p per miniature
Below in comparison with GHQ
(the GHQ model on the left)
And below Irregular, one of the uglier pictures from their website, same price range as H&R
From a distance it looks better:

And this is a discounted armoured division from Irregular, from 3 ft / 1 meter distance:
In fact I think that from a distance, and properly based, the general look of these miniatures is the same. Below grey Irregular and khaki GHQ. The further away, the less obvious the difference.
Above: enlarged. Below: as you view them from a distance.
You see?
Below: painted tanks from 6 different vendors, including high quality GHQ and low end H&R and Irregular. Notice that they all look the same, even on this enlarged picture.

(original pics from the website wargames.nordalia.com)
A penny saved is worth two in the bush, as they say in English, or ‘it is a six of one and half a dozen of the other’. So instead of 40 GHQ vehicles I bought three Irregular armored divisions, more than 120 different vehicles, plus relevant scenery like bunkers and pontoon bridges. I know that some wargamers are relentless about Irregular and that reviews of Irregular vehicles are mixed. However, the same reviewer wrote about Irregular WW2:
But as we went through and painted them, we remembered that most detail is lost at three feet away, and when the figures are about the size of the head of a 28mm miniature, detail requirements go down.
Those of us who play together regularly run the gamut where WWII Micro-armor is concerned. The Ninja is happy with three cans of spray paint – light gray for the Germans, Green for the Americans, and desert yellow for the British. The WebMistress is a fan of flesh on hands and face of each figure, and The GM is a stickler for trying to paint everything the artist put into the figure. Since The GM (that’s me!) did this review, they’re mostly done, but even then the web-gear that is on most of these miniatures is not painted. 1:300th of a two or three inch belt is… Not visible at anything more than a few inches away – particularly not with a dark uniform and a black belt.
So the figures are mostly “good enough” – with a few rough ones and a few gems. We’ve only seen one GHQ miniature that we thought fell apart on detail – the German heavy mortar team in this review. There are several cases where a little creative thinking is required with these figures. Some of them are as bad as the GHQ mortars in that review. But most are just soldiers, sculpted up to a satisfactory standard, and as we mentioned, a couple – like the LMGs for both sides – look pretty darned good. The planes are actually very nice, as you can tell from the pictures, while the armor and AT guns are definitely passable, though not the nicest on the market. Again, they’re 6mm, not 1:35th armor, and you can clearly tell what each is just by looking at it.
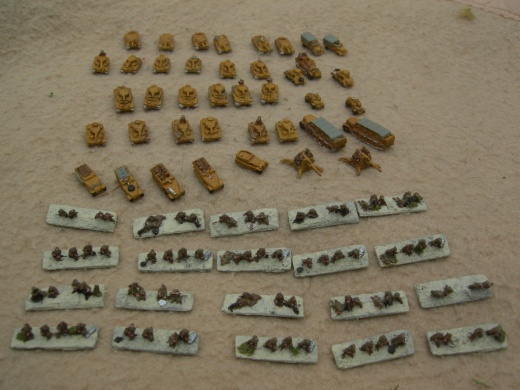
H&R might be a good or better choice than Irregular, but the H&R website and catalog looked out of date when I placed my order, and lacked pictures, Besides, Irregular sells convenient buy-and-forget-armoured division vehicle bags and has a nice 6mm scenery range. I decided I would fullfill my ambitions with these honourable mini’s. I bought three armoured divisions (German, UK, VS, basic cost 32 GBP for 40 vehicles and 20 infantry strips), 6 planes, a searchlight, two bunkers, a crashed plane, and two pontoon bridges, for 95 GBP including P&P = €107,50.
Choice of miniatures: Adler infantry
I got some discount because I only bought the vehicles and not infantry. Irregular infantry is often ‘bulky’, too bulky to my taste. Below Irregular Germans.
While H&R is too tiny IMHO. Below: Irregular (left) compared to Heroics (right)
First question is: why should I bother if you see them from a large distance?
I’m sure others will be perfectly happy with Irregular infantry. However I do bother.
1) I’m afraid that these roughly sculpted infantry miniatures degrade the overall look of your army. 6mm soldiers must convince you from a distance that they are little Germans or Americans, not universal blobs. For a good infantry comparison, check this page.
2) Irregular sculpts infantry as soldiers standing in line. When experimenting I discovered that I don’t like that line position. It’s static and unnatural.
After dismissing Irregular infantry I was in doubt about Baccus – Baccus is my preferred supplier in 6mm Napoleonics. This is the developing, and promising Baccus WW2-range (per november 2017)

6mm. Good service. Excellent site with clear pictures, much better and sharper than the H&R and Adler pics. Detailed sculpts. Limited range, yet.
So, finally, for WW2 my choice was Adler. A much larger range than Baccus. Lively poses, ‘heroic 6mm’ actually 7-8 mm. Relatively exaggerated heads/helmets compared to other brands.

(Painted by blogger Siggian from Lead from the Front)
The larger size and these exaggerated helmets make them more recognizable on the tabletop I think. And I was charmed by Adlers message on the site: “I should point out that we are a designer led outfit, (…) this is a one man operation. We don’t have a team of casters and packers waiting around for orders. Basically I do everything from designing the figures to taking the orders down to the post office”. Support you local artisan!
Basing: designing a logical system
I needed a logical system, with not too many subtypes. Because, with 6mm miniatures, it’s often hard to see the diference between the many different troops during setup or on the tabletop. Do you immediately spot the difference between a Panther, a Tiger I and a Tiger 2? I don’t. Not with my middle-aged eyes in the dim lit dungeon that we call our club house.
Besides, many of my opponents are 6mm newbies. We don’t want to play this game with a magnifier, or make mistakes like ‘I shot 60cm but now I see it was not my King Tiger but my Panther so the range is actually 50 cm’. Or constantly check the bottom to see if this was a light mortar or a heavy one. Or spend hours to put the right base in the right box. For smooth play, I want to see from a meter distance:
a) the nationality
b) the troop type
c) the weapon class/ strength (light, medium, heavy)
Tip #1: Different base colours
I admire the armies of 6 and 10mm painter Nik Harwood. Two examples, his German& Russian 6mm early war miniatures. Great work!

However from a distance they look too similar, IMHO.
My 6mm are playing pieces in the first place, not showpieces. I want different colors, like chess, for easy recognition. So I decided to give every army it’s own base earth color:
- light grey for the Germans
- pale sand for the Americans
- pale brown MDF for the British
- brick red for the French
No dark grey, medium green or medium brown, 6mm miniatures ‘disappear’ on a medium or dark base. Camo figures in particular.
I sprinkle flock on the bases so the colour difference is mitigated. However, the bases differ.
Tip #2: heavies on large bases, lights on small bases
Conventional basing is one vehicle or squad per base. Which makes recognition harder.
My currently preferred system, Blitzkrieg Commander II, (a Warmaster derivate) has 10 troop types with several subtypes and classes
- Commanding Units (commanders and subcommanders)
- Forward Observers (to direct artillery and air attacks)
- Recconnaissance Units (infantry and armoured recon units}
- Infantry platoons, with subtypes
- antitank/flamethrower infantry (actually a heavy infantry upgrade, not a special type)
- infantry support (slower reacting light antitank guns and mortars)
- Engineers (specialist infantry and mechanized infantry and tanks, like mining tanks etc)
- Armour (medium and heavy tanks)
- Anti Tank (medium guns and ‘tank hunters’, aka self propelled anti tank units)
- Artillery (heavy guns, and heavy mobile rocket launchers like the Katusha, Calliope and Nebelwerfer)
- Aircraft (planes)
- Transport (cars, trucks, halftracks, mules, jeeps etc)
Internet forums advised me:
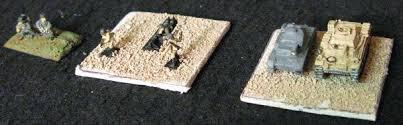
- Commanders: 50×50 HQ: 40×40 (in other words: a special large base for the commander and a large base for the subcommanders)
- FAO/FAC/Snipers: 25×20 (a very small single model square base)
- Infantry / recce / transports: 50×25 (a small base)
- Armour: 50×30 (a medium base)
- ATG / AA: 40×40 (a large base)
- Artillery: 50×40 (a very large base)
I also checked the Flames of War basing guide. Not that I want to play Flames of War, but Battlefront tries to apply logic to their basing system. The same basing logic that is evident in good old DBA. FoW’s system on rectangular bases:
- Commanders: no special basing
- Observers: no such unit in BKCII
- mounted mechanized large or small recon teams: a large base or a medium base, respectively, facing the short edge when mounted and the long edge when dismounted
- Infantry: medium base
- subtypes bazooka’s and PIATS: a small base
- infantry support, like small mortars, small guns: medium base, facing short edge
- engineers, infantry or mechanized: no such unit
- armour: not based
- large or small mounted horse unit: a large base or a medium base, respectively, facing the short edge when mounted and the long edge when dismounted
It’s very logical: however still a bit too complex to my taste, in particular because I like to have a simple standard base width, no short or long edge stuff.
So this is my system, tailored to DBA-sized 4cm bases:
- Commanders & subcommanders: 4x4cm. Large base. Higher than other bases.
- Forward air/artillery observers/snipers: for these individual bases, I used some spare round 4cm bases, instead of a 4×4 cm large base. Binocular figures. Sandbags.
- light recon teams, light tanks and transports: 4x2cm. small base. A vehicle and a few miniatures.
- infantry platoons: 4×2 small base. 4-6 miniatures. Some terrain.
- infantry anti tank upgrade units: 4×1,5cm small base, 2-3 miniatures, placed directly behind the platoon, in base contact
- infantry support units like medium guns, mortars, MG’s, etc: 4x3cm medium scenic base. Medium mortars, two per base. Heavy mortar: one per base.
- engineers: one vehicle and a couple of engineers, on a 4×3 base.
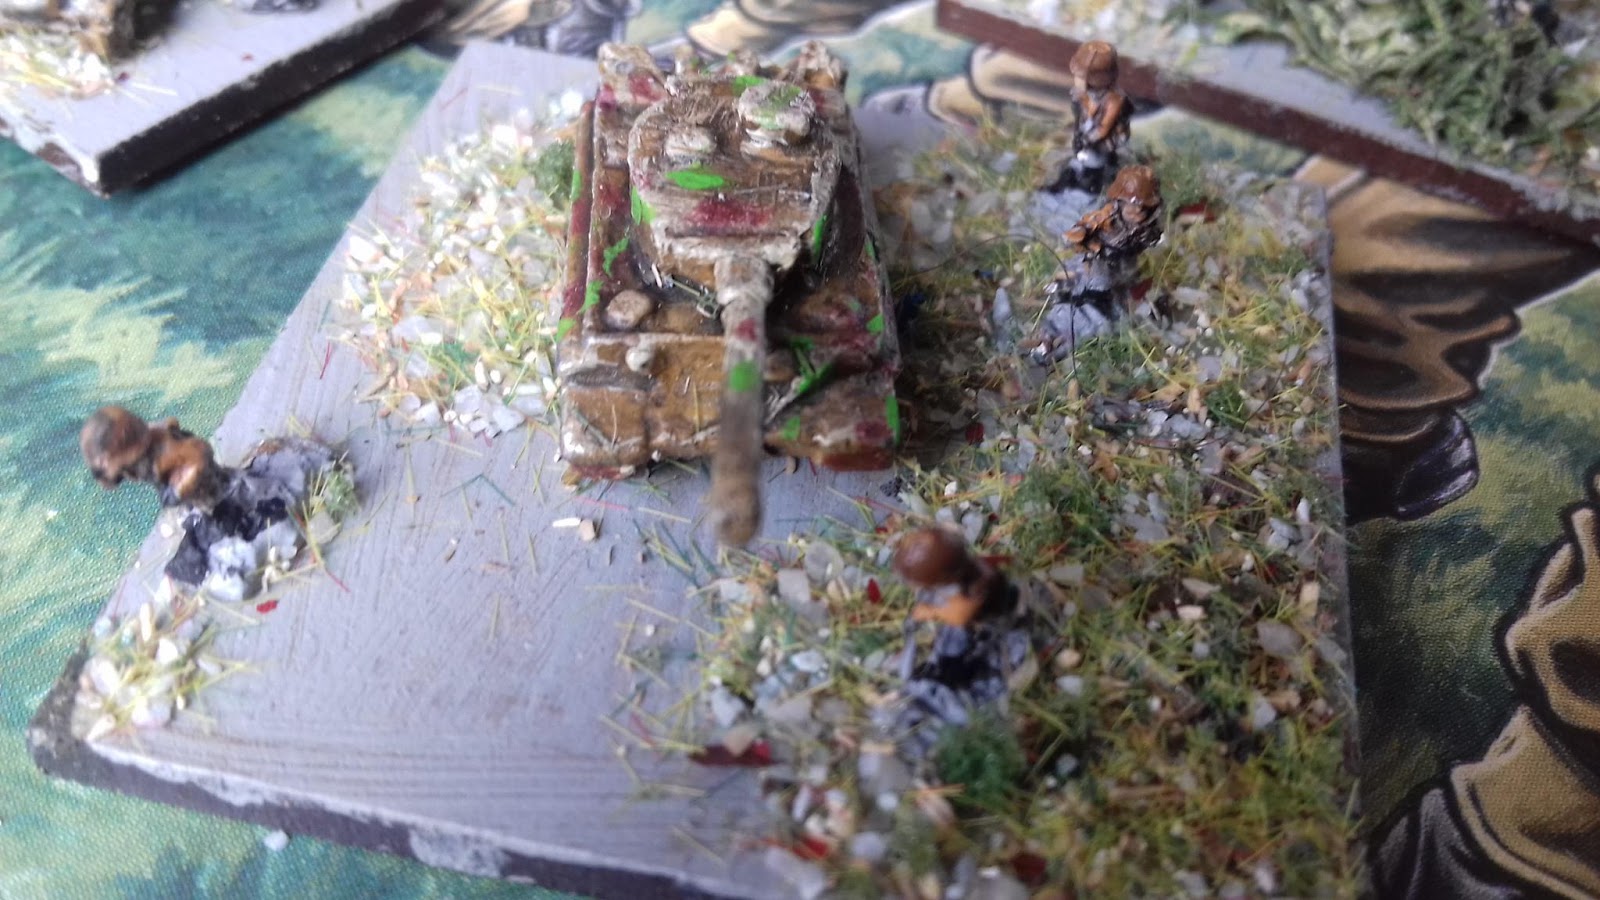
- armour on 4×4 diorama bases. Medium tanks: 2 tanks on a 4×4 base. Heavy tanks: 1 heavy tank on a 4×4 base
- anti tank guns, tank hunters: 1 model on a 4×3 medium base.
- heavy artillery, heavy mobile rocket launchers: 1 model on a 4×4 large base.
Thus all light troops are predominantly on small bases, all medium units predominantly on medium bases and all heavy units on large bases, two models for medium heavies, one model for heavyweights.
I think it’s quite universal. This system makes 6mm FoW an option indeed. Or Spearhead. Or I Ain’t Been Shot Mum.
For extra visual impact I ordered 6mm scenic items from perfect six scenics to give the bases more dioramic quality.
Tip #3: paint brighter colours
As Peter Berry in his Baccus 6mm painting guide wrote: what many wargamers
fail to realise is that painting 6mm castings requires a rethink of techniques and methods of applying paint. As opposed to producing pieces of military sculpture on wargames bases, we are attempting to create an overall effect of a large body of men and are therefore aiming to emphasise only those features that can be picked out from a viewpoint of over a metre away from the figures.
The general rules that I learned when painting 6mm Napoleonics were:
- use bright colours, brighter than normal. When painting Napoleonics the trick is to paint the miniature in bright colors, to make it stand out. Don’t use Napoleonic dark blue, but very bright mid-blue: don’t use dark grey, but light grey. Authentic colours often appear as black or brown from a distance.
- the visual power is the ‘mass effect’
- paint the unit, not the miniature: the overall look of a base is more important than a bi-coloured plume.
I applied these rules to the WW2 vehicles and infantry. I wrote a quite long detailed how-to-page, with examples from the web. I will not repeat it here, but to summarize:
- all vehicles: extreme highlighting, with bone yellow higlights (German vehicles) and grey (Allied). For the Germans I used extremely bright camouflage colours: red, grass green, The authentic colours are too dark.
- Germans: the regulars light grey with a field grey jacket, the Waffen-SS the ’44 mustard yellow camouflage ‘Erbsenmuster’. I chose mustard instead of the green camouflage schmock, to emphasize difference with the US troops. No camouflage, useless for 6mm.
- German fallschirmjäger: also mustard yellow, but with mid-blue trousers and green-grey helmets here to emphasize difference with the SS
- UK: regulars brown, with quite bright, sand yellow, highlights,
- UK paratroopers mid brown and army green. I – reluctantly – painted bone yellow, wine red and bright grass green dots on the jackets to emulate camouflage. Otherwise the difference with UK regulars and brown/green Americans was too small. I gave all red berets orange highlights, all helmets bright green highlights. Still not satisfied I colour coded the base with a red rim.
- US regulars: mid brown trousers, 60% an army green jacket 40% the distinctive buff blouson, painted in a bright off-white and with a brown wash.
- US paratroopers: very, very pale khaki.
Below a few Allied infantry samples. Britis regulars, British paratroops, US regulars, US paratroopers

Tip #4: Use a Lot of Big Decals on Top
Several companies sell home-made or GHQ-micro armour decals, I bought mine via Magister Militum. It’s a fiddly and time-consuming job. For instructions, check this manual. It’s worth the effort, though. Any vehicle miniature gets an immediate visual upgrade. A German tank in camouflage is just another German tank. With a German cross and/or a miniature swastika it’s suddenly a movie villain tank, easily spotted from a meter distance. Allied vehicles are upgraded to liberators with their great white Hollywood stars.
My tricks
Decals on the sheets vary in size. If enough space on the model, I used a larger, slightly out-of-scale star, cross or swastika to maximize visual effect.
Historically, the Germans had markings mostly on the sides and the Allied troops on top of the vehicles. On a wargame tabletop you see the miniatures from above. So I often added an extra decal on top of a German vehicle.
The Balkenkreuz had a hollow white early war version, and a later war black version. But large white decals are better visible than black decals, so I unhistorically used the white version for my later war vehicles. A small adjustment with great effect..
My British tanks have a star on the hood of the vehicle and an encircled star on the rear deck, American vehicles vice versa.
Tip #5: Base Like Spielberg
Conventional 6mm WW2 basing is often like the picture below.
Evenly spaced out miniatures on a flat base, that’s apparently the standard. Infantry and vehicles based separately.
I tried the same (picture below, right base) but this first base scored a zero on my hot-or-not-rating.
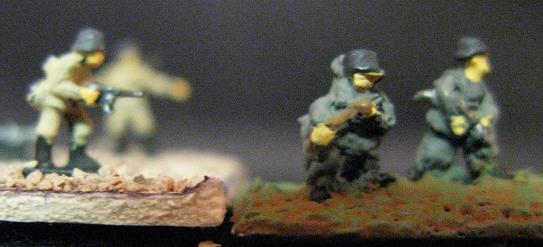
WW2 soldiers do not fight in line and should not be based like Napoleonic line infantry, I thought. They are running for cover, hiding behind walls, lurking in bushes, dodging bullets. Like the left base, below.
A base becomes more dynamic when you vary the spacing and the facing of the miniatures. Scenic bases are much more cinematic than standard flat bases. Hollywood B-movies and videogames gave me great inspiration.
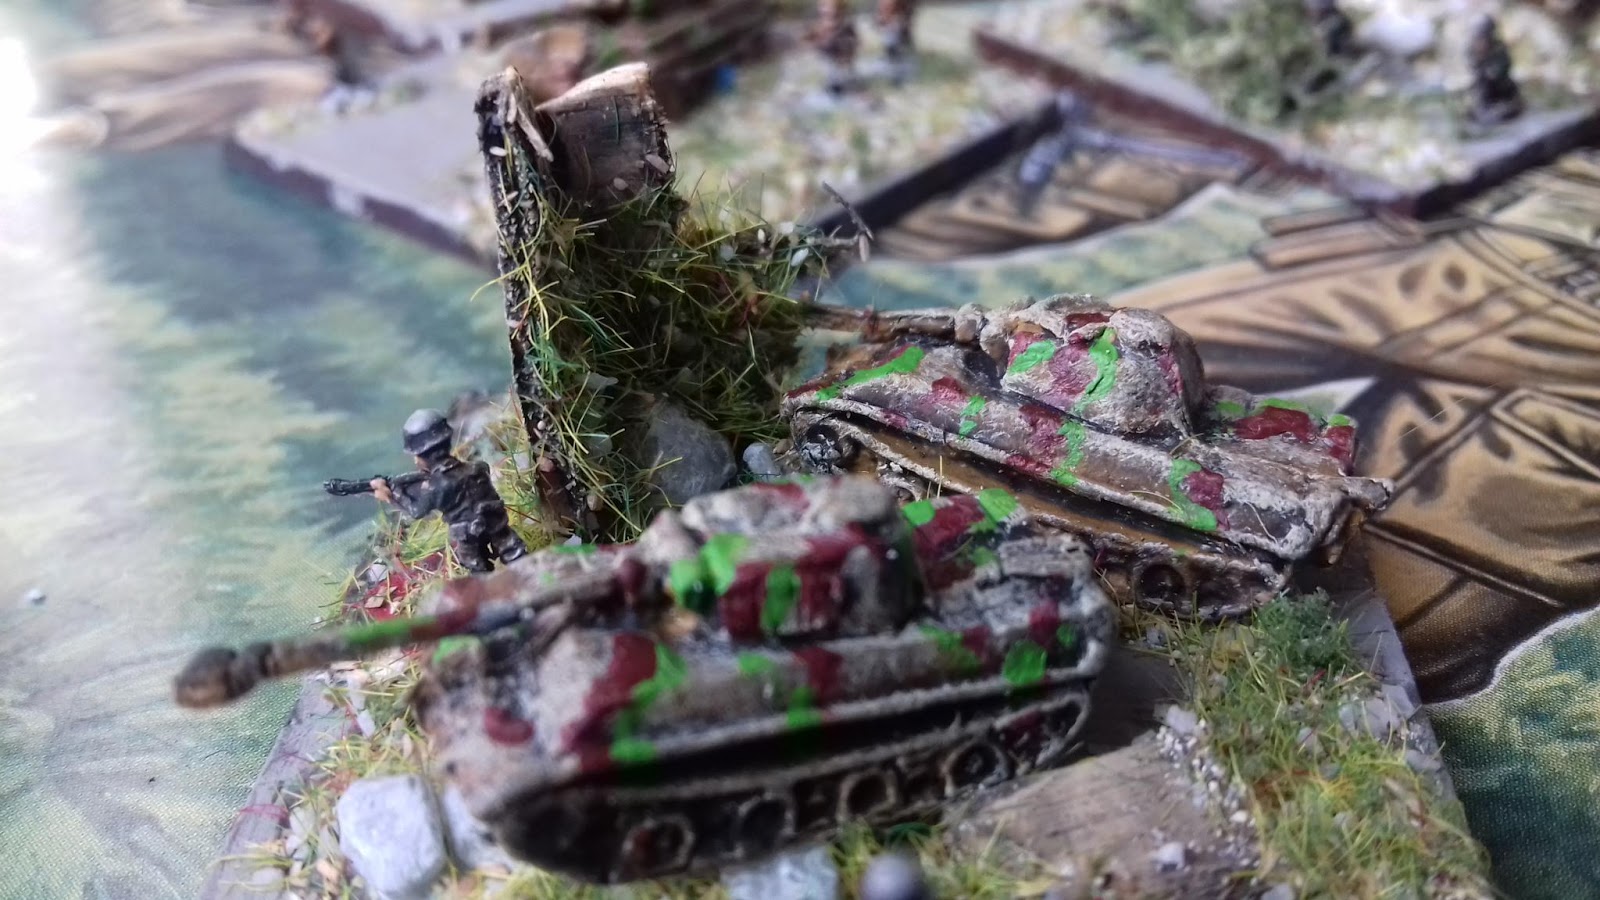
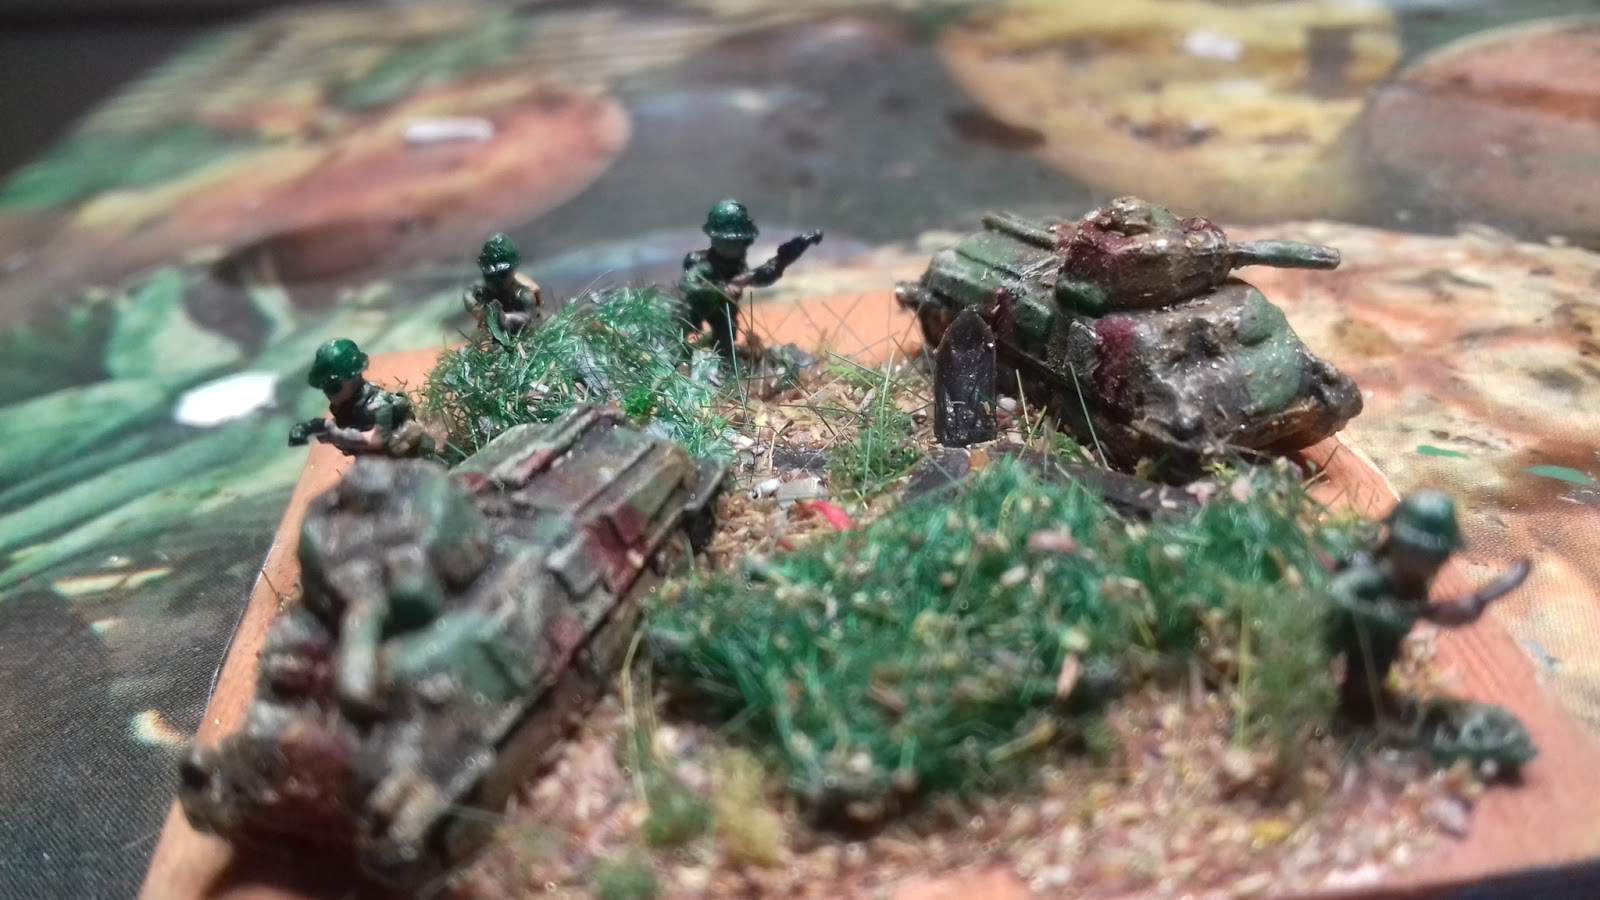
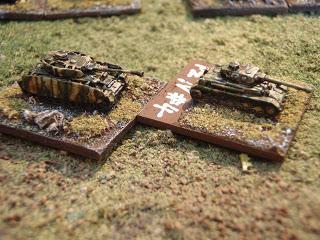
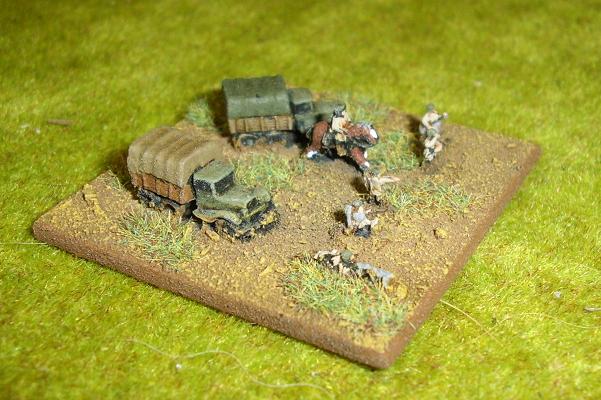
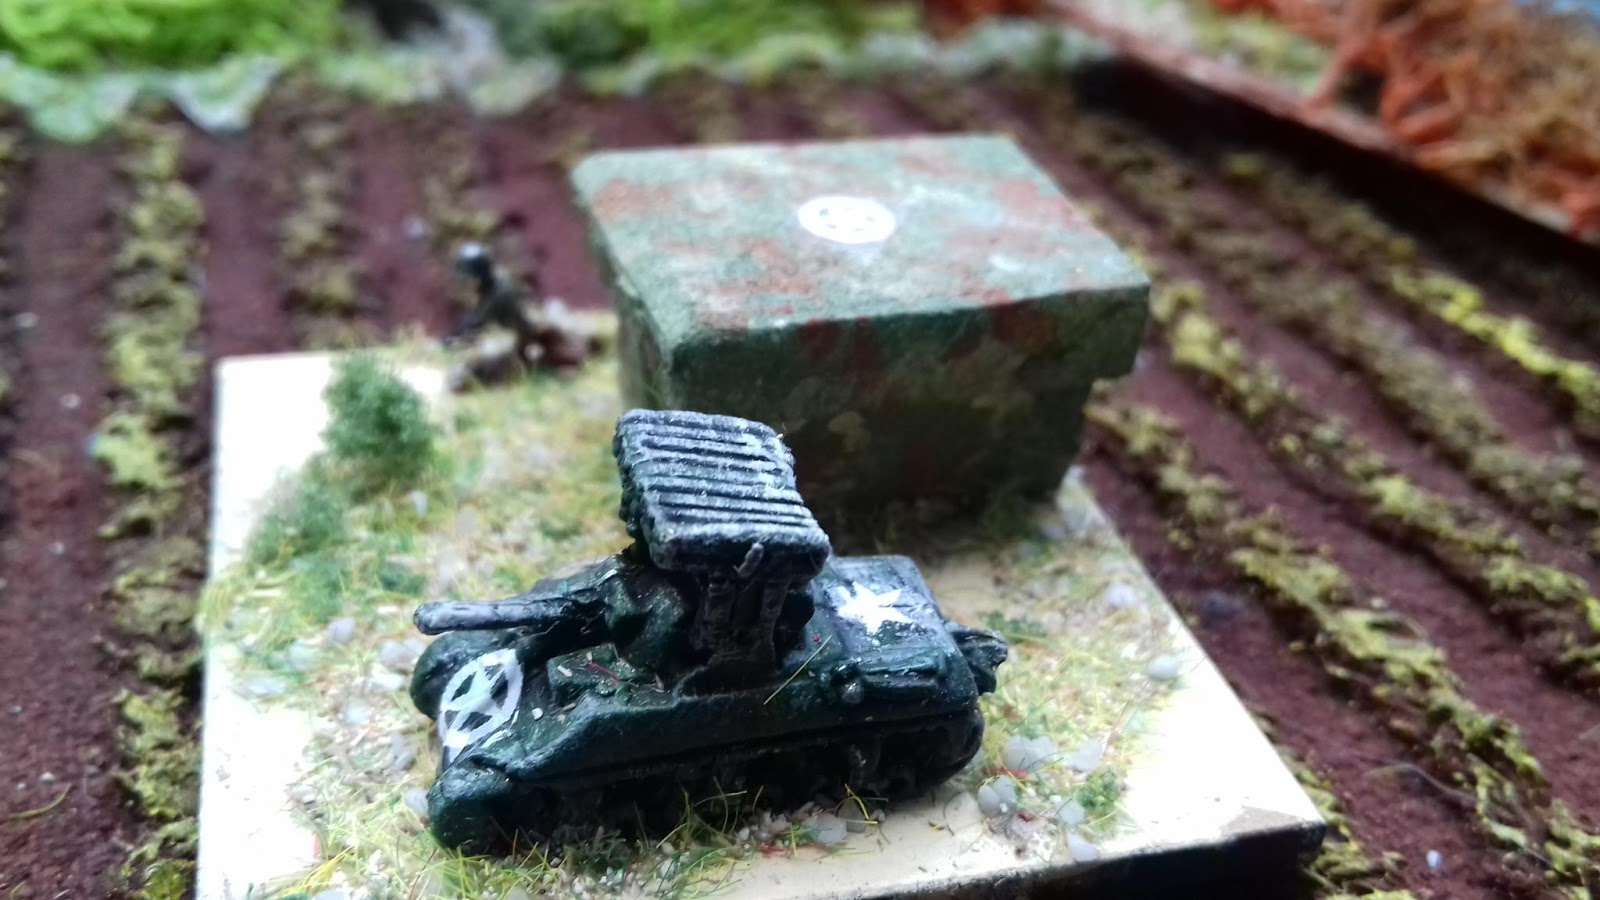
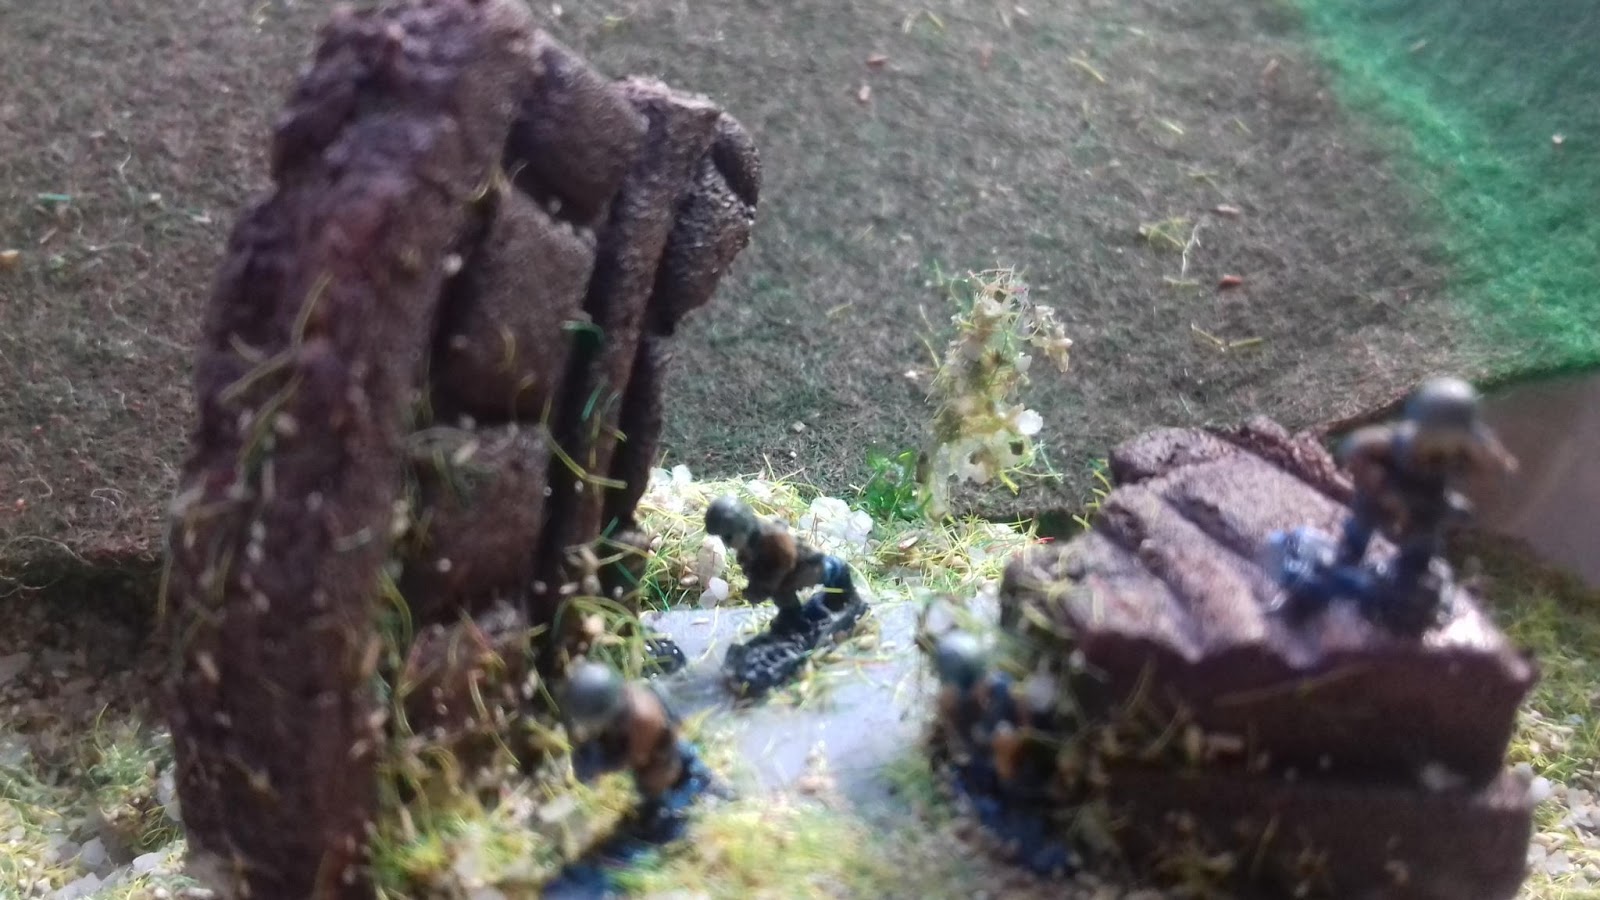
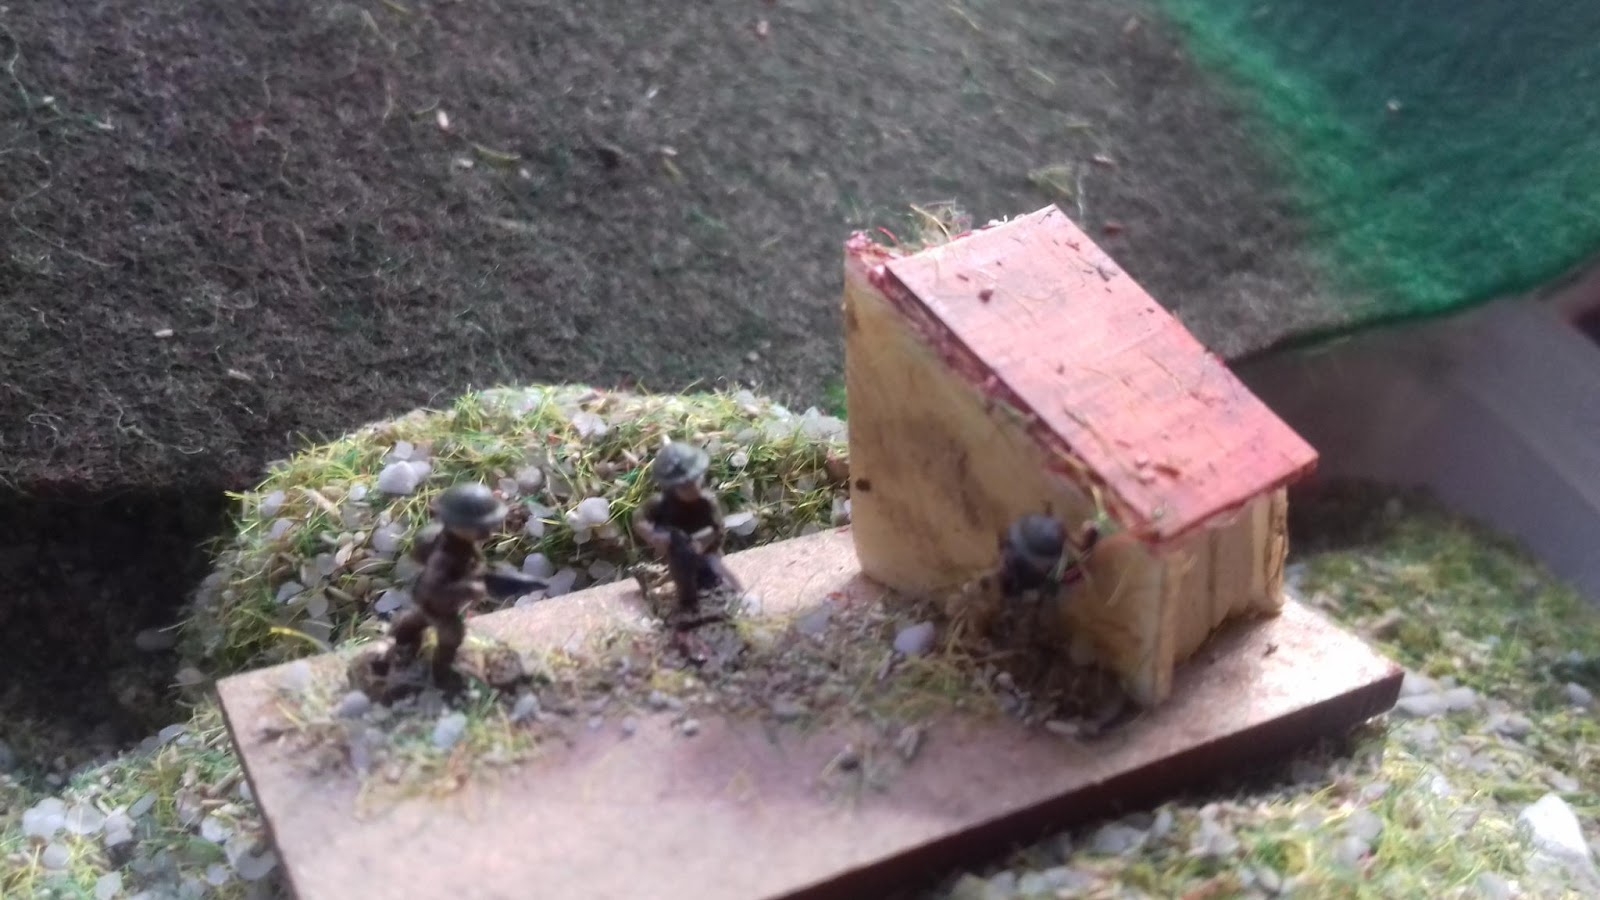
Take this vehicle base for example, above. Two Panther tanks, lurking behind a wall. Panthers are medium tanks, so I glued two on a large grey (German) base. I added two miniatures and a made a simple ruin from woodsticks.

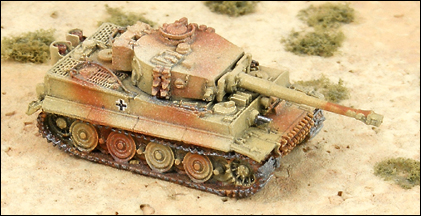
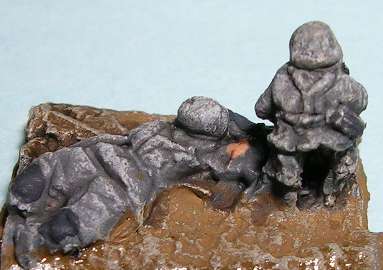
Above: Wolfenstein. Below: a 6mm Tiger. Achtung! Panzer!

Just like photo’s, bases are more lively with human figures who look in different directions, and asymmetric basing. Why glue a vehicle in the center of a base? It’s not necessary for gaming purposes. Use the full base and make a diorama.
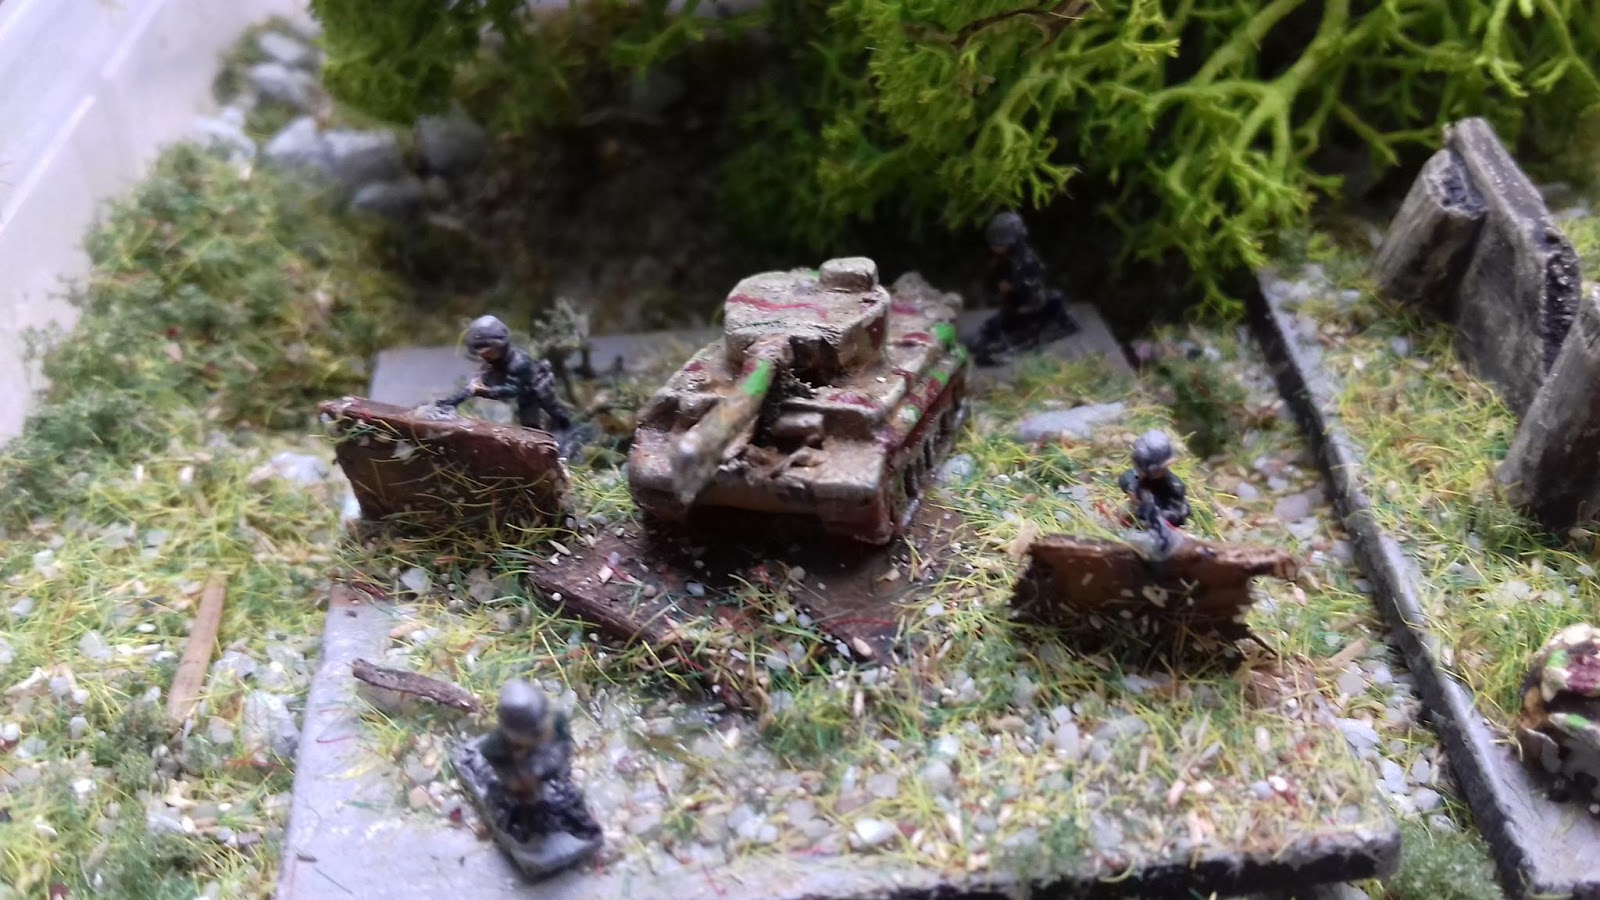
(above) A Tiger with some Wehrmacht soldiers. Diagonal, out of center, barricades, action!
As a side effect if you base vehicles together with soldier miniatures, you create IMHO more a suggestion of ‘an overall effect of a large body of men’, everywhere on the tabletop, more than when you have empty vehicle bases.
Some more examples
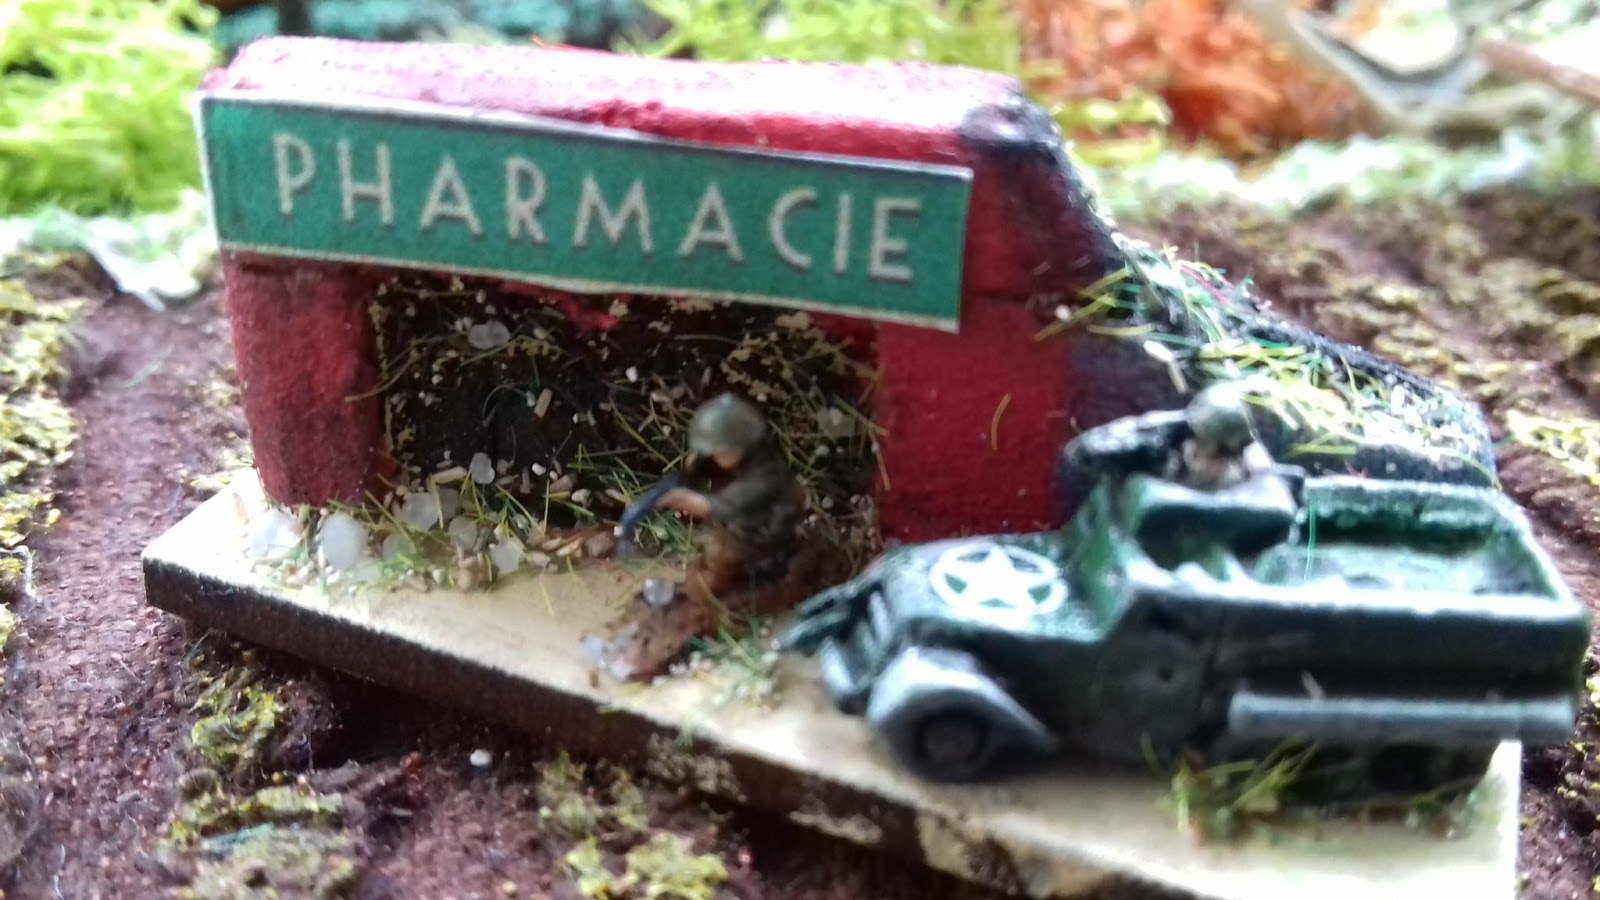
Above: the ruin above was made from two simple popsicle sticks. The ‘billboard’ is from a free print from Warflag.com. You can also scale down the free WW2 Normandy billboards, markings and roadsigns from Rapid Fire, here. 4×2 is big enough for scenery items. Below: a Hollywood cinematic drama scene. A MG-42 shooting behind a giant draped swastika flag. It’s not ‘realistic’ at all. It certainly is a Hollywood B-film-shot. But on a 6mm-tabletop it’s very effective, this is clearly a Nazi base recognizable from a meter distance. Get those Inglorious Basterds!
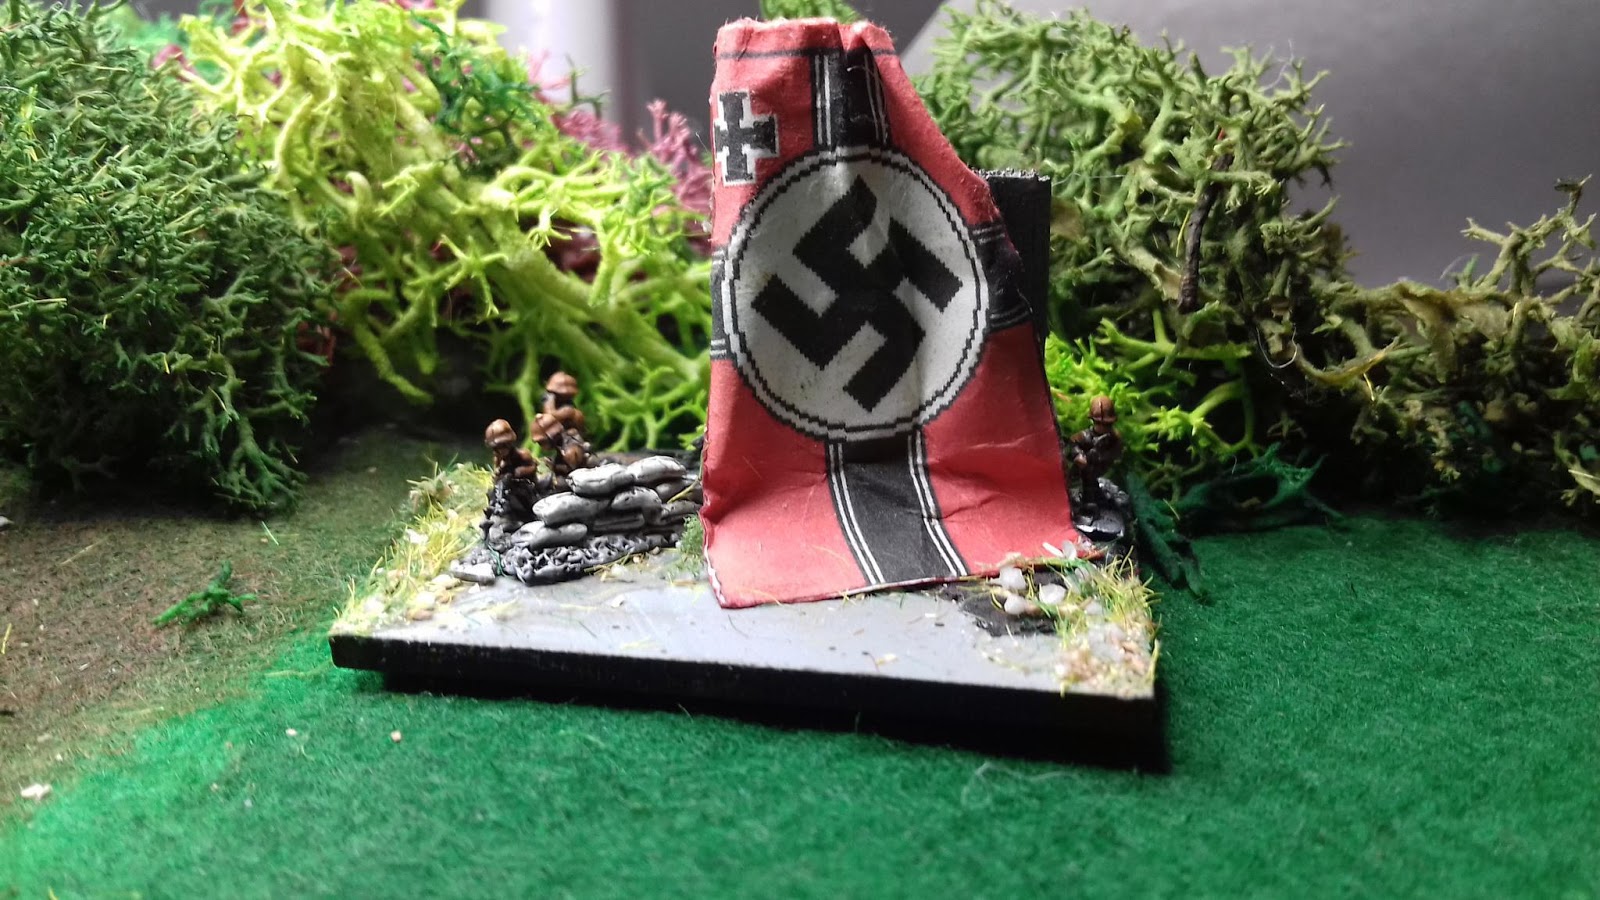
(Flag from warflag.com. Sandbags from perfect six scenics).
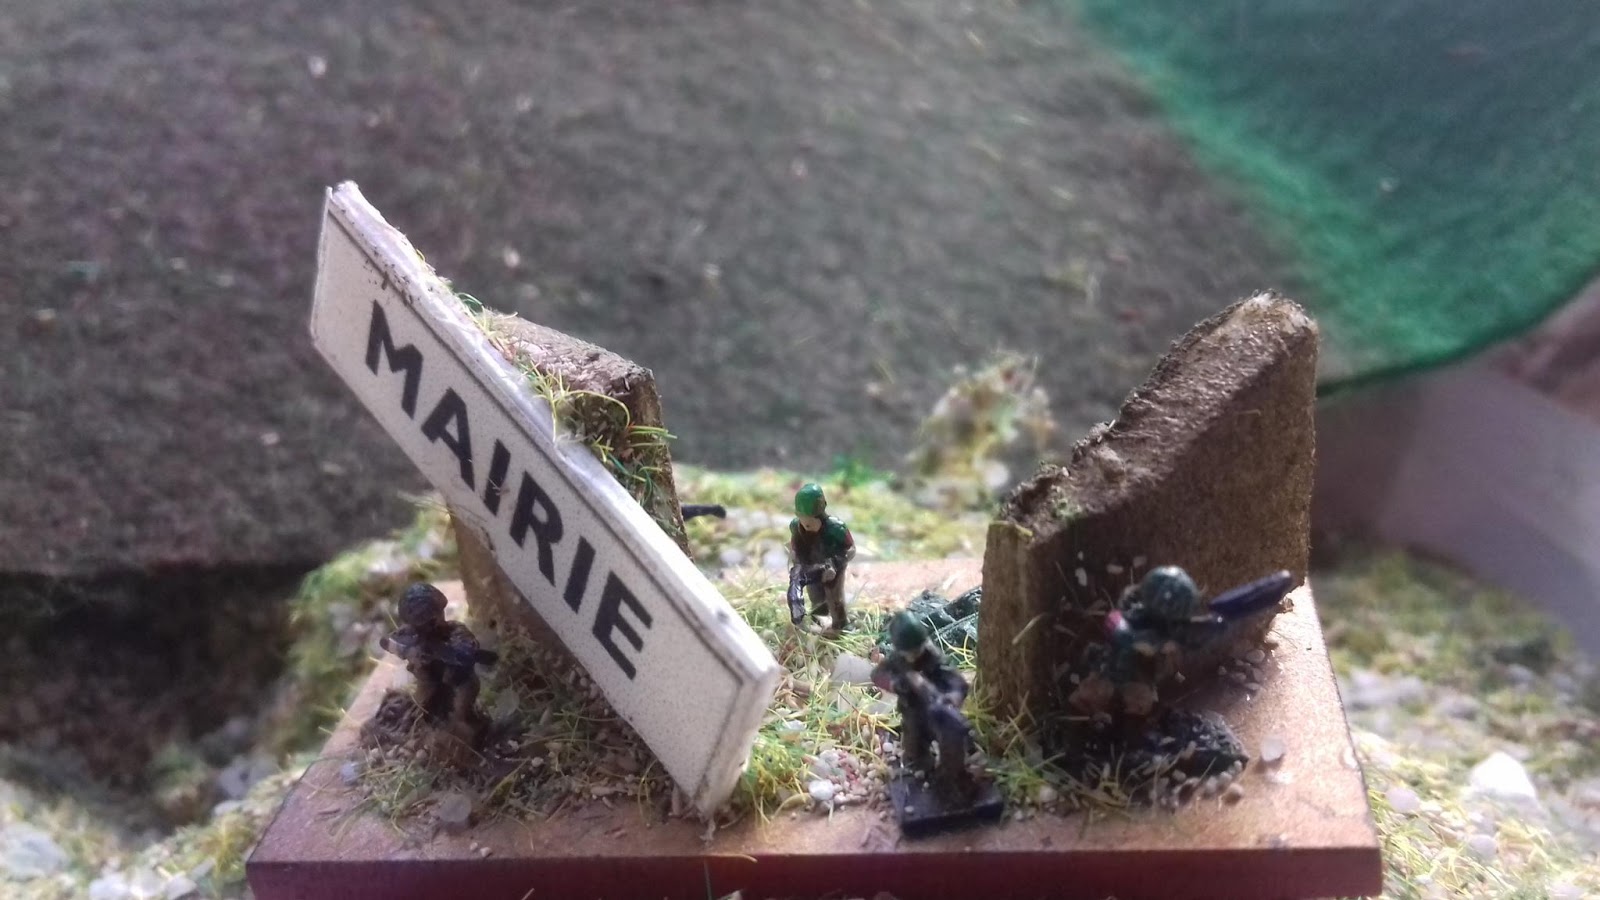
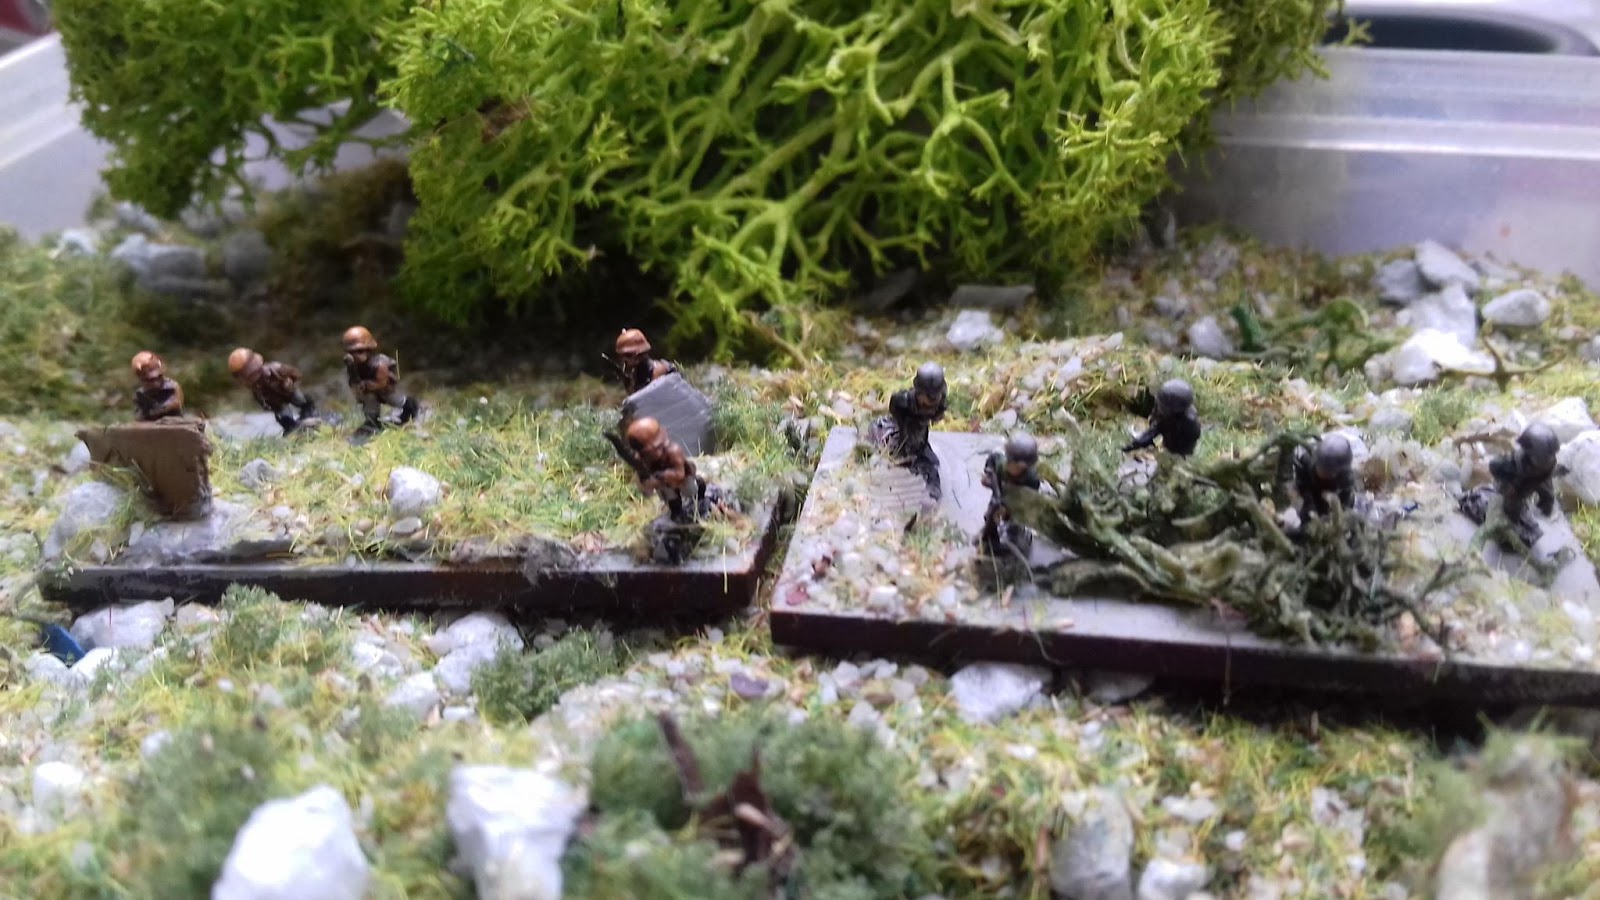
Above: British paratroopers in a French town hall. Made with foam and a downscaled Rapid Fire cutout.
Below: German Fallschirmjäger..
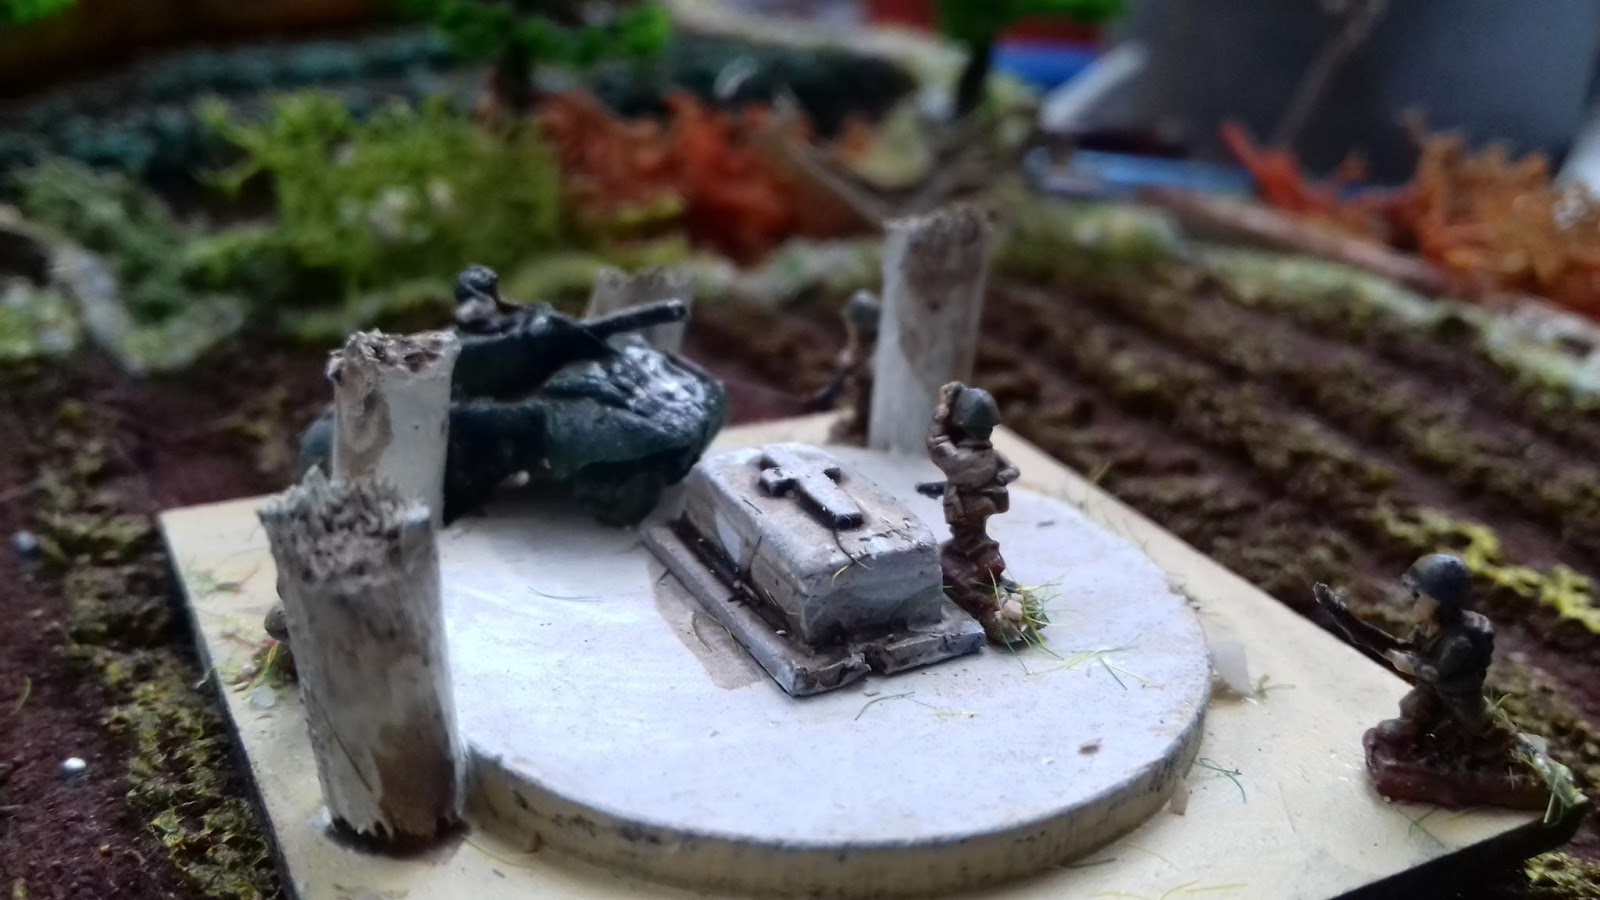
Above: an American 4×4 command base. Tomb from Perfect Six.

Several Allied bases, above.
Last: true Wolfenstein.
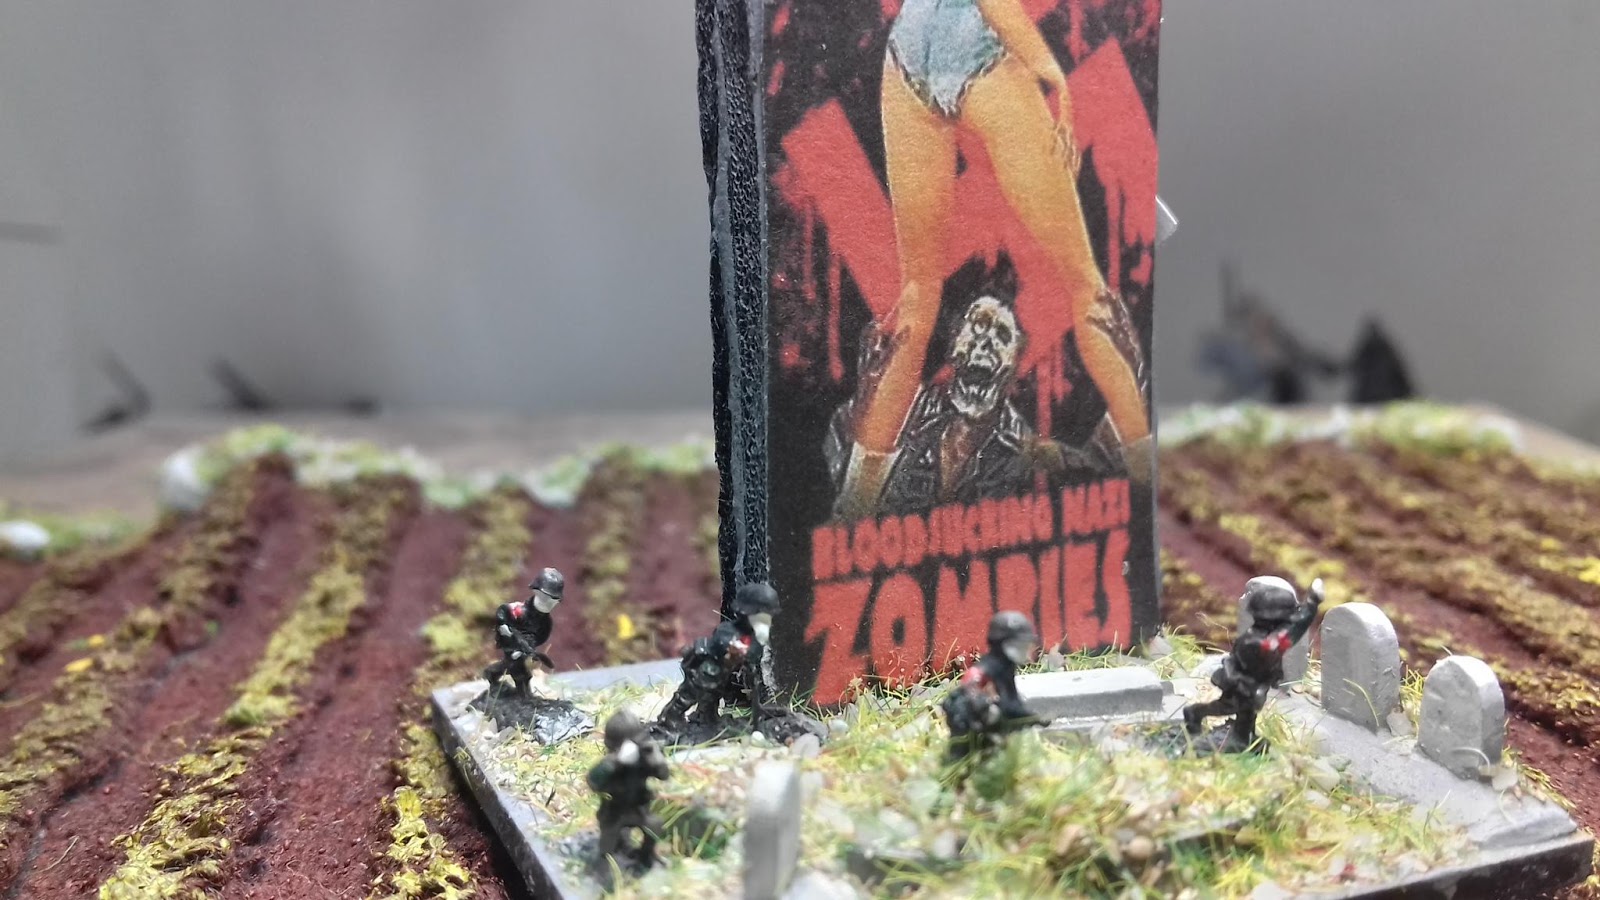
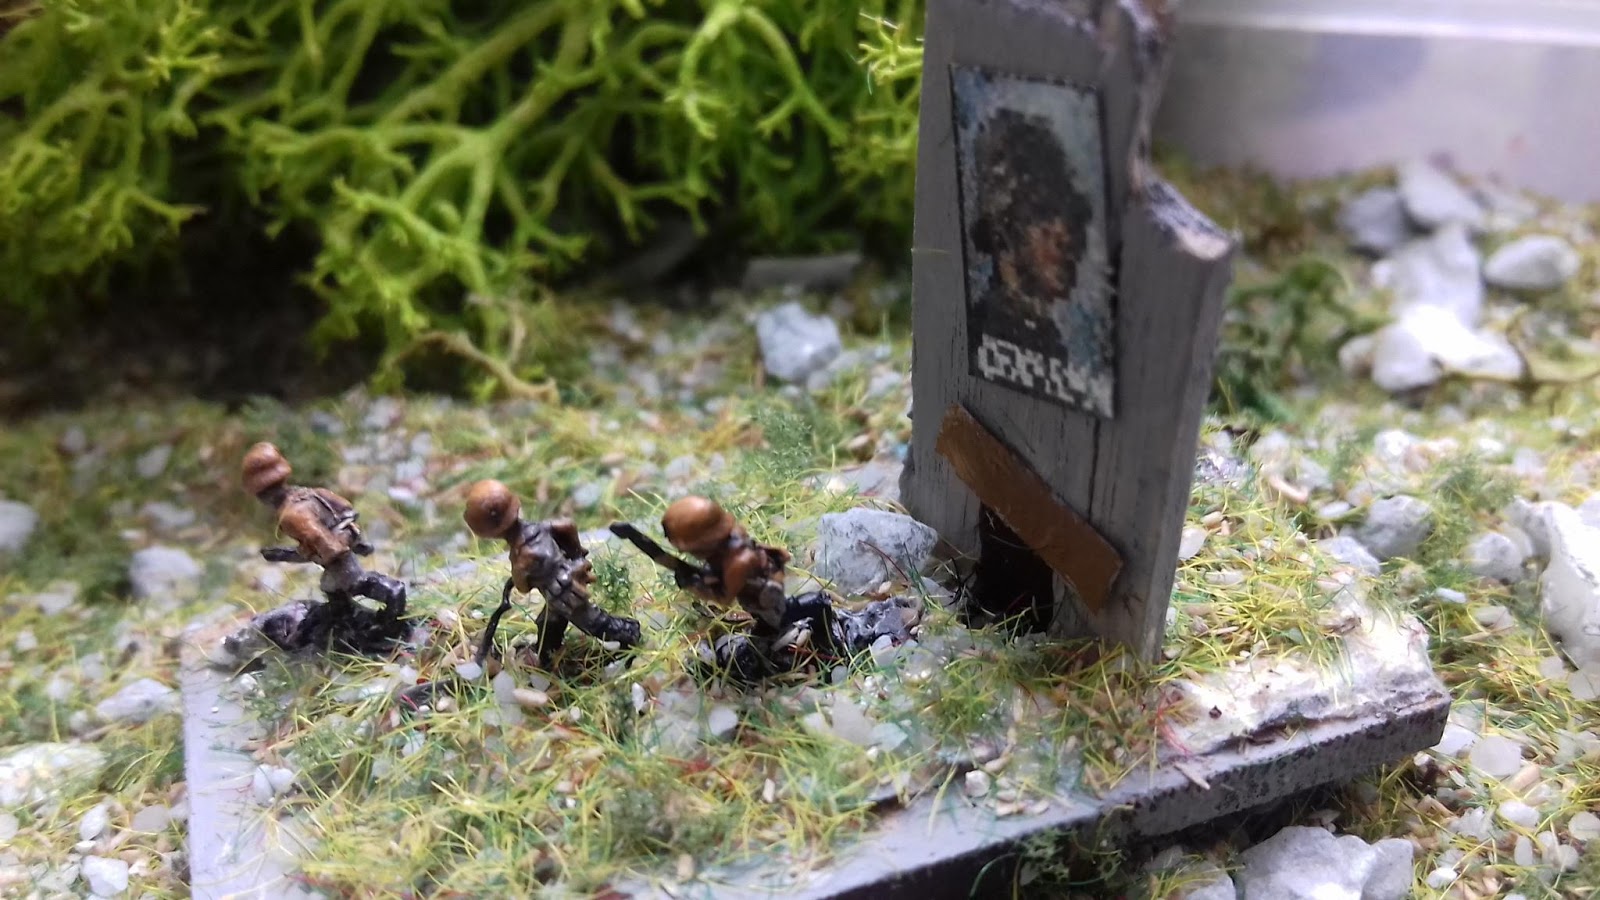
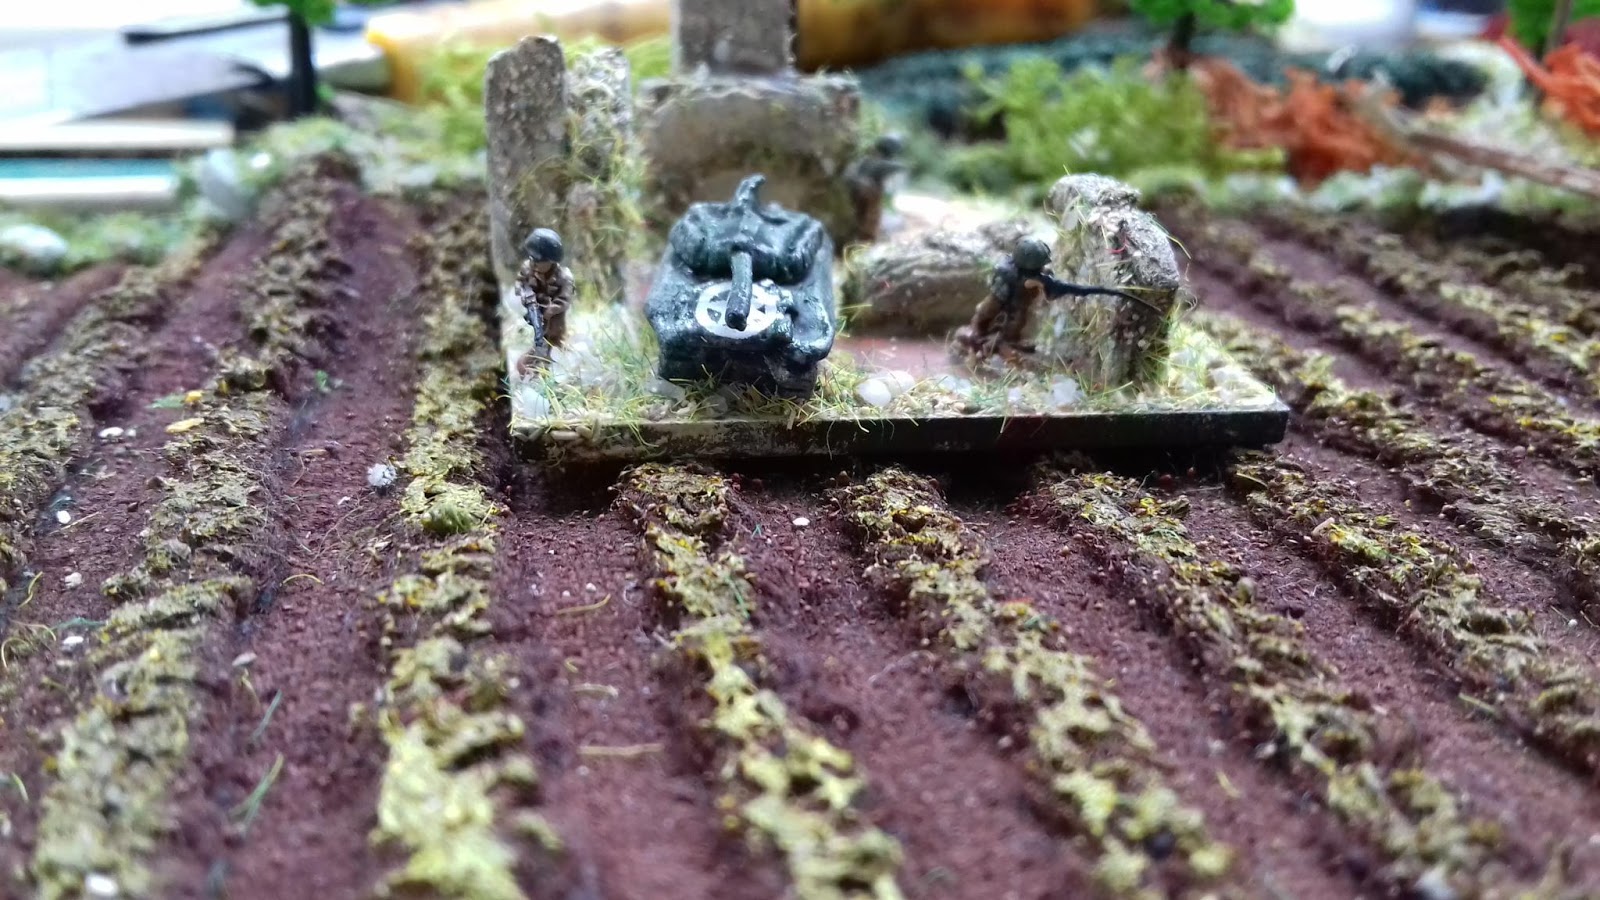
SS Command base. Over the top, indeed. Don’t try this at home 🙂
You see, a ‘historically correct’ SS commander would probably be a war criminal and nazi fanatic. So my CiC is a cartoon nazi: a Nazi Zombie SS commander in chief, big pulp poster in the background, standing in a graveyard. The proud boss of an evil dark force, unforgettable on the tabletop.
Heresy. But fun. Why so SS-erious?
Does it work?

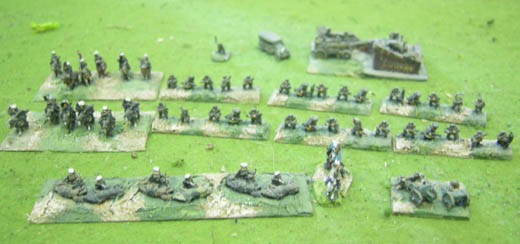
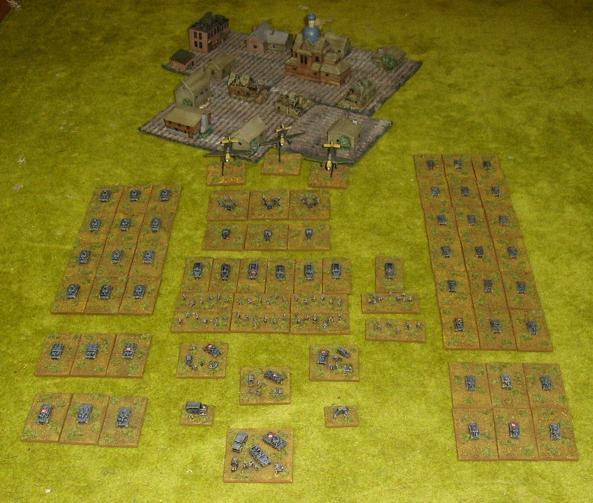
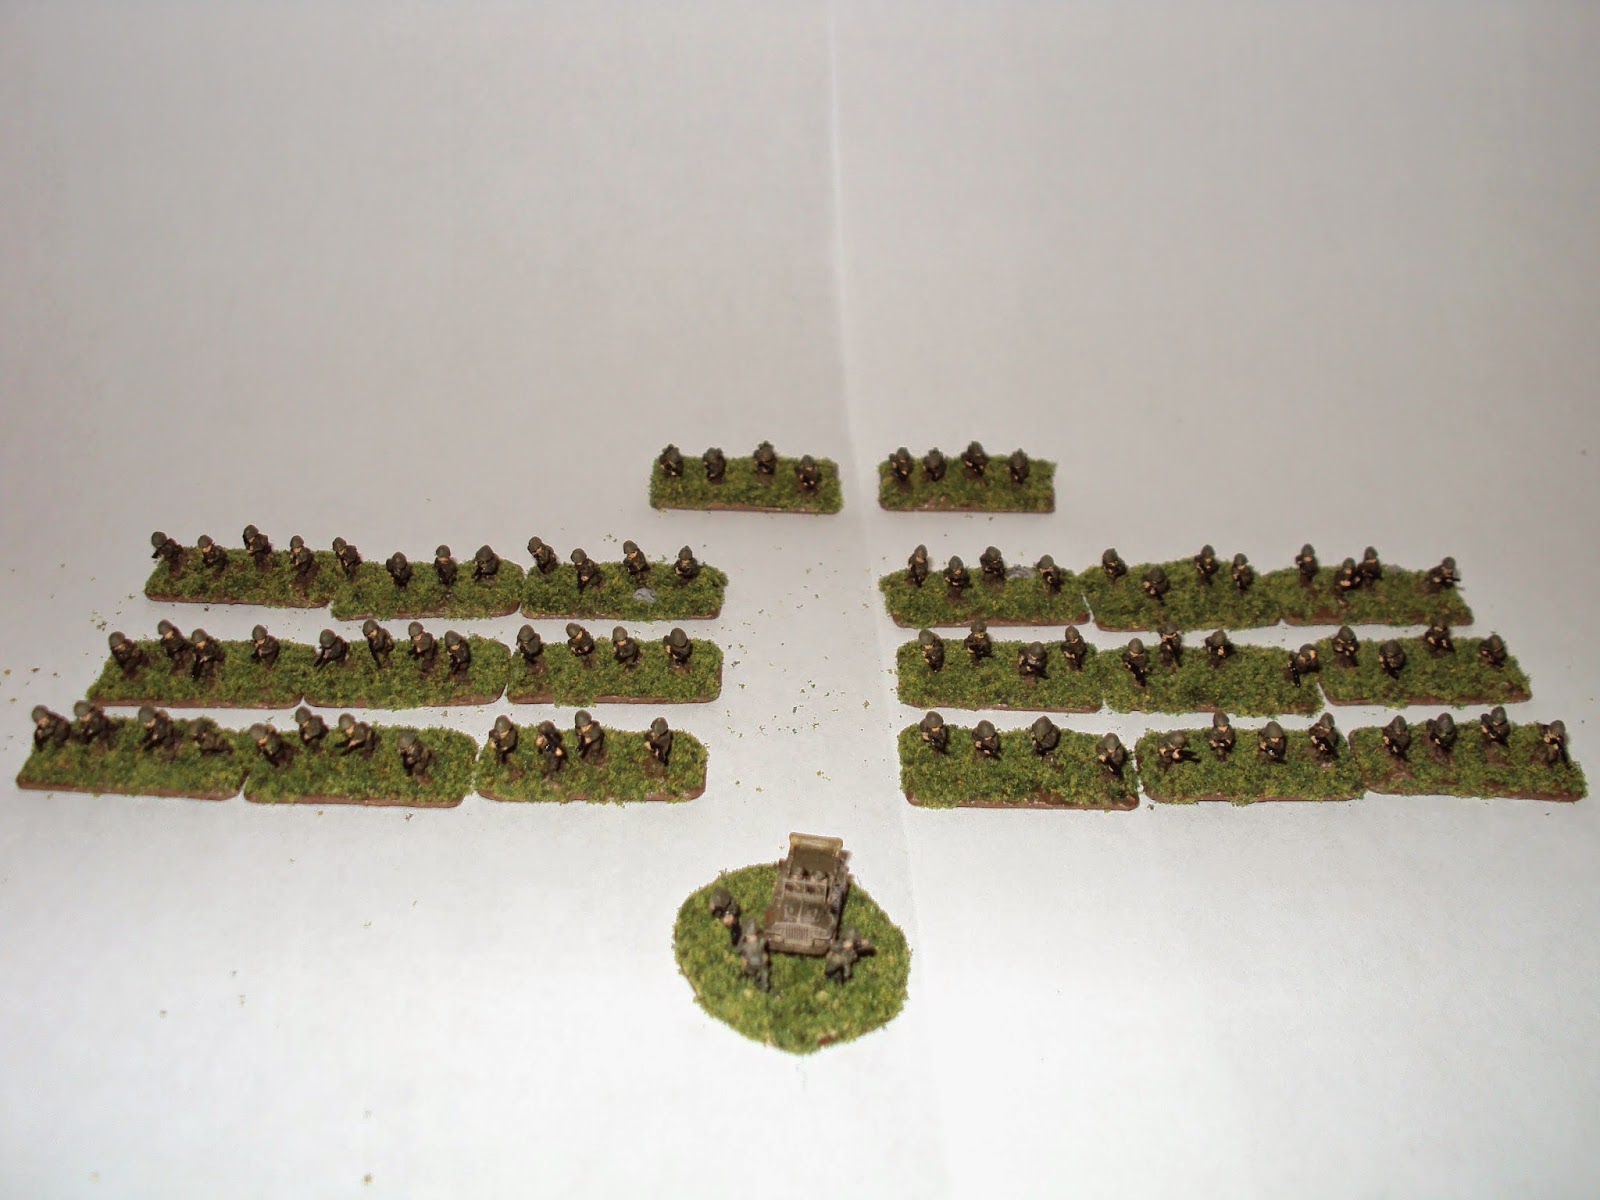
Above: German units approaching. Are they ‘typical Germans?’ Instantly recognizable?
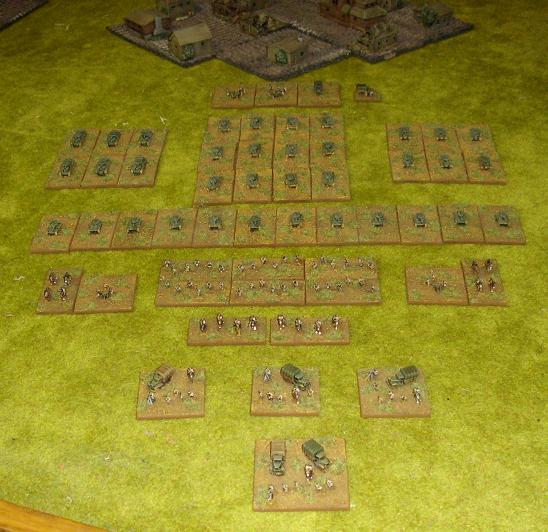
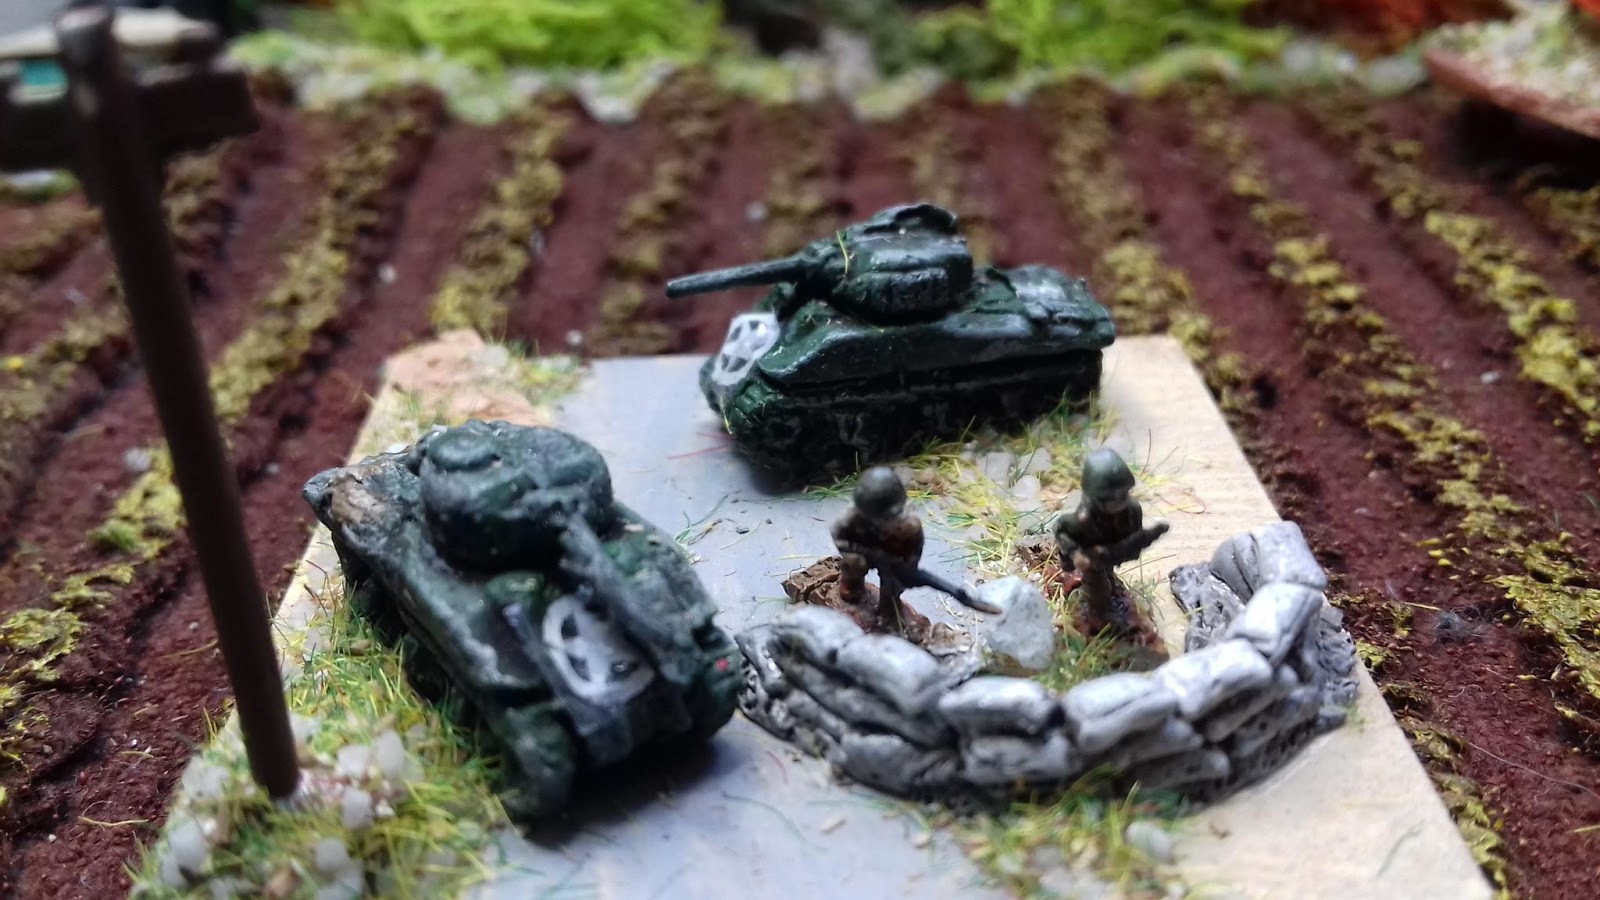
Below: American units. Pale bases.
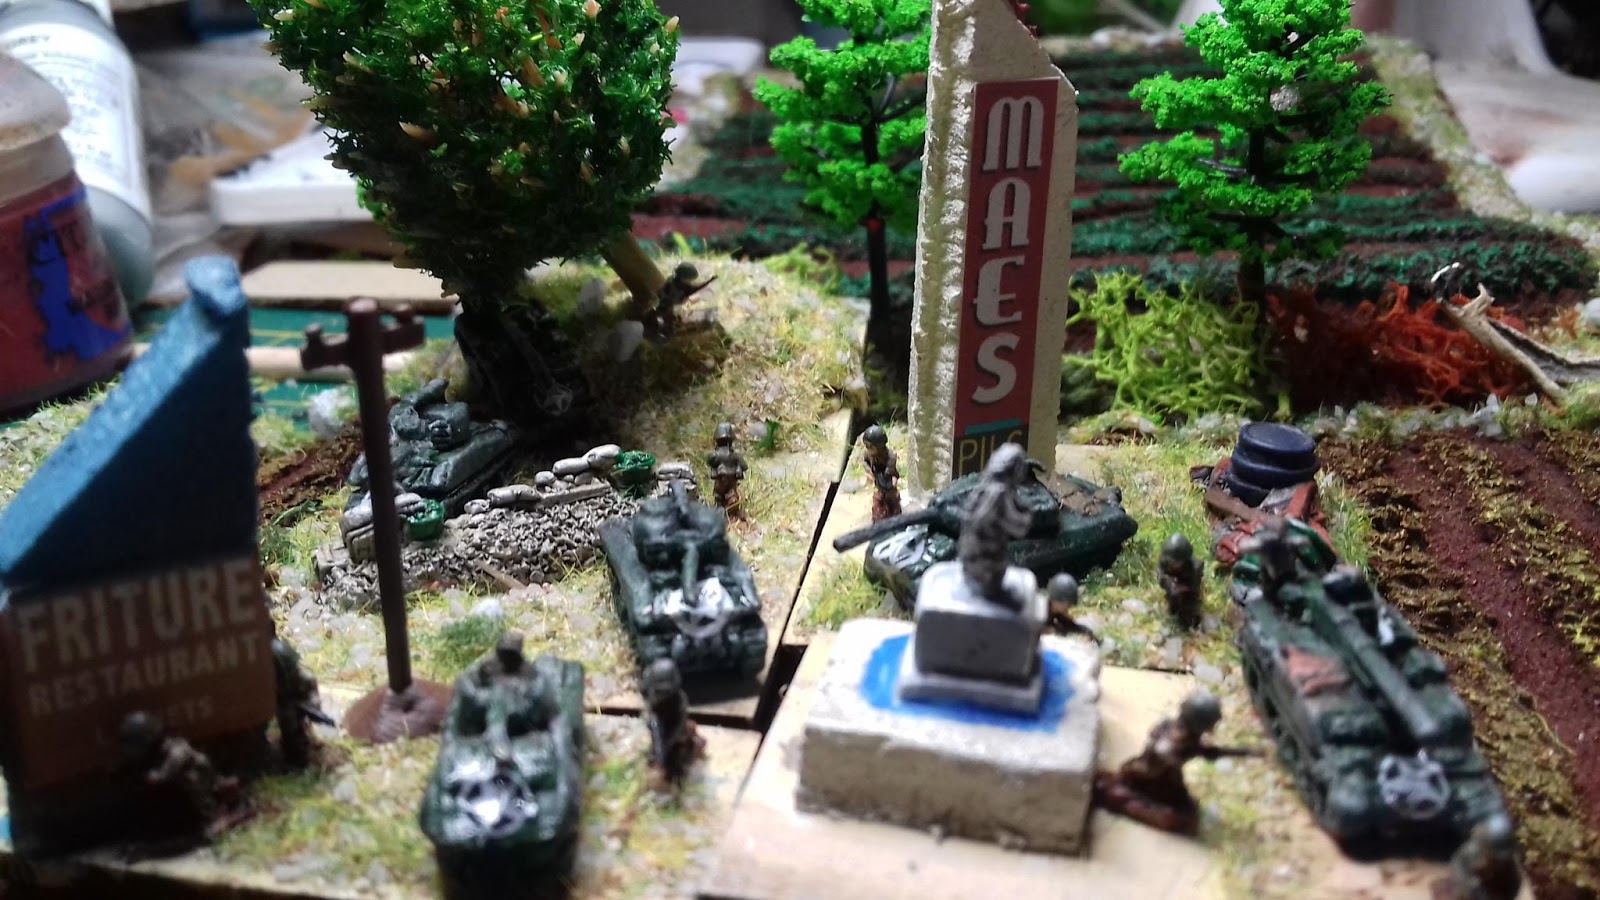
Back row left: two medium tanks (Shermans) on a large base. Back row right: a single Pershing heavy tank on a large base. Front row left: armored car on a small base. Front row right: tank hunter on medium base. Buildings: foam. Signs: downsized Rapid Fire markings. Statue, pole, barricades: Perfect Six Scenics.
Below: a picture from above. Can you see from a distance the difference between the British and the German Army? Judge for yourself.
6mm WWII – an after action report
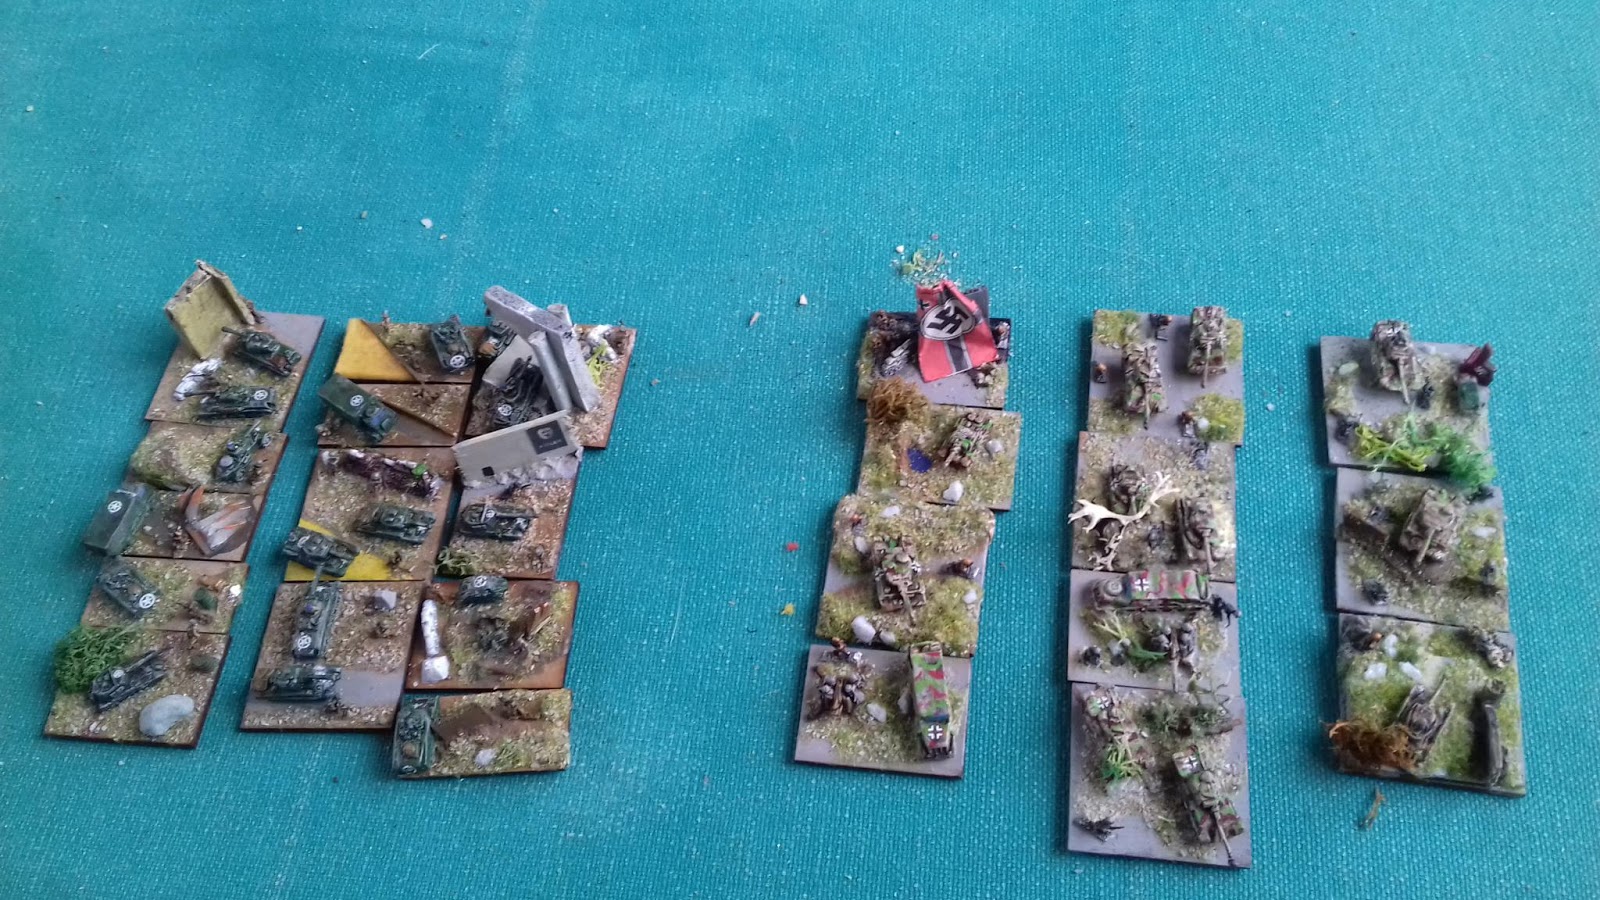
I painted 6mm Napoleonics, 6mm WW2, 20 and 28mm WW2 in 2017. A comparison:
- I paint most WW2 infantry just as quickly as Napoleonics, 40-80 on a long evening. Camouflage jackets however were time-consuming, even tedious.
- On the whole, a 6mm WW2 army cost me surprisingly a lot more time than a Napoleonic brigade, only because of the decals. 40 vehicles is 80, quite small, decals. I had to cut out every decal with a knife, put it in water, carefully glue them on the vehicles… a very time-consuming process, one or two full evenings per army.
- In comparison, speedpainting a 20mm or a 28mm 25-figure WWII platoon is relatively simple. Easier. A few block colours, Army Painter, matt varnish, ready. And 20 or 28mm looks good on any table top, even with a mediocre paint job. I’m afraid that a mediocre 6mm WWII army – a monotone army without decals – looks drab and unimpressive.
- Rating overall ‘speed & simplicity’, I would say that blocks of 6mm Napoleonics and one-piece 28mm or 1/72 miniatures are quick jobs. 6mm WW2 is also simple to paint but camo, decals and basing take extra time. Hardest IMHO was finishing a 28mm multi-part-multi pose WW2 plastic Warlord platoon, not because of the painting but because of all the assembling and glueing.
- I doubt if 6mm WW2 is much cheaper than 28mm WW2. More specific, I think that a 6mm grand scale WW2 set with a mix of infantry and armor will cost the same 80-100 euro as two 28mm skirmish platoons with a vehicle.
So it’s a matter of taste: do you want to capture 6mm Arnhem, or do you want to capture a 28mm Dutch farmhouse? A campaign, with artillery and air support, or just a firefight?
The price of the toys is the same. Money is not an argument. Manageability is. I can store my three armies in a few cigar boxes.
Don’t forget that for a 6mm battle good scenery is as important as a well painted army. Spend as much time and money on scenery as you spend on your 6mm toy army.
Sometimes people react that they dislike the bright colours, large, wrongly positioned decals or the idea of a scenic base in a city or field. Again, it’s a matter of taste. In the continuum between ‘historical unit’ and ‘chesspiece’ my based units are more ‘chesspiece”

2 thoughts on “Painting Private Ryan: a 6mm-how-to”