

In this time of not-so-splendid-isolation (I hate disproportionate lockdowns, based on lacking data and global panic, not on facts) I took refuge in my hobby and started a long overdue project, a Donnybrook (or other Renaissance skirmish) 28mm miniature set.
I bought this heavily discounted Wargames Factory set for 12 euro a couple of years ago at the Crisis convention in Antwerp, together with WF’s cavalry box that I will tackle later this year. 36 figures in a box. WF sold the molds to competitot Warlord Games. WG doubled the price per miniature from 50 pence to 1 pound – that’s capitalism :-(.
Preparation and priming
The box was made in 2012. The 3D-sculpted multi-part miniatures have enough detail . Not better or worse than a 2020 standard Victrix or Warlord hard plastic figure. Same quality. Eyes bulging a bit, but I can handle that.


Multi-part with separate heads and arms allows for ‘historical detail’: some regiments or individual soldiers had a tricorne, others a bearskin cap. Unfortunately Donnybrook is a fictional historical skirmish game, historical data about 18th century uniform details are scarce and often in contradiction and this is my umpteenth miniature army, so personally I was not delighted with all the extra work. Cutting out heads, arms and pikes and glueing them to upper bodies is pretty boring. For me a miniature is a beautifully painted chess piece, not a puzzle.
Anyway, after three evenings my army was ready. I made three groups, 12 with floppy hats, 12 with tricornes and 12 with bearskin / pointed grenadier hats. Grey for the flops, red for the tops, blue for the trikes.

Here’s the prep stage. Simple Halfords grey (a perfect prime colour, in particular with a brown or black quickshade dip, black primer is too dark). Followed by a short burst of the main colour. (Army Painter).
I once tested Contrast Paints on a few miniatures, and although the results were OK, I stick to quickshading for my larger projects. I prefer the oil-based Quickshade protective varnish and stark contrasts.
I don’t like the Contrast Paint pastel effect and the two or more coats often needed when contrast painting. I recommend CP though for what I call pre-highlighting – see below. Contrast Paint can be a useful extra tool.
Block Painting & Highlighting
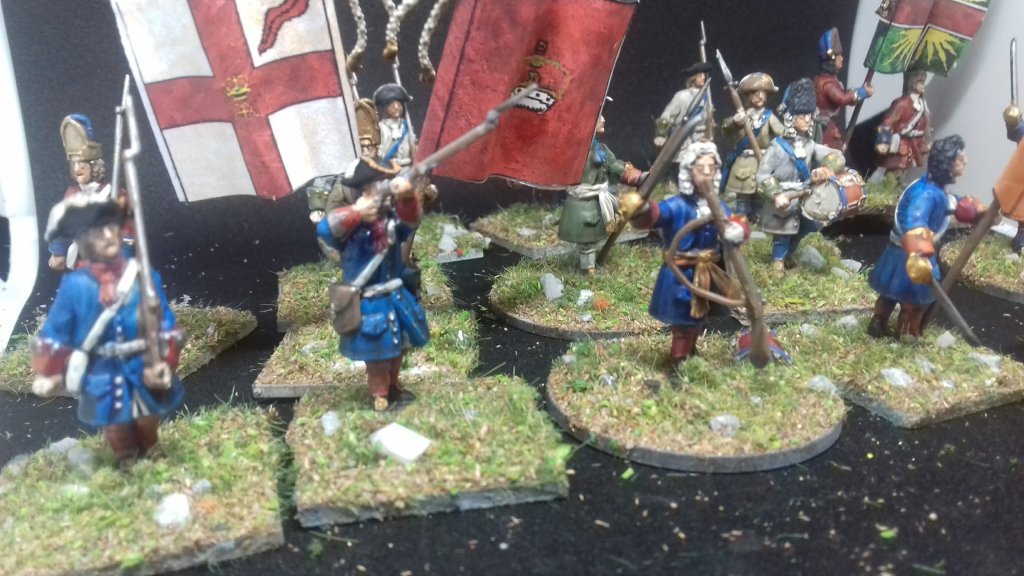
I painted the 3 groups in batches – conveyor belt style. As proud Dutchman I had only one choice: to paint one of the units as Dutch Blue Guards. The ‘Blaauwe Garde’ was the SAS of the 1690. And they are BLEAUTIFUL.

I blockpainted the miniatures, then inked the jackets with Contrast Paint for enhanced effect.

Before 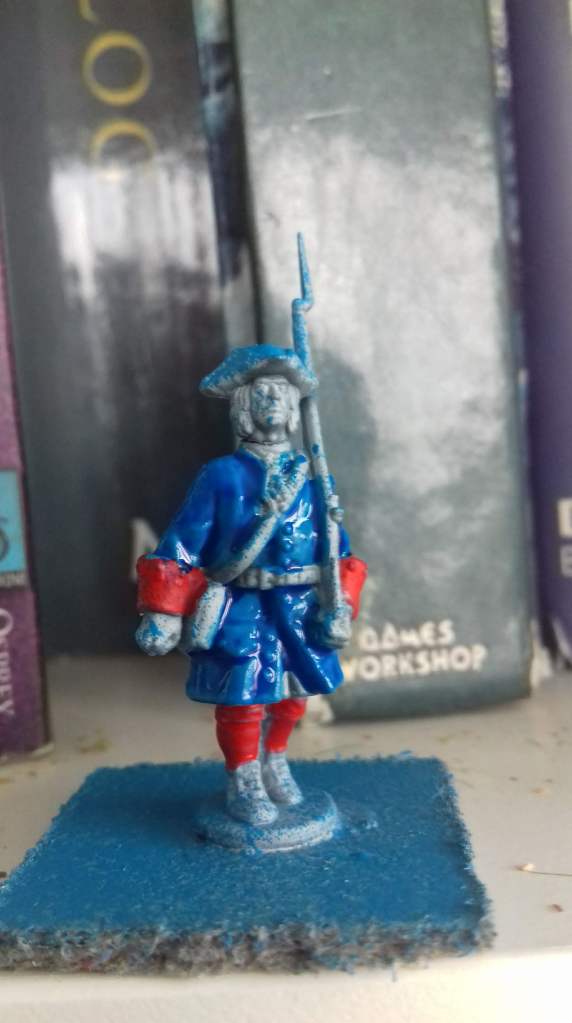
After
I chose red and grey for the other two groups. Red and grey were common WSS colours. Greycoats were often irregulars or conscripts, so I varied the tone of the grey jackets a little.

I added a few extra higlights with medium blue and orange. I finished the project with Quickshade Darktone Dip, that I brushed on the miniatures.
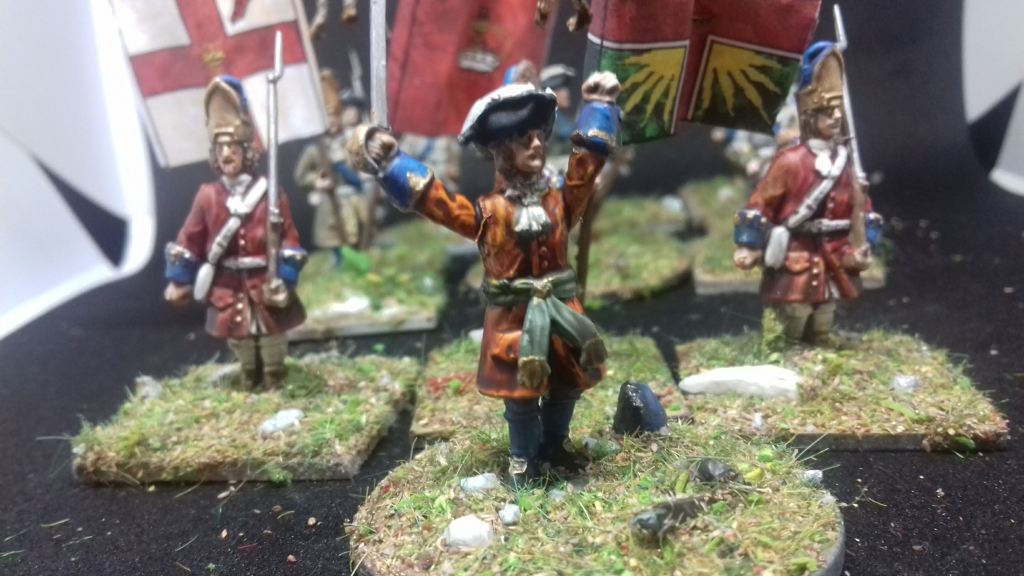
Final result


Evaluation: figures
- Final result was ok. I had doubts but in the end I was happy.
- These figures have been re-issued as Warlord WSS infantry (20 GBP for 24 figures). The Warlord box has less options, 20 marching figures and 4 multi-part (instead of 24 plus 12 multipart). See also this review with pictures. The original Wargames Factory figures look stiff and have weird eyes. Reissued as Warlord figures the box now has more stiff marching poses and less variation for a higher price. In comparison: Warfare Miniatures is asking 37,50 pound for 25 miniatures in different poses and Foundry 36 GBP for 24. Warlord is cheaper cannon fodder.
- In comparison: I bought and painted cheap HäT Bavarians, single body figures, and although their sculpts were maybe less detailed the poses were more lively.
- Free flags from Warflag.com and from Ray Roussell, thank you.
- My rating for this out-of-production Wargames Factory box would be 7 out of 10. Cheap and OK. I think I would rate the Warlord box 6 out of 10, more expensive, fewer poses.

Warfare Miniatures 
Foundry
Evaluation: Quickshading
Army Painter cheats. Although my conveyor belt method is relatively quick, I’m much slower than the standard Quickshade promotional examples. I didn’t clock my painting this time, but including assembly I estimate that I spent at least 7 evenings = 7×3 = 21 hrs on this 36-figure project. At least. So, 30-45 minutes per figure. Compare that with promotional examples ‘Jonas’ massive ECW army’ in a week, from Army Painter & Warlord.

Army Painter is taking many shortcuts in this example.
- No assembly time mentioned. Assembly slows down.
- Only 1 green basecoat: I prefer a grey basecoat and a second thin sprayed colour coating on the jacket, or a colour and then a thin white on the face and white trousers, because blue and red often annoyingly shine through white and flesh paint
- A very limited colour palette: all leather and boots and the gun fur brown, hats and pouches desert yellow, flesh and metal. 4 layers and that’s it. My standard Blaauwe Garde-musketeer has, from top to toe:
- white feathered black tricorne with orange lining
- white or brown hair
- medium flesh face and hands that I highlighted with a lighter flesh colour
- blue highlighted jacket with white lining
- white straps and pouch
- red cuffs highlighted orange, with silver or gold lining
- red trousers highlighted orange
- black shoes with golden buckles
- a brown musket with a metal barrel
- silver or gold buttons
- a silver sabre with gold handle.
- Standard Quickshading is perfect if you have no problem with a relatively flat, dark, large army. Because I want something inbetween the “5 hours per individual figure” and “5 figures per hour” I pre-highlight and use more colours for a lighter and IMHO better final result, check my Bavarians and Napoleon statuette.
- I ran out of Strong Tone Quickshade (the brown wash) so I used Dark Tone (black). I think it’s just as good, works fine on the blue and grey coats. The flesh faces however got an unnatural black shade so that I had to correct that a little after drying.
- Leofwine, member of the Milton Hundred Club, tested several colours Army Painter Quickshade dips and bottles with acrylic inks in 2012 on the same WSS infantry box. For comparison, check his blog here.

Great post. Nice to see your process broken down like that.
Cheers,
Pete.
LikeLike