

I recently bought 3 boxes HäT 28mm Bavarians at a convention: marching, action poses and infantry command. I should say we, because I bought these budget miniatures for our club and promised to speedpaint them. Here’s my review and speedpaintblog.

Why Bavarians?
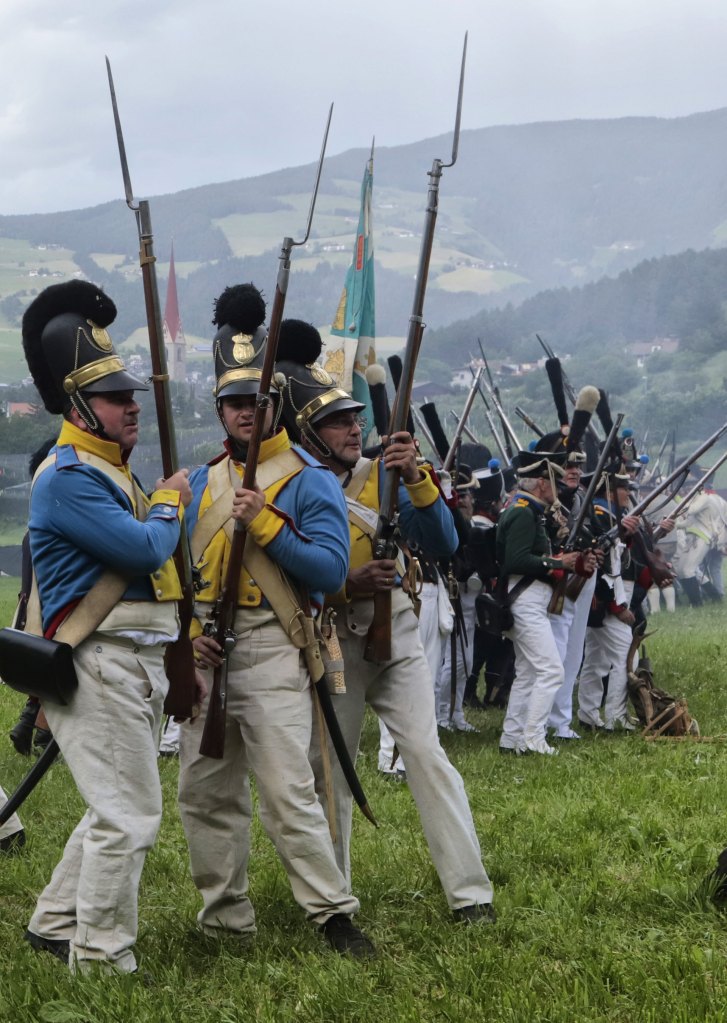
The Bavarians are a versatile army because they regularly switched sides. They were allied to the French between 1805 and 1813 and allied to the Austrians and Russians before and after. You can use this miniature army in skirmishes against different opponents: French, Austrians, Russians, Prussians, Tyroleans.
- in 1800 they were allied to the Austrians
- in 1805 the Austrians attacked Bavaria, the Bavarians defended and secured the French flanks and supply at the Battle of Austerlitz
- In 1809 the Bavarians with French assistance struggled against revolutionary forces in Tyrol and battled against the Austrians (Wagram)
- In 1812 Bavarian troops joined the Russian campaign
- Until Leipzig Bavaria supported the French, but switched to the coalition
- in 1814 they fought battles against the French, now together with the Russians, the Prussians and the Austrians, marching to Paris.
So if you’re looking for a small and useful army, try Bavaria!
Why HäT?
For some reason the HäTs 28mm are neglected by the wargaming community. Everybody buys the much better marketed and trusted models from Warlord and Perry’s and others. HäT is mainly a soft plastic 1/72 manufacturer, so can these 28mm be any good?
I stumbled upon them and couldn’t believe the price. We wargamers are orthodox believers in the Religion of Many Coins – only the unaffordable can be good. These HäT sets will cost you 10-12 euro (10 pound) for 32 figures. That’s less than 40ct per miniature, and cheaper than a white metal 15mm. Regular 28mm (metal) miniatures are 1 euro per figure, or more. Warlord is 20 pound for 20 figures, even cheap Victrix (50ct per figure) is more expensive.
The HäT-sets have been in the market since 2010, but I never see them featured in paint blogs or on wargame tables. Are they that ugly? I wondered.
So I checked the boxes before buying. Here’s a close up.
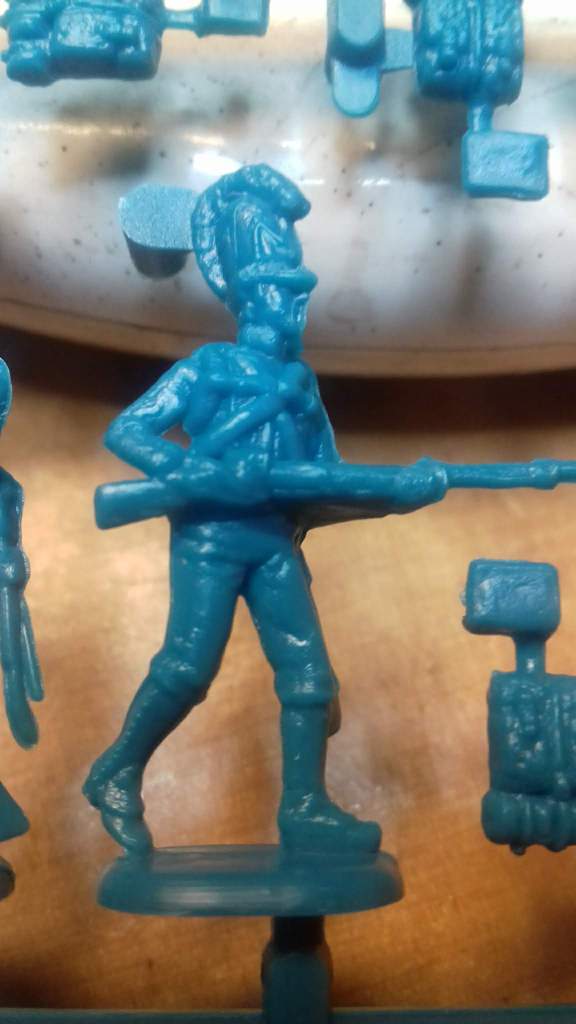
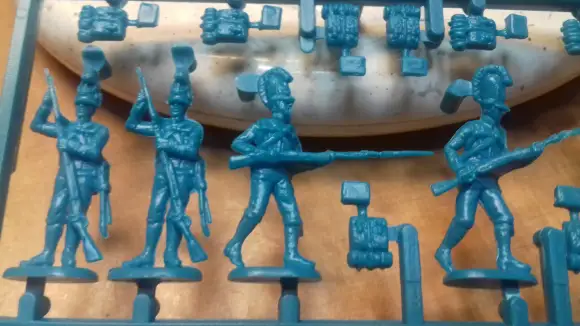
The plastic is normal hard plastic, many different poses, enough detail.
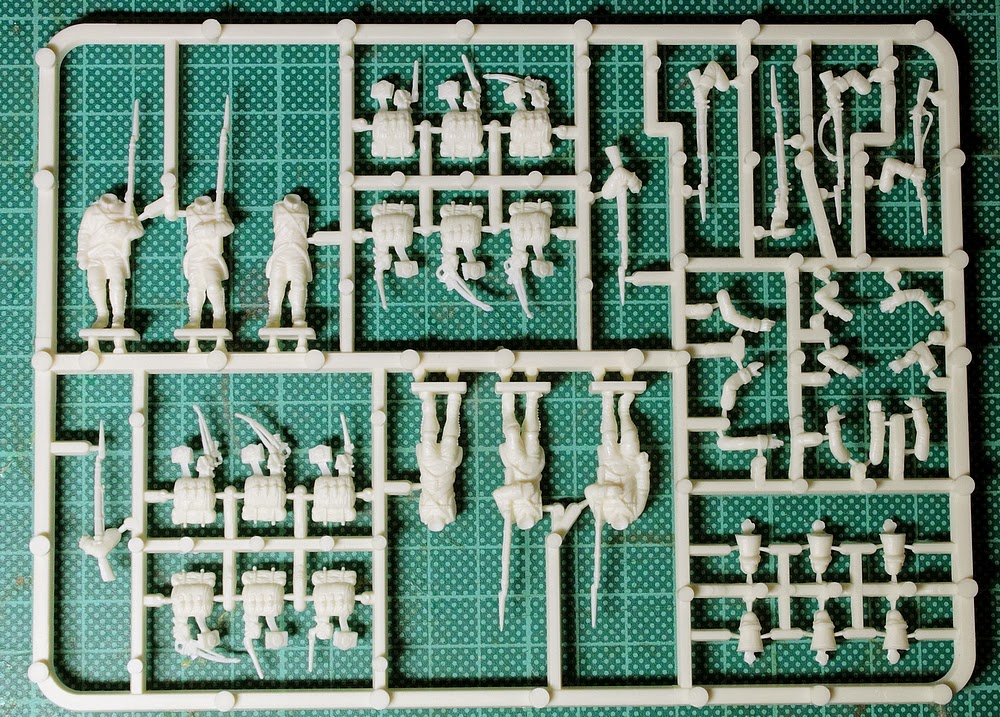
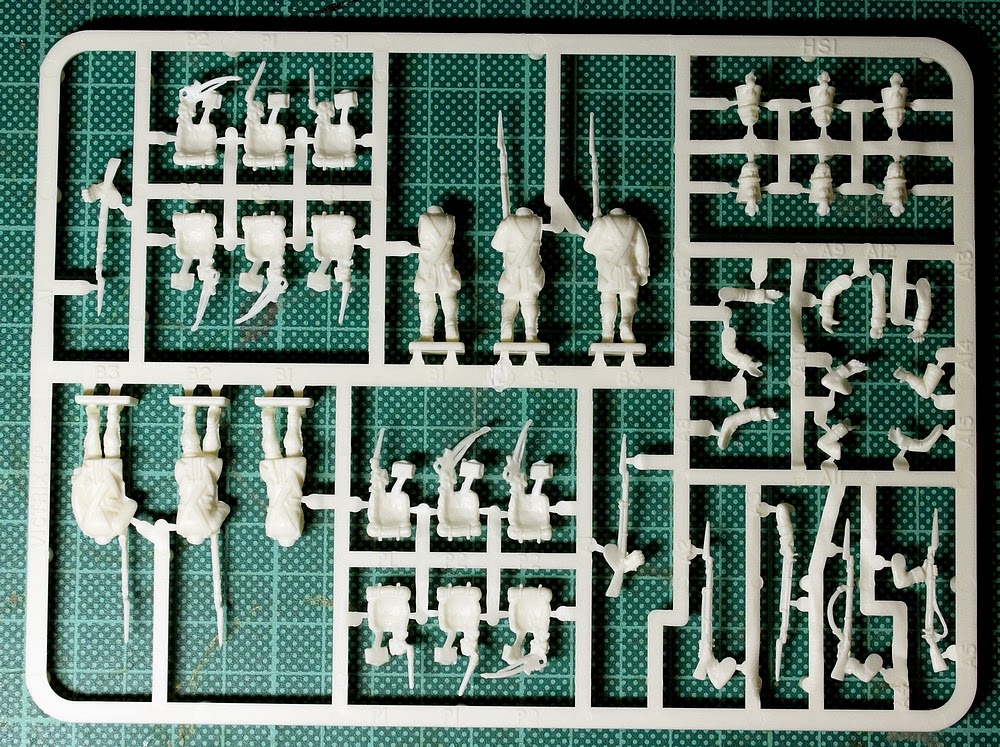
A very big difference with other manufacturers is the number of separate parts. HäT provides a complete figure with a separate backpack and an optional plume. That’s all. Compare the sprue above with the Victrix Austrians below, with separate heads, arms and rifles.
Scott MacPhee, a former semi-official HäT-painter, reviewed the boxes in 2009. He wrote then:
Plastic molds cannot have as much undercutting as metal molds, which means the plastic figures generally cannot have as sharp relief. Some other manufacturers have released figures with a great many parts. This allows for more realistic detail, but requires the wargamer to spend a lot of time building the intricate soldiers (…) HäT has compromised by making some separate pieces for the figures, but keeping the main body of the figure as a single piece.
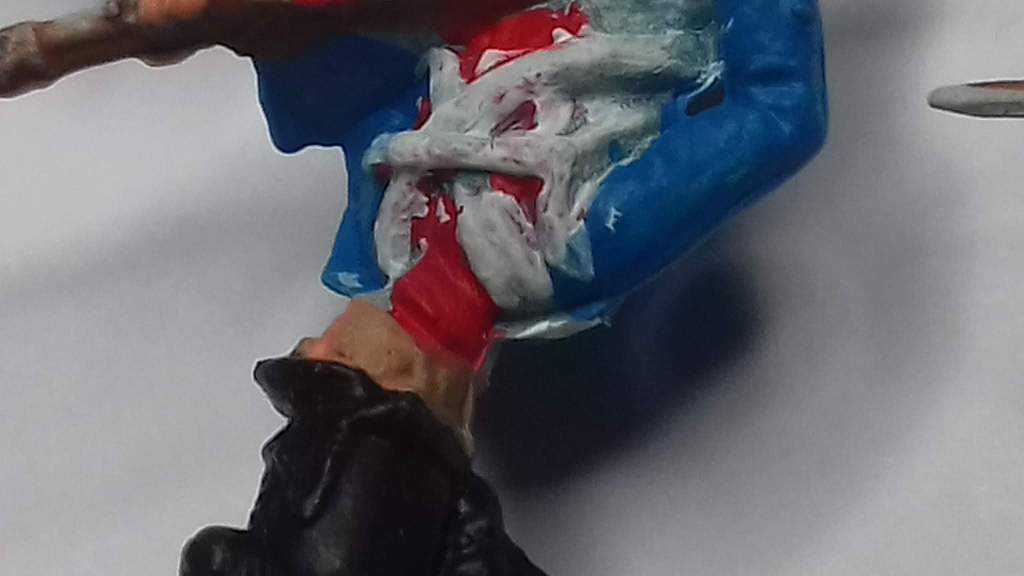
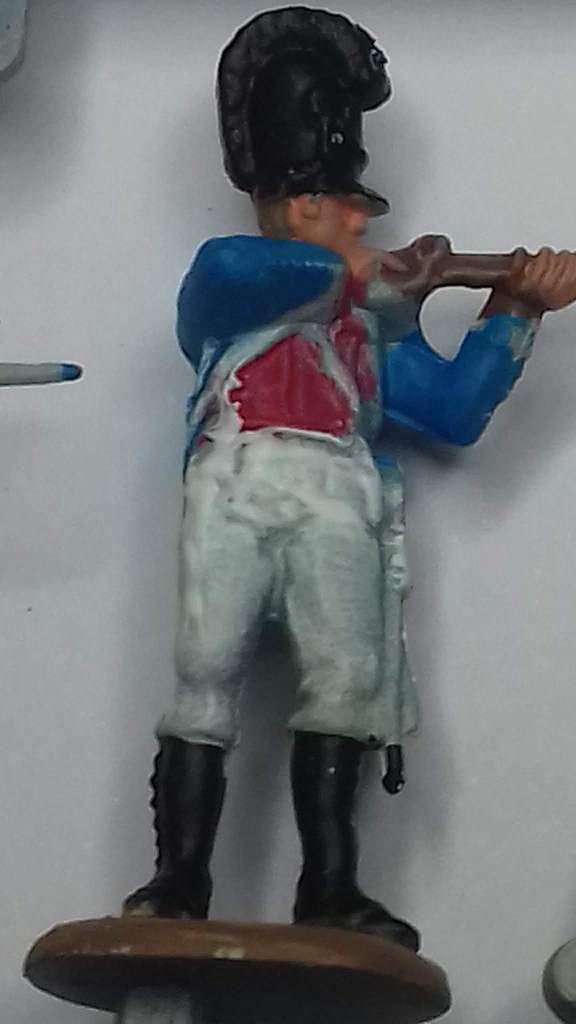
As a speedpainter I dislike glueing multi-part miniatures so I have absolutely no problems with HäT’s single-piece approach. But as MacPhee remarked, some poses
clearly showed the limitations of HäT’s single piece approach, with some areas that should have had gaps (such as between the musket and the body, or the arm and the body) instead having solid plastic
As you can see on this close up here:

Better proportions
The HäT-figures are not ‘heroic’ but more realistically proportioned. Compare with Warlord, below.


It’s all very nuch a matter of taste, of course. The standard in tabletop wargaming is the 28mm fatboy with a giant gun. IMHO the slender HäT-figures with rifles that don’t look like cannons win the realism and beauty contest.
I also bought these HäT because cheap quicksnap miniatures lend themselves more to speedpainting than expensive multipart figures or metal figures. My challenge was to paint a good tabletop army in a short time.
Why Quickshade?
The Quickshade dip method is out of fashion. Acrylic wash and Contrast Paint rule. I use different painting techniques, depending on the project, but for large 28mm armies I still prefer the dip over the acrylic wash or CP. Check the advantages
- QS masks mistakes, more than Contrast Paint
- the relatively dark QS shadows and stark contrasts improve mediocre sculpts more than subtle shades or the CP water colour effect. Extra deep colour contrast/shadowing can compensate for a certain lack of sharp relief.
- It’s a club army for quick use and storage, so I prefer an extra protective varnish cover.
- I believe that QS is faster than other methods. Guy Bowers from WSS painted 10 simple green British Rifles in 5 hours with Contrast Paint. Excellent, but I’m quicker: I paint 3 blue/white/red uniformed Bavarians per hour, 92 in 30 hrs. I estimate I could Quickshade paint 10 simple green Rifles to a tabletop standard within 2-3 hours.
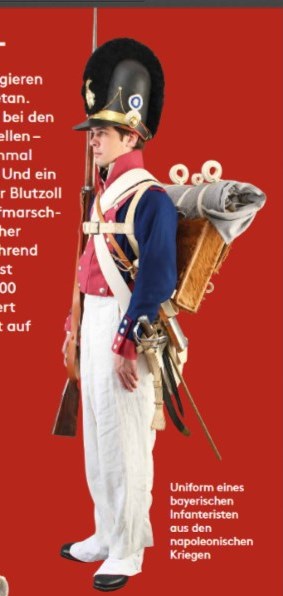
Bavarian Uniform Colours
In 1809, there were thirteen regiments of Line Infantry in the Bavarian army, numbered 1-14 (with #12 being vacant). The Blunders on the Danube blogger published an overview:
| No. | Title | Collar | Lapels/cuffs | Piping | Buttons |
| 1 | Leib Regiment | Red | Red | None | white |
| 2 | Kronprinz | Red | Red | None | yellow |
| 3 | Prinz Karl | Red | Red | White# | yellow |
| 4 | Salern | Yellow | Yellow | Red | white |
| 5 | von Preysing | Pink | Pink | Red | white |
| 6 | Herzog Wilhelm | Red | Red | White | white |
| 7 | Lowenstein | Pink | Pink | None | yellow |
| 8 | Herzog Pius | Yellow | Yellow | Red | yellow |
| 9 | Graf von Ysenberg | Red | Yellow | Red | yellow |
| 10 | Junker | Red | Yellow | Red | white |
| 11 | Von Kinkel | Red | Green | Red | yellow |
| 13 | – | Red | Black | Red | white |
| 14 | – | Red | Black | Red | yellow |
ALL regiments had red turnbacks, and blue shoulder straps, piped red.
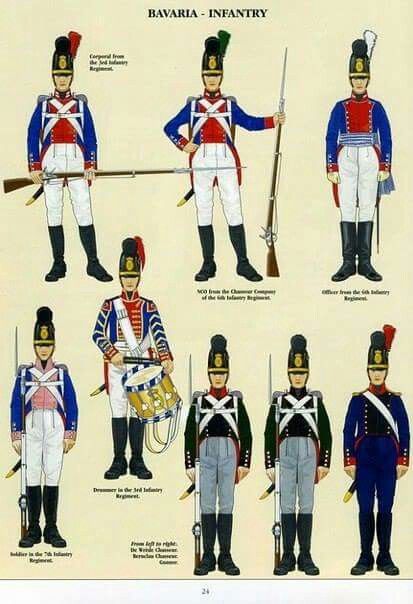
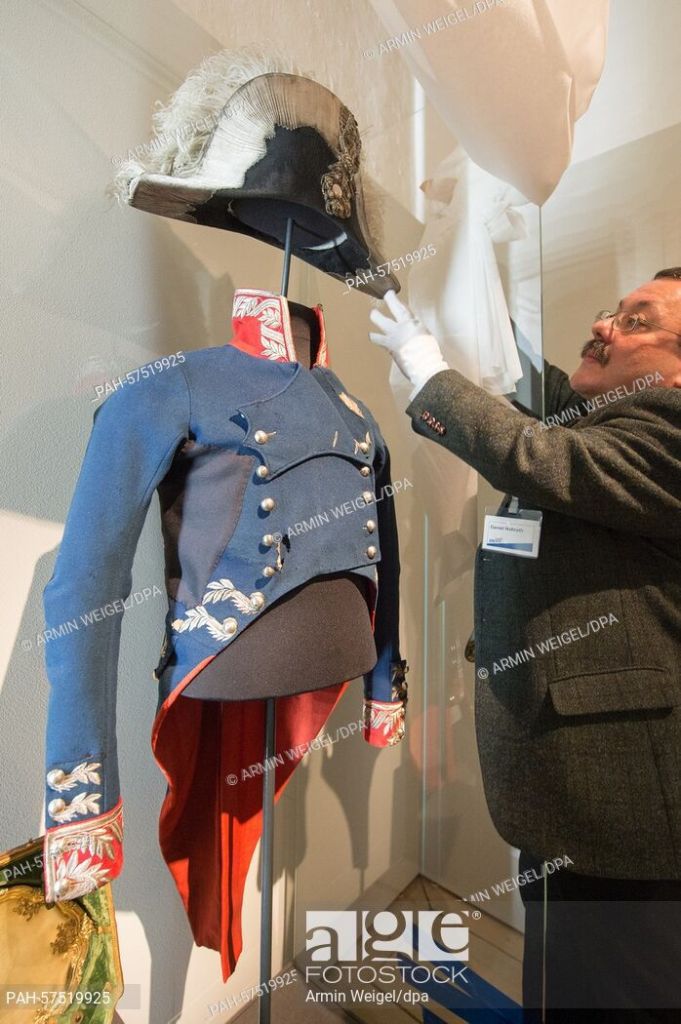
Detailed 19th century original uniform plates can be found here.
What’s the Right Bavarian Blue?
That’s an eternal question, just like the ever returning question ‘what is correct Prussian Blue’ and ‘what is correct French Blue’. The correct answer is: we don’t know, check this thread. Many wargamers seem to think that it was a medium blue, as opposed to the darker blue of the French and the Prussians. Foundry sells ‘Bavarian cornflower blue’. Actually it’s all a shot in the dark. Check the colour variations below:

Different suppliers who dyed the fabric with indigo 200 years ago produced different results. And like blue jeans, just after dying the fabric might be very dark blue, but repeated washings or sunlight or rain will soften the colour and it will turn into a medium blue.
In short: any blue is ok. Wargamers prefer medium/ cornflower blue, which is just as good as a darker variation.
Block painting and dipping
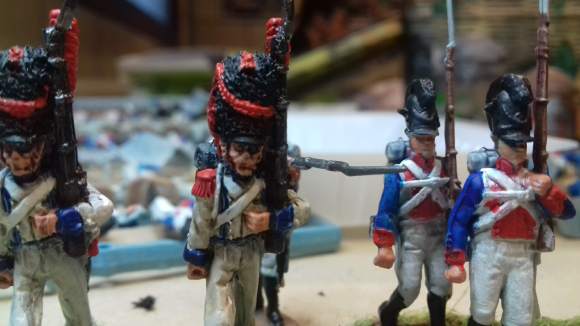
I painted the miniatures while still in the sprue, in the standard red/blue/white colour scheme.
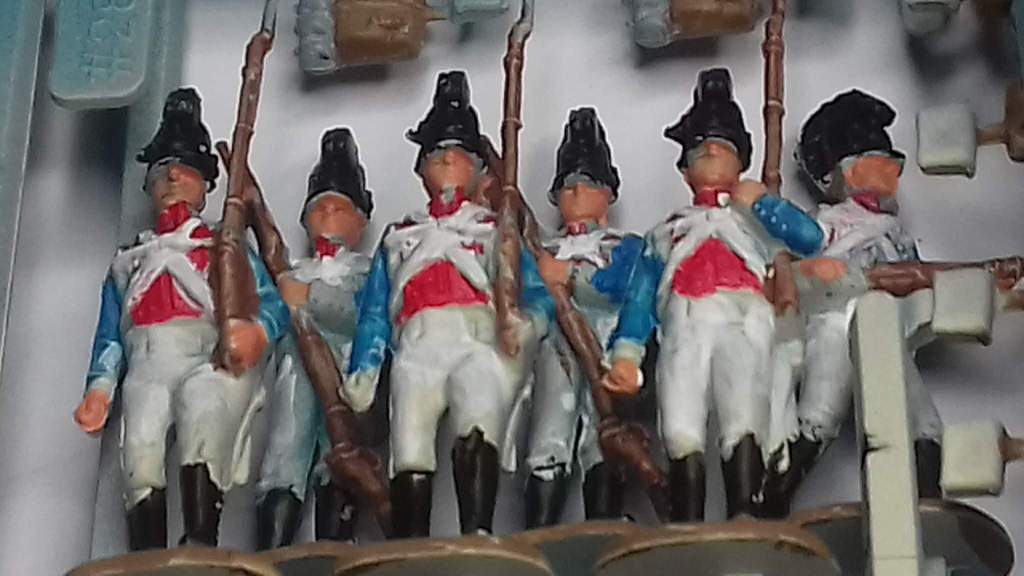

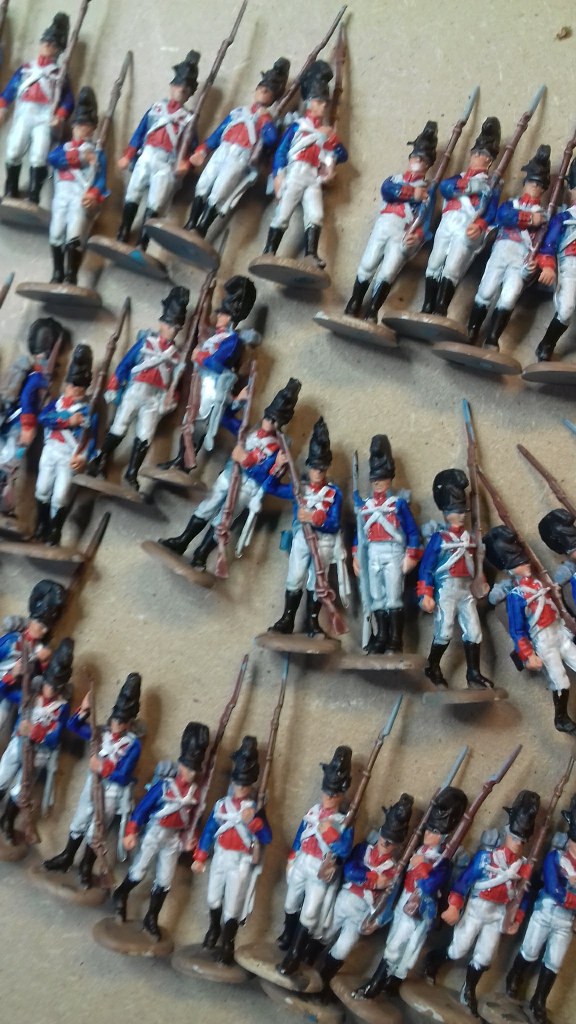
As you see this first layer is sloppy. I then sharpened the relief of the blue jacket and red front with blue and red contrast paint. The official method is to CP a white or grey primed colour, resulting in a pastel effect. Instead, I used CP to contrast and correct the flat medium blue and red painted jacket. The Contrast Paints fill gaps and holes.
Next I removed them from the sprues, checked every miniature, corrected mistakes and painted finer details like barrels, gold helmet lacing, and white rucksack straps. Then I slapped the (mid-tone) Quickshade on the figures.
Before and After Quickshade
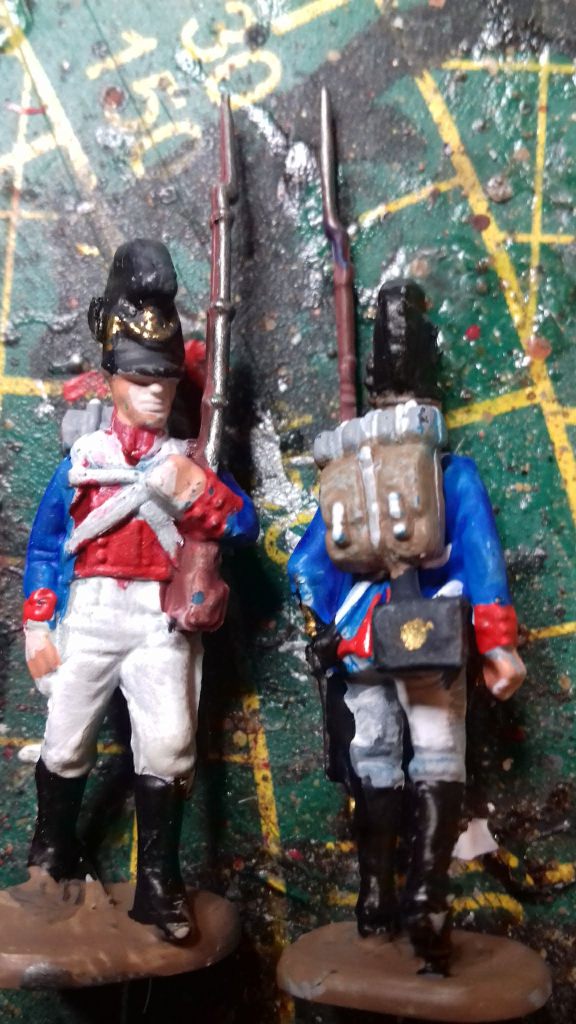
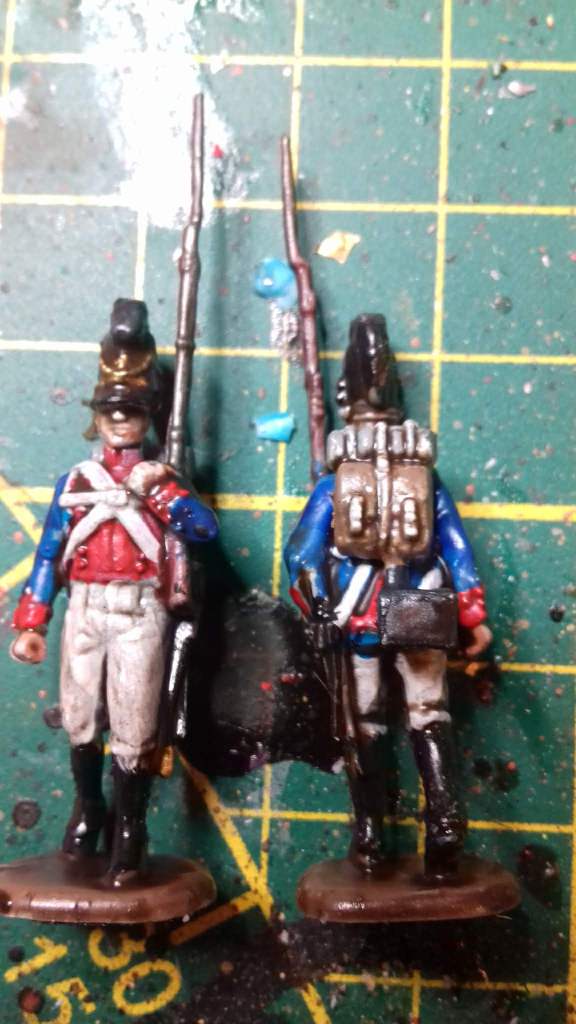
As you see, even my sloppy painting becomes standard tabletop quality with Quickshade. Mistakes are covered and relief improved.
Quickshade Tips For Beginners
- Stir the QS very well and test on 1 figure first. Dilute the Quickshade with turpentine if too dark. QS often thickens in the tin.
- Prime grey, not black, blue or white. Black is too dark as undercoat. A blue undercoat often results in a blueish shade on white or flesh. A true white undercoat doesn’t add extra contrast or mask faults, like darker colours.
- After priming grey, I sprayed a very thin coat of GW Corax White on the front half of the sprues, to speed up the painting process, because trousers and belts are white.
- Forget the separate helmet plumes that HäT provides. Glueing them on the helmet is too much of a fiddly job. I painted the plumes on the helmet.
- I slashed a dab of dark grey on the helmet front and top and a large dot of lighter flesh on the faces as pre-higlight before the Quickshade layers. Rough pre-highlighting works better than fine post-highlighting.
- Brush the QS on the miniature. I don’t dip. Check the miniature after 10-20 minutes and remove puddles.
- Wait 24-48 hrs before matte coating. Otherwise the varnish crackles or will frost. Spray a thin coat in short, quick bursts from a distance.
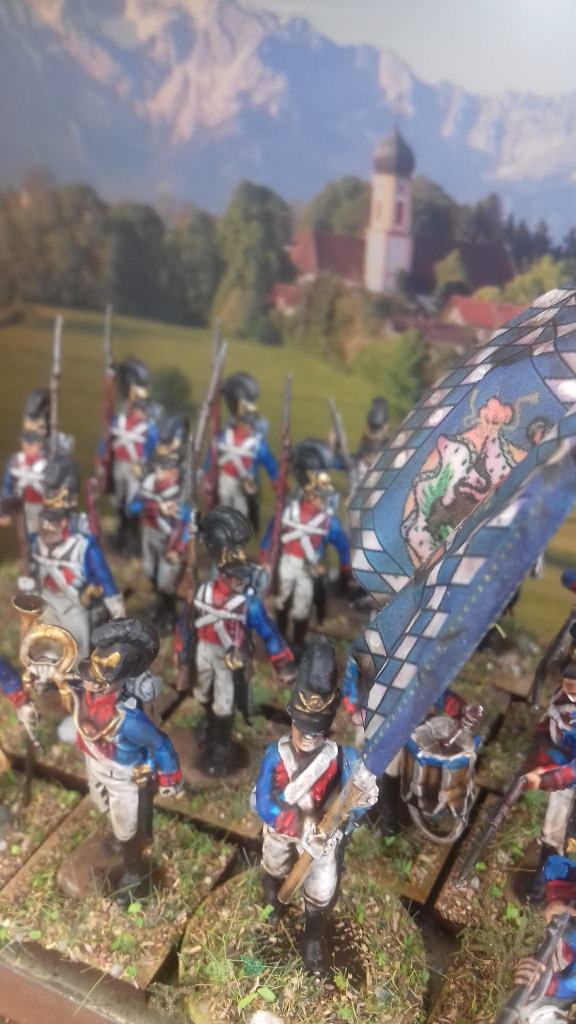
- The HäT Command box comes with plastic flags that you can handpaint if you’re really good in handpainting. I’m not and/or lazy. So I clipped the flags from the pole, glued a paper flag on the pole, varnished the paper with clear varnish and then quickshaded the paper flag. Without clear varnish undercoat, the Quickshade colours the flag very brown.

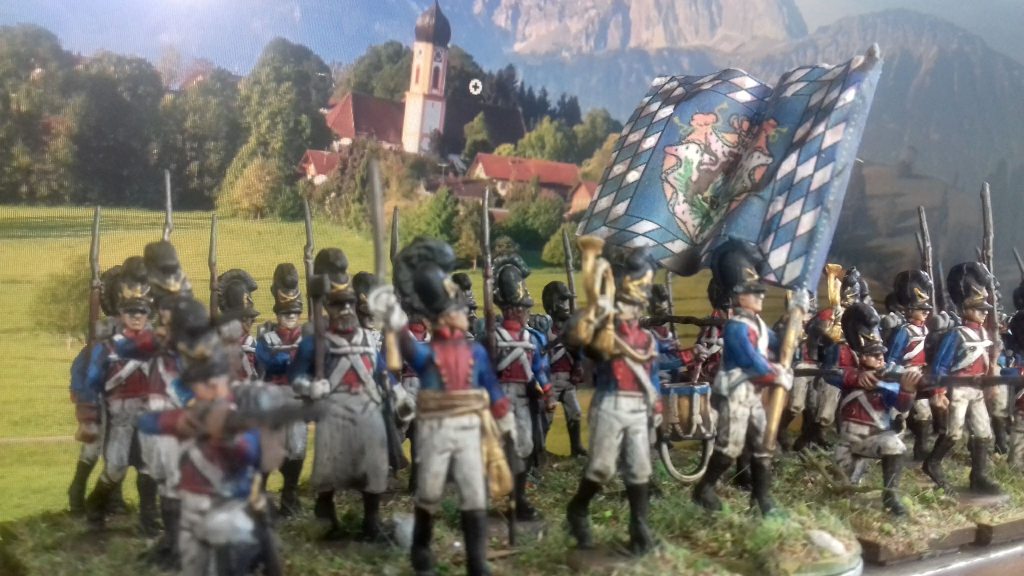
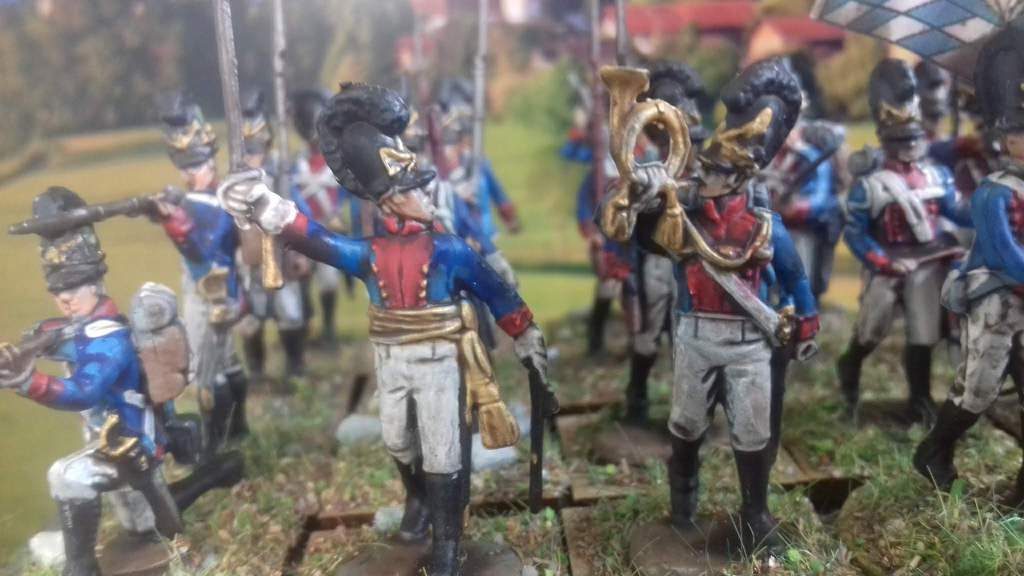
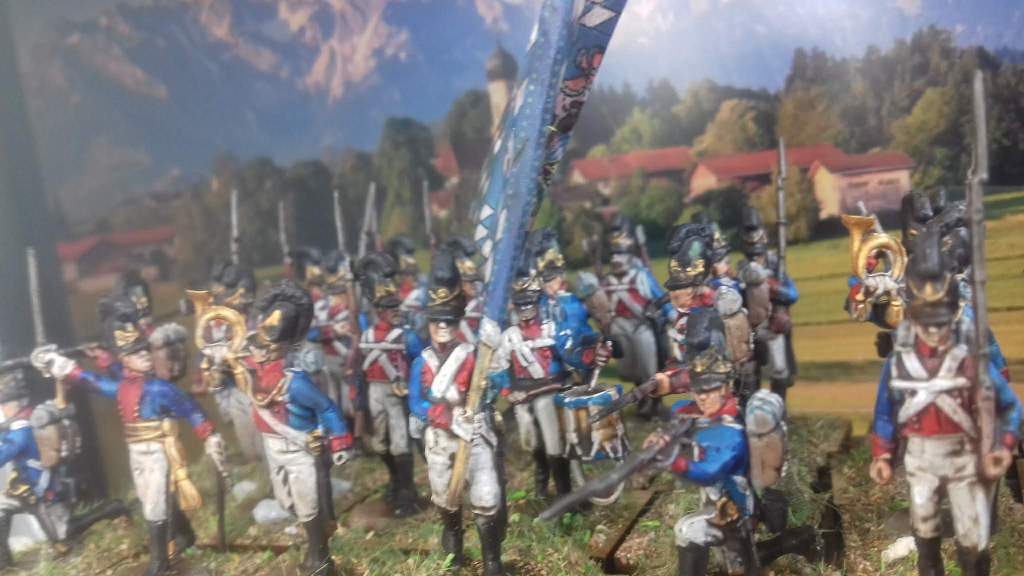
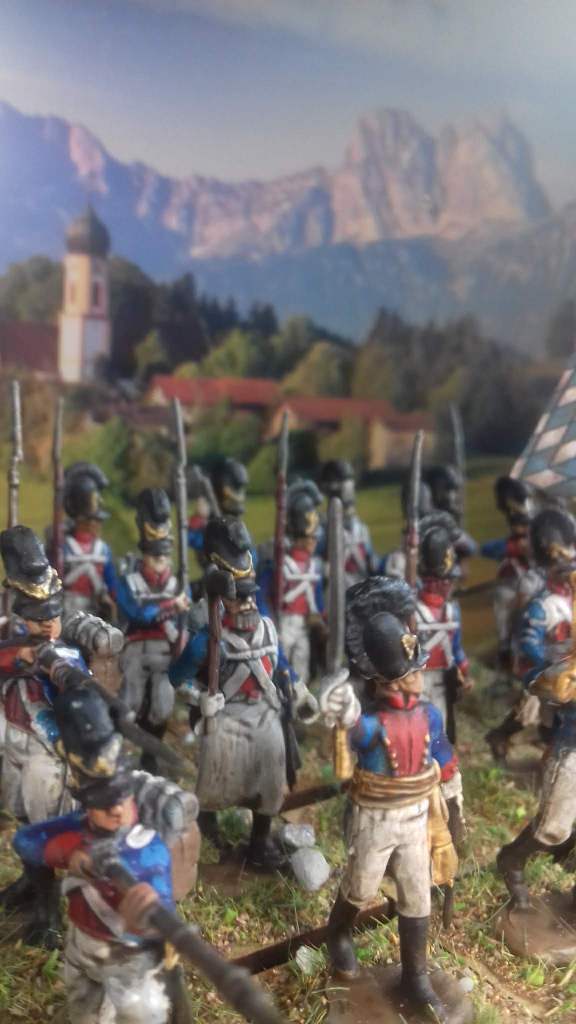
They look amazing. A great force for any club.
Cheers,
Pete.
LikeLike
Thank you very much for this. I actually came across it in a search re the Tyrolean campaign [actually looking for info on Tyrolean costume for Sharp Practice] but will return to this when I get around to painting my many HaT figures for “24 figure battalion games” [as you may have guessed I haven’t chosen the rules yet].
Did you ever do a similar exercise with Austrians and/or French?
LikeLike
Soon some French Legere. Austrians, Prussians never.
24 fig battalion games? ‘Brutus said he was ambitious/ And Brutus is an honourable man’.🙂
LikeLike
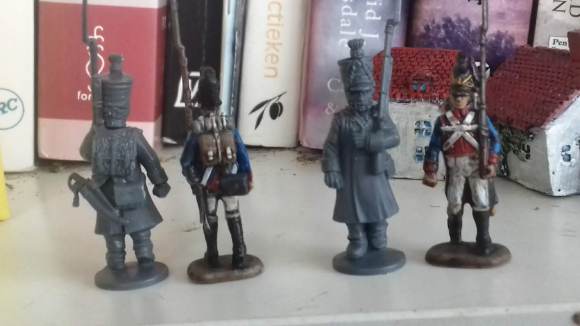
These figures look great after painting. They appear to be produced in a blue plastic and not the more common grey. Is that more difficult to paint and do Hat produce other figures in other colours do you know please? I always wondered why figures weren’t routinely produced in white plastic.
LikeLike
Correct. The plastic color is blue. McPhee’s blog shows red plastic. Forgot to mention, but I primed the frames grey, same primer as my metal figures, perfect primer for white trousers, good, not too dark if you dip. Just as easy to prime and paint as metal or white plastic. Why the color? I don’t know. Internal Hät production efficiency reasons, I suppose.
LikeLike