
For portable Napoleonic big (Blücher) battles I bought 2mm Irregular miniatures and researched how to paint & base them. Unhappy with a standard functional approach I amalgamated different ideas and techniques and finally wrote my own tutorial, for more aestethic bases. Painting 2mm is NOT difficult or microscopic. But you should bigbase this scale and make units/bases easily recognisable.
My written tutorial below is summarized in a 2 minute videoclip:
I also found the free “2×2 Napoleonics” rules that I polished somewhat, see download under the text.
What you need
- Two Irregular 2mm armies (13,75 GBP per army at the time of writing)
- Composition: the French army is 48 small infantry blocks, 40 cavalry blocks (light & heavy), 8 artillery & limber; and a handful commanders and skirmish units. The Austrian army is 30 (large & small) infantry blocks, 40 cavalry blocks (light & heavy), 10 artillery & limber. That’s enough for 25 French and 26 Austrian bases: with 2-6 blocks per base (unit) I could make
- 12 infantry bases
- 3-4 light cavalry bases*
- 1 lancer base
- 2-3 heavy cavalry bases*
- 4-5 artillery halfbases*
- and 4 commander bases per army.
- *(the French and Austrian army are roughly similar, but the French have one cuirassier unit more and one hussar unit less than the Austrians, and the Austrians have 2 extra guns)
- Composition: the French army is 48 small infantry blocks, 40 cavalry blocks (light & heavy), 8 artillery & limber; and a handful commanders and skirmish units. The Austrian army is 30 (large & small) infantry blocks, 40 cavalry blocks (light & heavy), 10 artillery & limber. That’s enough for 25 French and 26 Austrian bases: with 2-6 blocks per base (unit) I could make
- Irregular’s Horse & Musket scenics pack (15,40). Musthave. Scenery is essential for nanoscale wargaming. Otherwise the table is dull.
- Medium or large rectangular bases. I bought 60×40 bases from Warbases.
- Dice cells and 7mm dice, also from Warbases. Besides, I bought a Blücher token set also from Warbases.
- Magnetic sheets. I glued a 1mm magnetic strip on the back of every base. During play I can click hobbystore locknuts on the strip.
- GW Contrast Paint. Older tutorials often advise a brown or black undercoat and drybrushing but I had good results with bright Contrast Paint. Choose bright colours for highly contrasting armies. French vs Austrians is a blue vs a white army. French vs Prussians is blue vs blue, not my choice. I would paint Russian blocks in a very yellowish green.
Tip #1: Be Humble
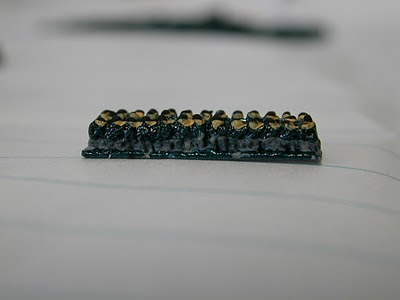
This scale is a fun scale. You’re not painting miniatures! You’re painting white metal cubes. Rice. Pinheads. Dead bacteria. Look at the picture below and try not to laugh.
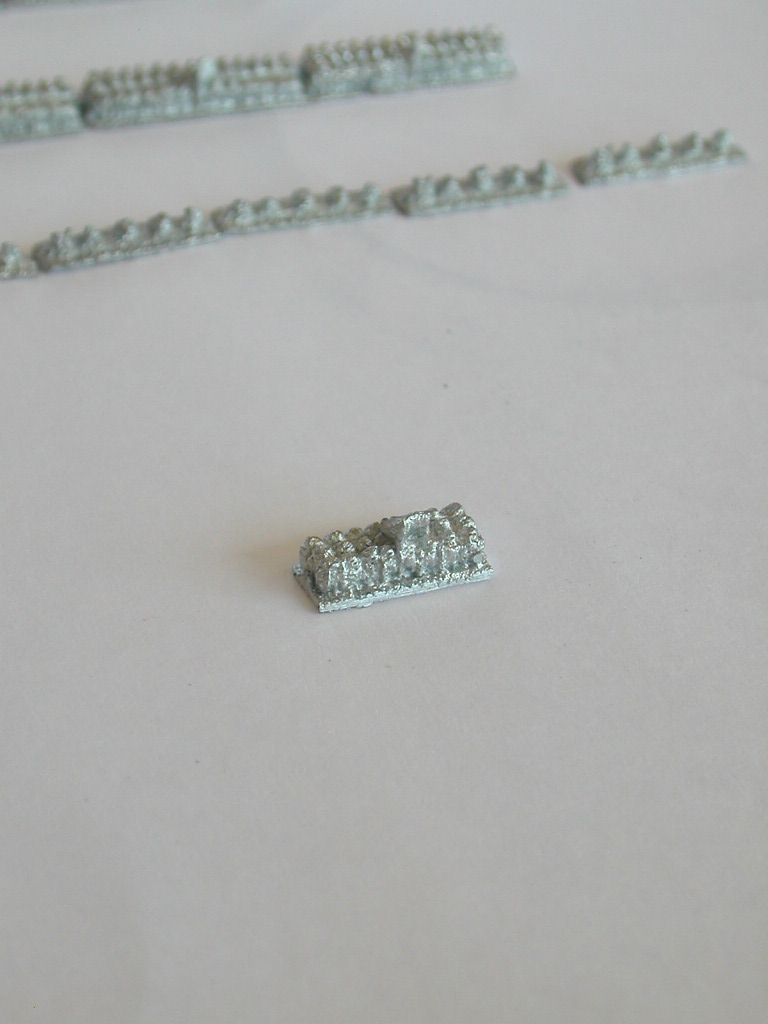
What’s this? A coffin?
War Depot ‘painted’ his Prussian army. It’s Mondriaan. Not Van Gogh. His instruction:
“Line Regiments are dark blue top half and grey bottom half with black on top.
Reserve Regiments are grey on top and bottom with black on top.
Landwehr Regiments are dark blue on top half and white on bottom half.”
To summarize: you don’t ‘paint’, you draw horizontal lines on primed metal cubes.
What you’re actually doing is producing a humble counter. A 3D-playing card. Like below but better.
Do it in style. Do it in the best style you have.
Tip #2: Be Ambitious!
Lloyd from Lloydian aspects managed to paint a 2mm Roman unit with a flag with SPQR on it.
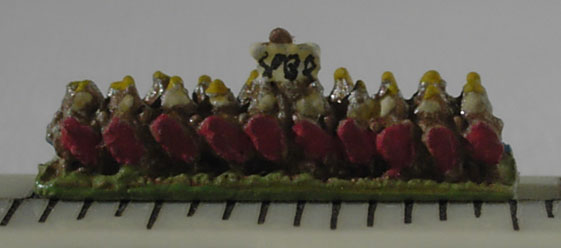
War Depot painted a British Napoleonic unit.
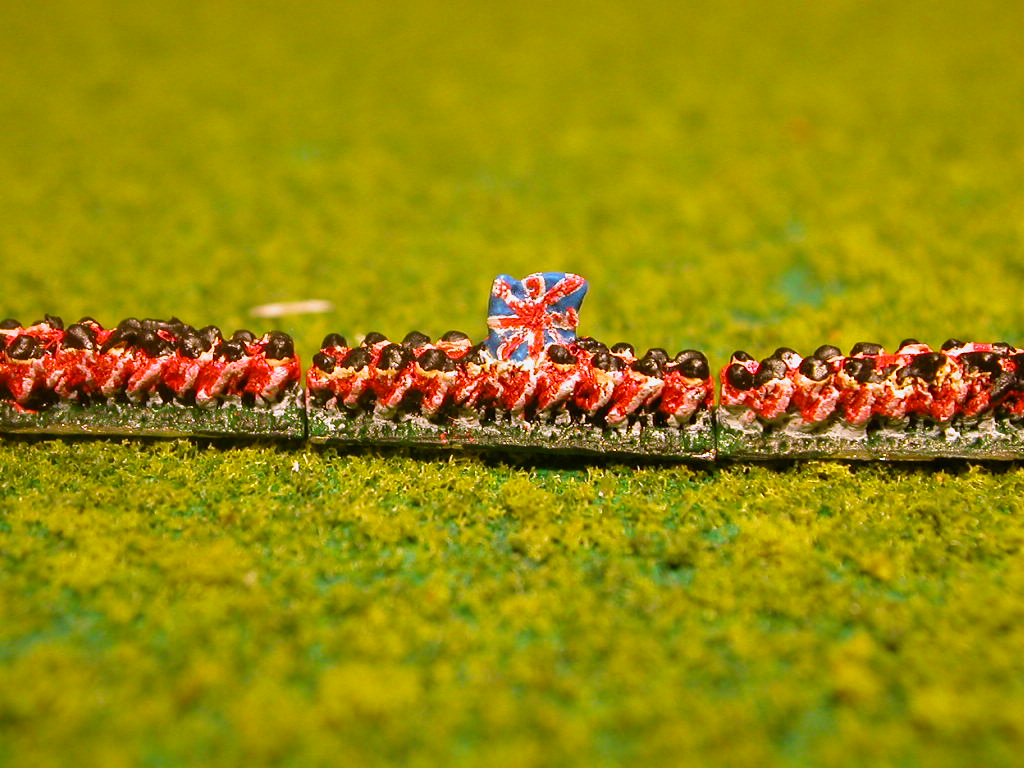
In other words: if you draw the right lines, your metal cubes can be convincing. Surprise your friends! Show them your painting power!
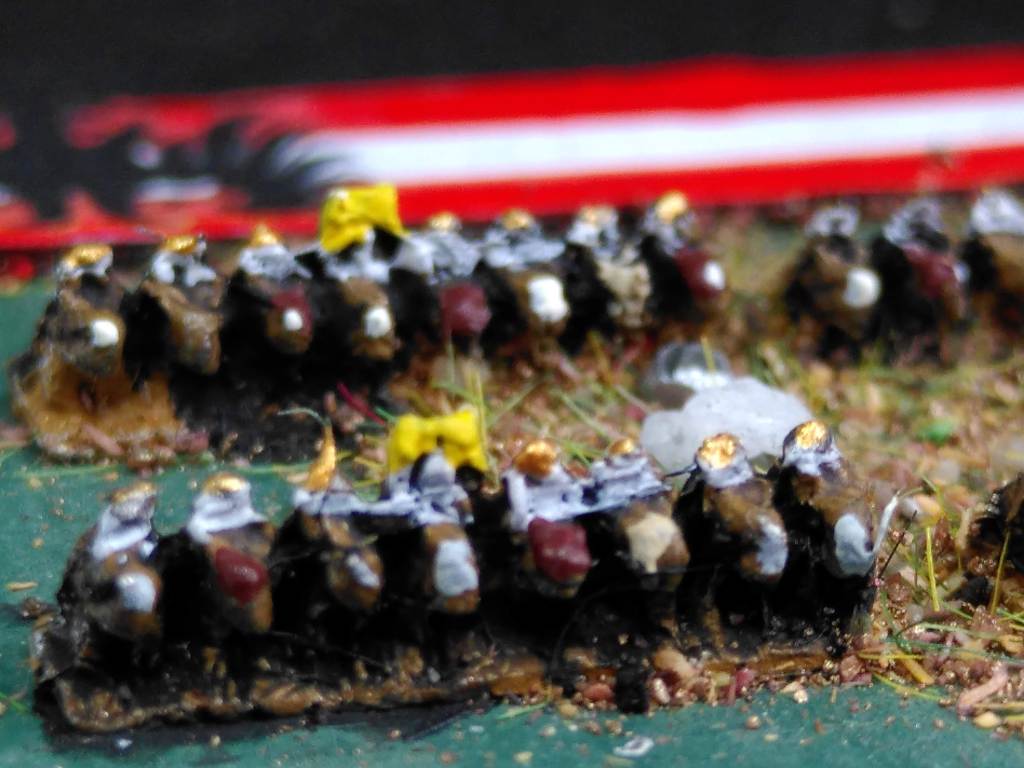
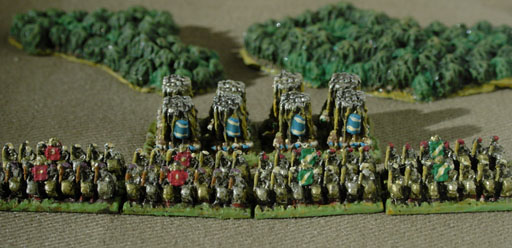
And look at that cavalry!

I was sceptical when I saw the infantry blocks. I immediately stopped laughing however when I checked the 2mm cavalry and artillery. I could identify arms, tails, I spotted the difference between lancers, hussars and cuirassiers, I discovered a saddle cloth, I could identify artillerists loading a gun – the relative detail of this dead bacteriae is amazing. A nice painting challenge.
Tip #3: Flag Them!
Printed flags are best. War Depot:
Flags are from flag info I gathered over the years reduced down to 4mm square and printed on normal 80gsm paper and then brushed on the reverse with PVA glue and carefully stuck onto the cast flag on each infantry block.
The flags make the coffins more recognizable. Check War Depots pic:
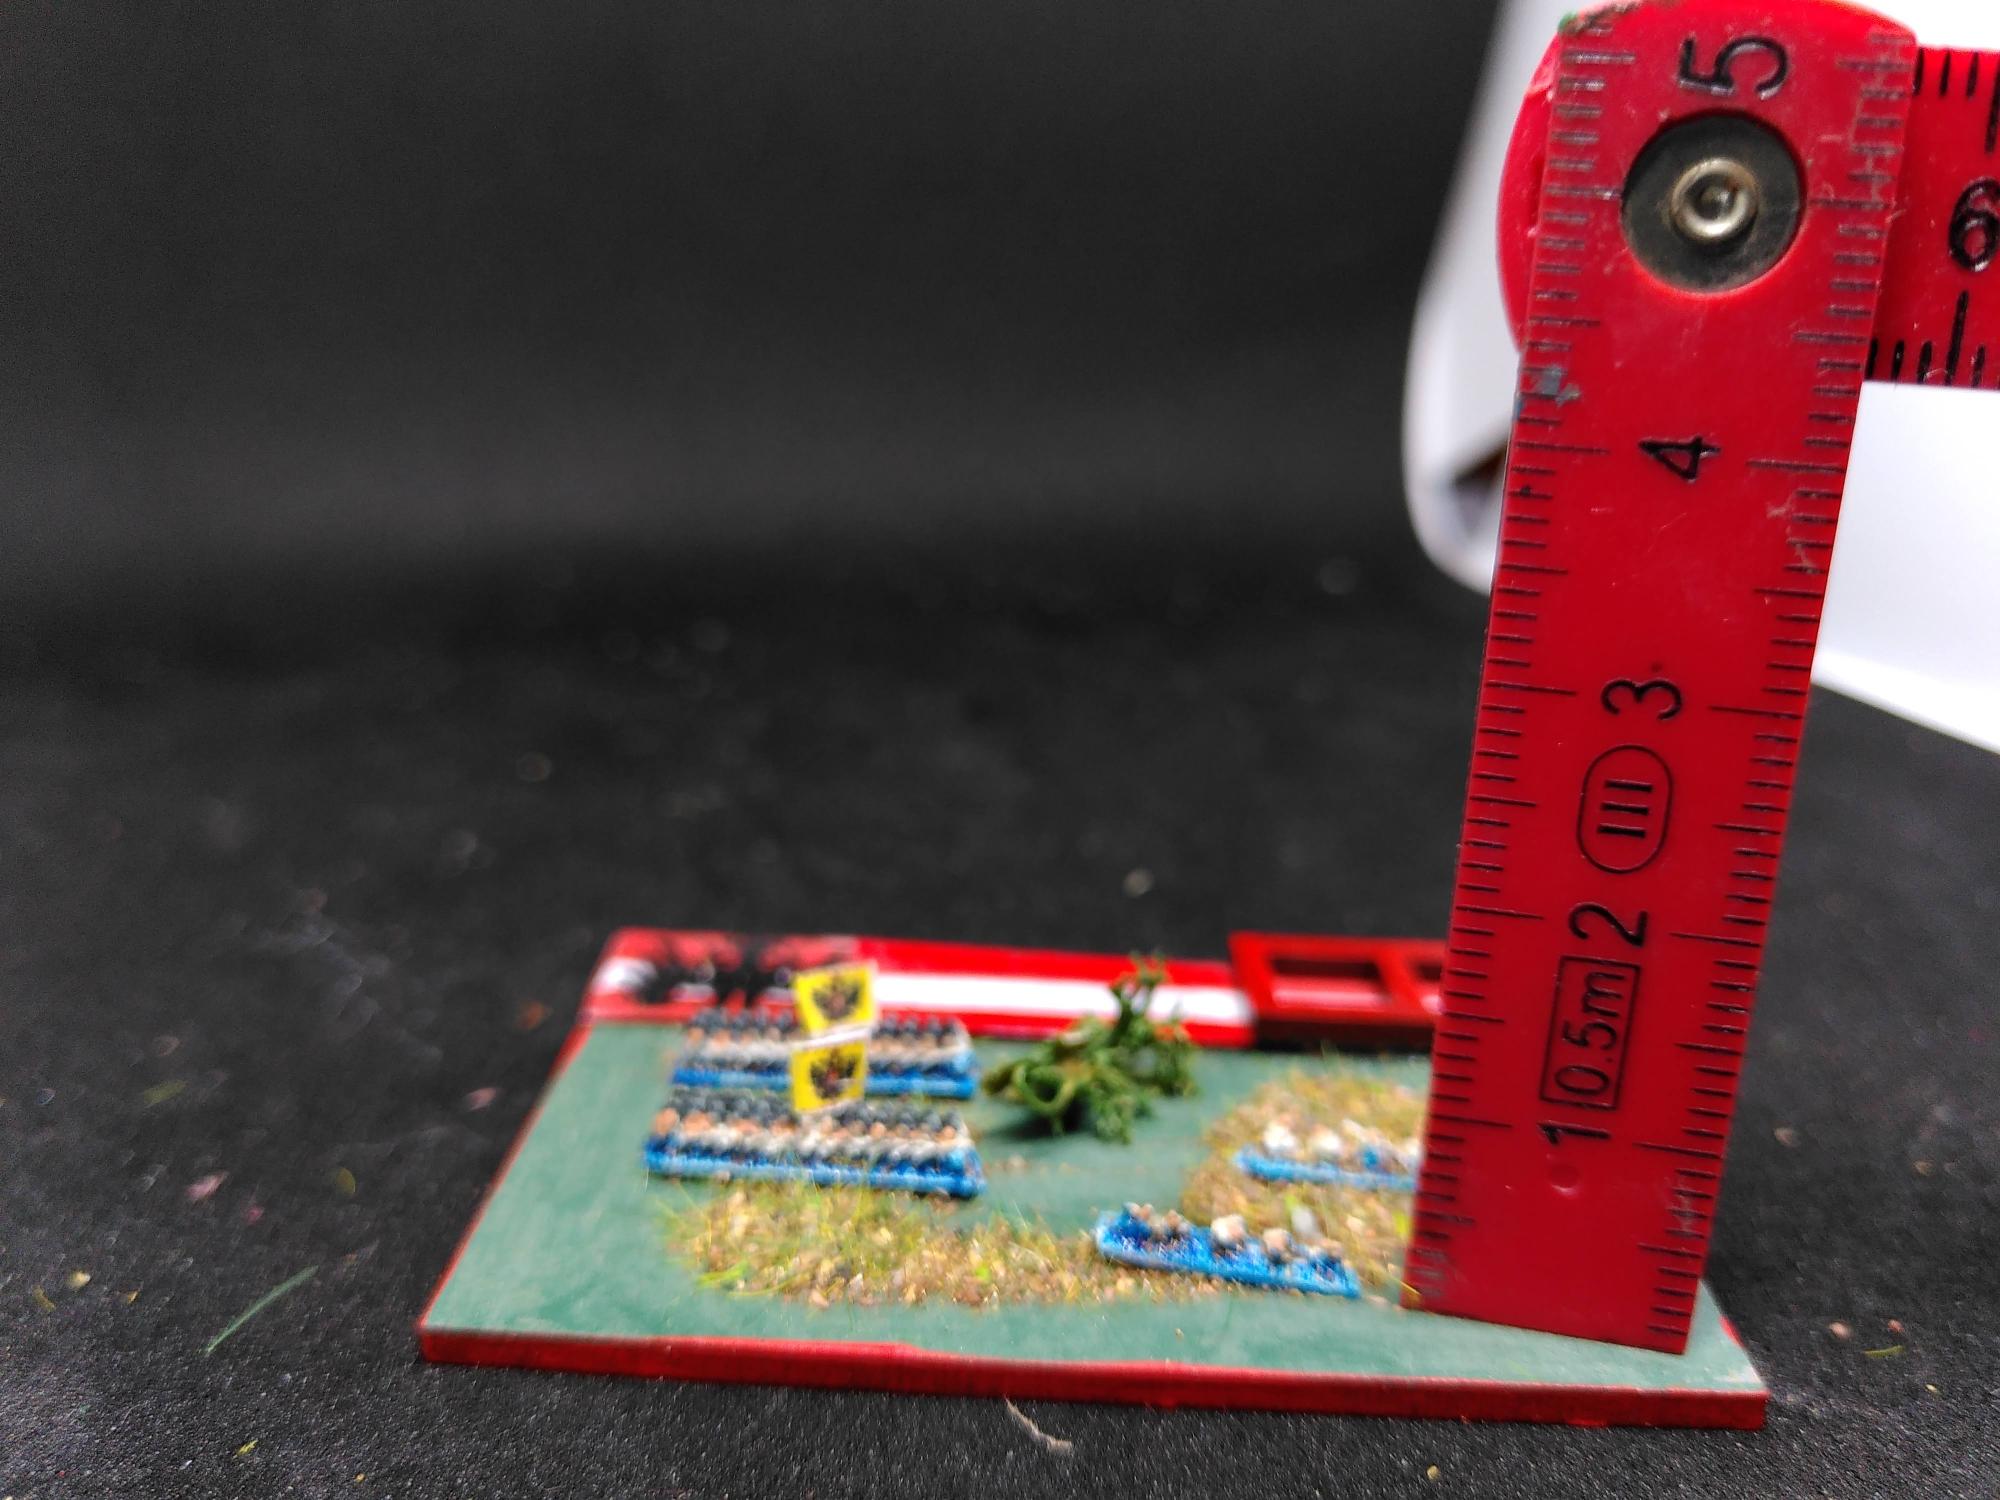
I copied online flags that I downscaled to 2mm. See below.


Tip #4: Prime Light!
Just as for larger scales, the priming colour is very much a matter of personal choice. You can prime 2mm in the main army colour, grey, brown, black or white. A few examples from the web.
For 2mm I used Contrast Paint over a white undercoat. The smaller a miniature, the brighter the army. The Contrast Paint gives some depth while it is as fast as a colour primer. I primed the cavalry twice: first khaki brown, then a dark wash (Nuln Oil) I then primed the rider again in white or yellow, and finally I contrast painted the rider.
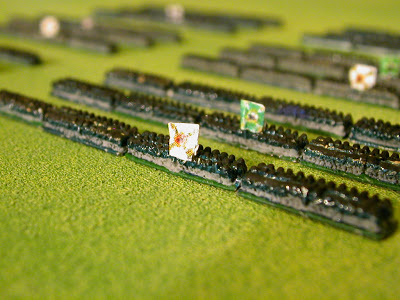
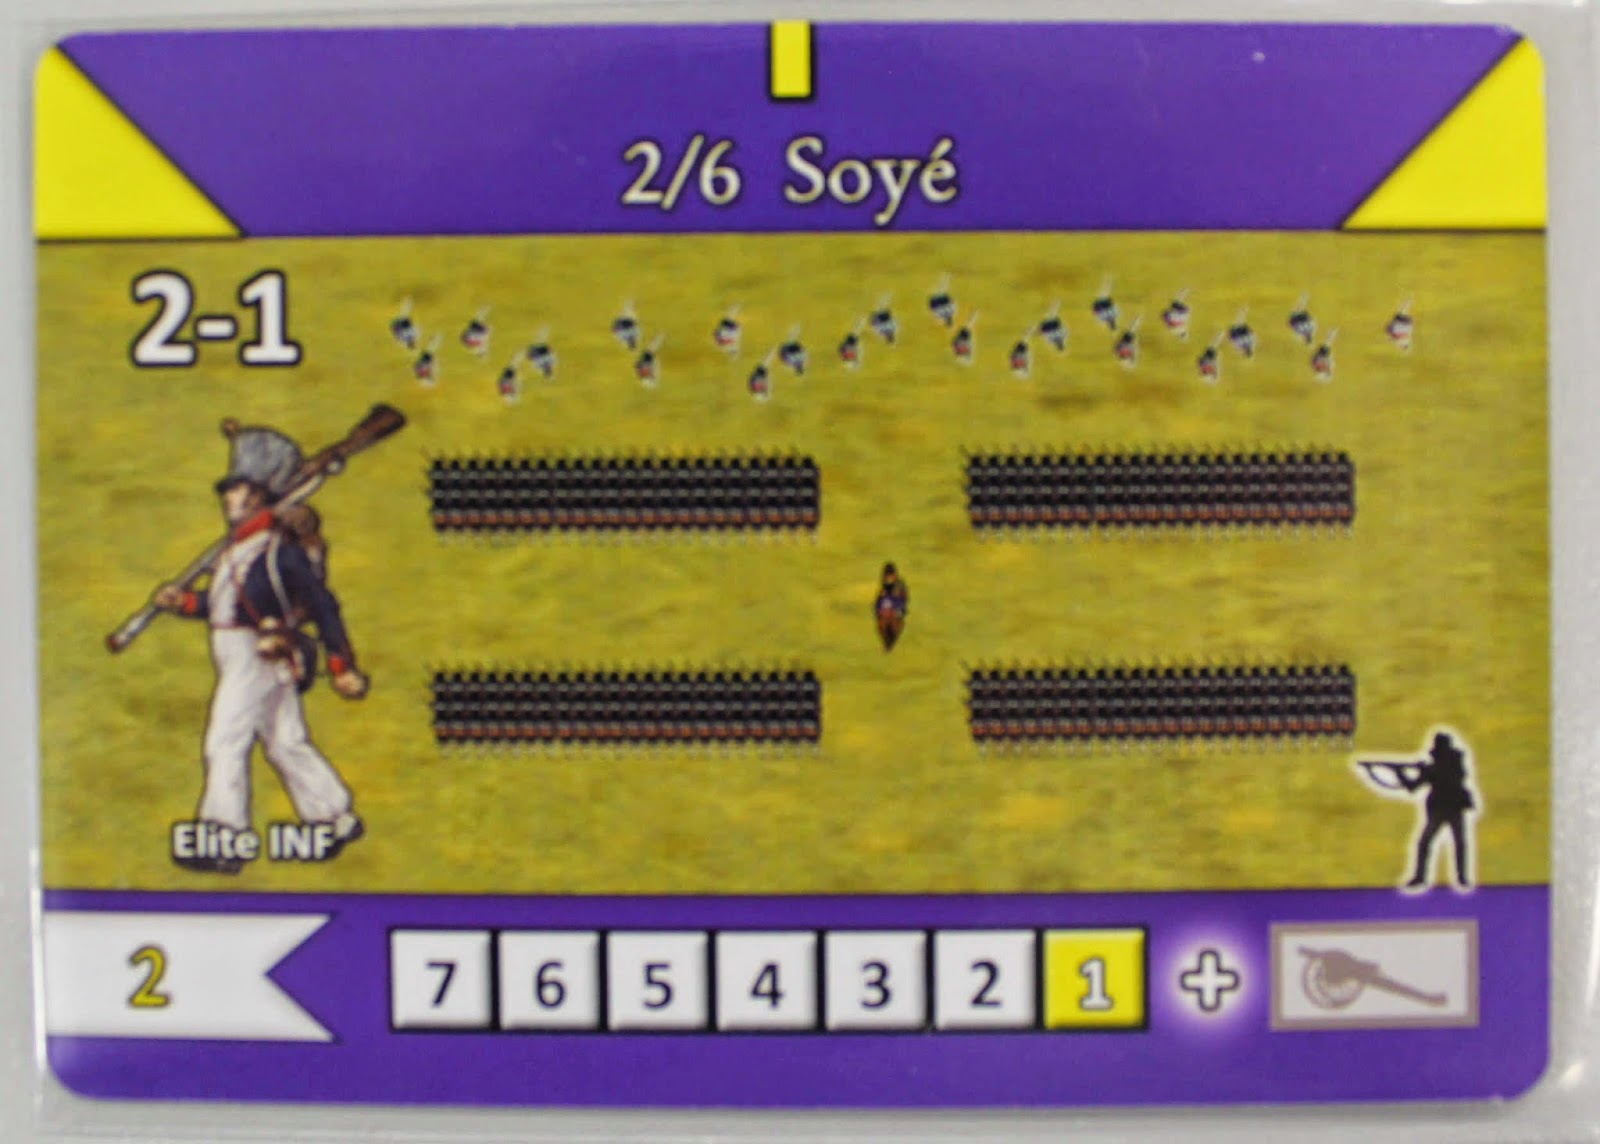
Tip #5: Use Bigbases
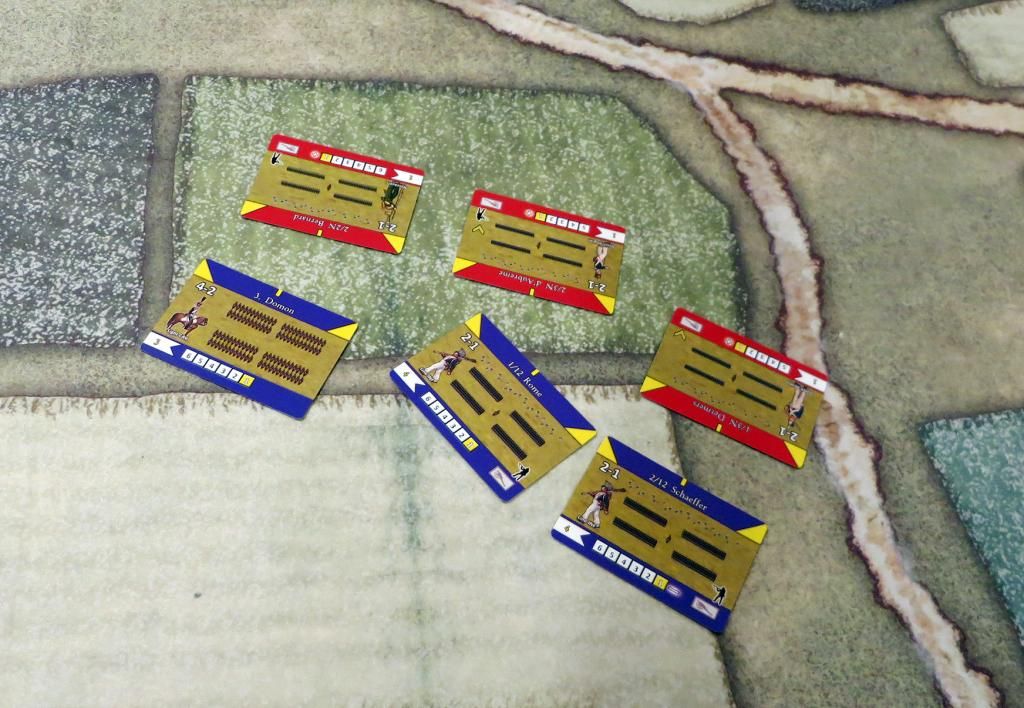
Two is a company, three is a crowd. The 2mm armies that I liked were not cramped on a small base, but spaciously based on bigbases, as battalions or divisions. 3D-cards. Below a Blücher card: 4 ranks plus skirmishers.
I saw that reflected in Roundwoods 30YW 2mm project.
Size is a personal choice.
- The advantage of 40mm wide/20 to 40mm deep is that you can play a DBA-sized game on a 90×90 table with 30+ small bases/units.

- And the advantage of 60×80 (poker sized cards) is that they have the same size as the Blücher cards.
- I compromised. 60×30 seems common.
- I chose midsized 60×30+10mm for a magnetic label = 60×40 for infantry, 4 units per base.
- I based artillery on 30×40 (half the standard bases) and commanders on circular bases.
- Thus, a full battle can be played on a 24×16 basewidths = 144x96cm (5×3″) small kitchen table.
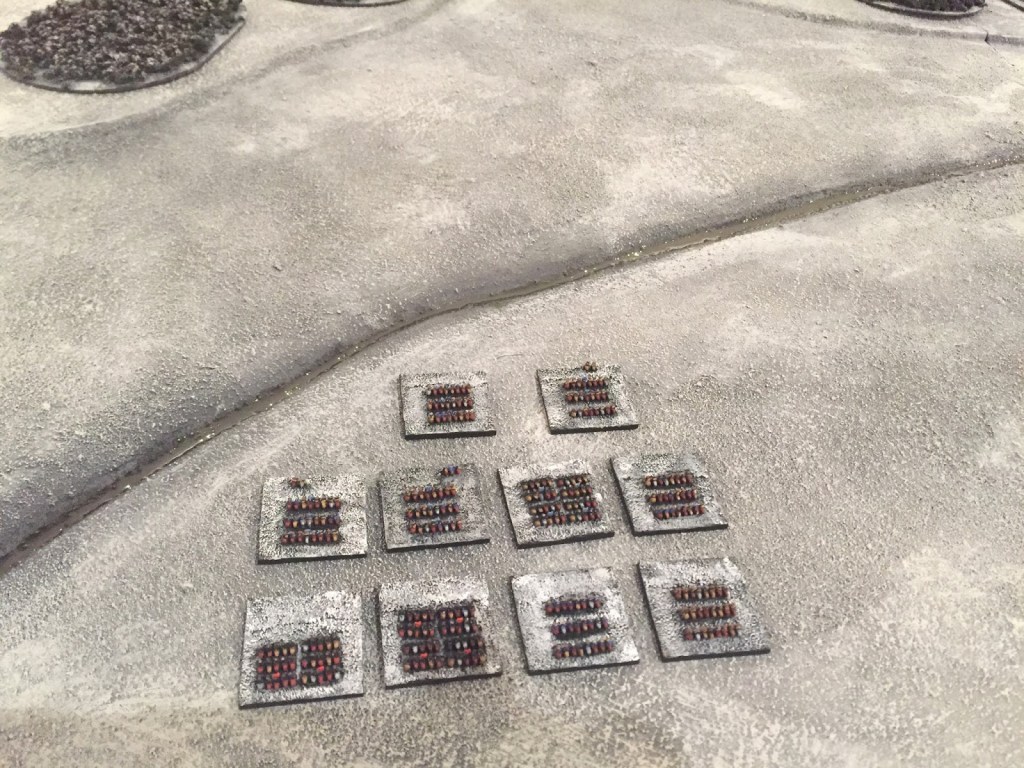
Tip #6: Paint the base, not the unit
In 6mm the adage is ‘paint the unit, not the miniature‘. In 2mm the adage is: paint the base, not the unit. The tiny unit should contrast with the base and the base should accentuate the units.
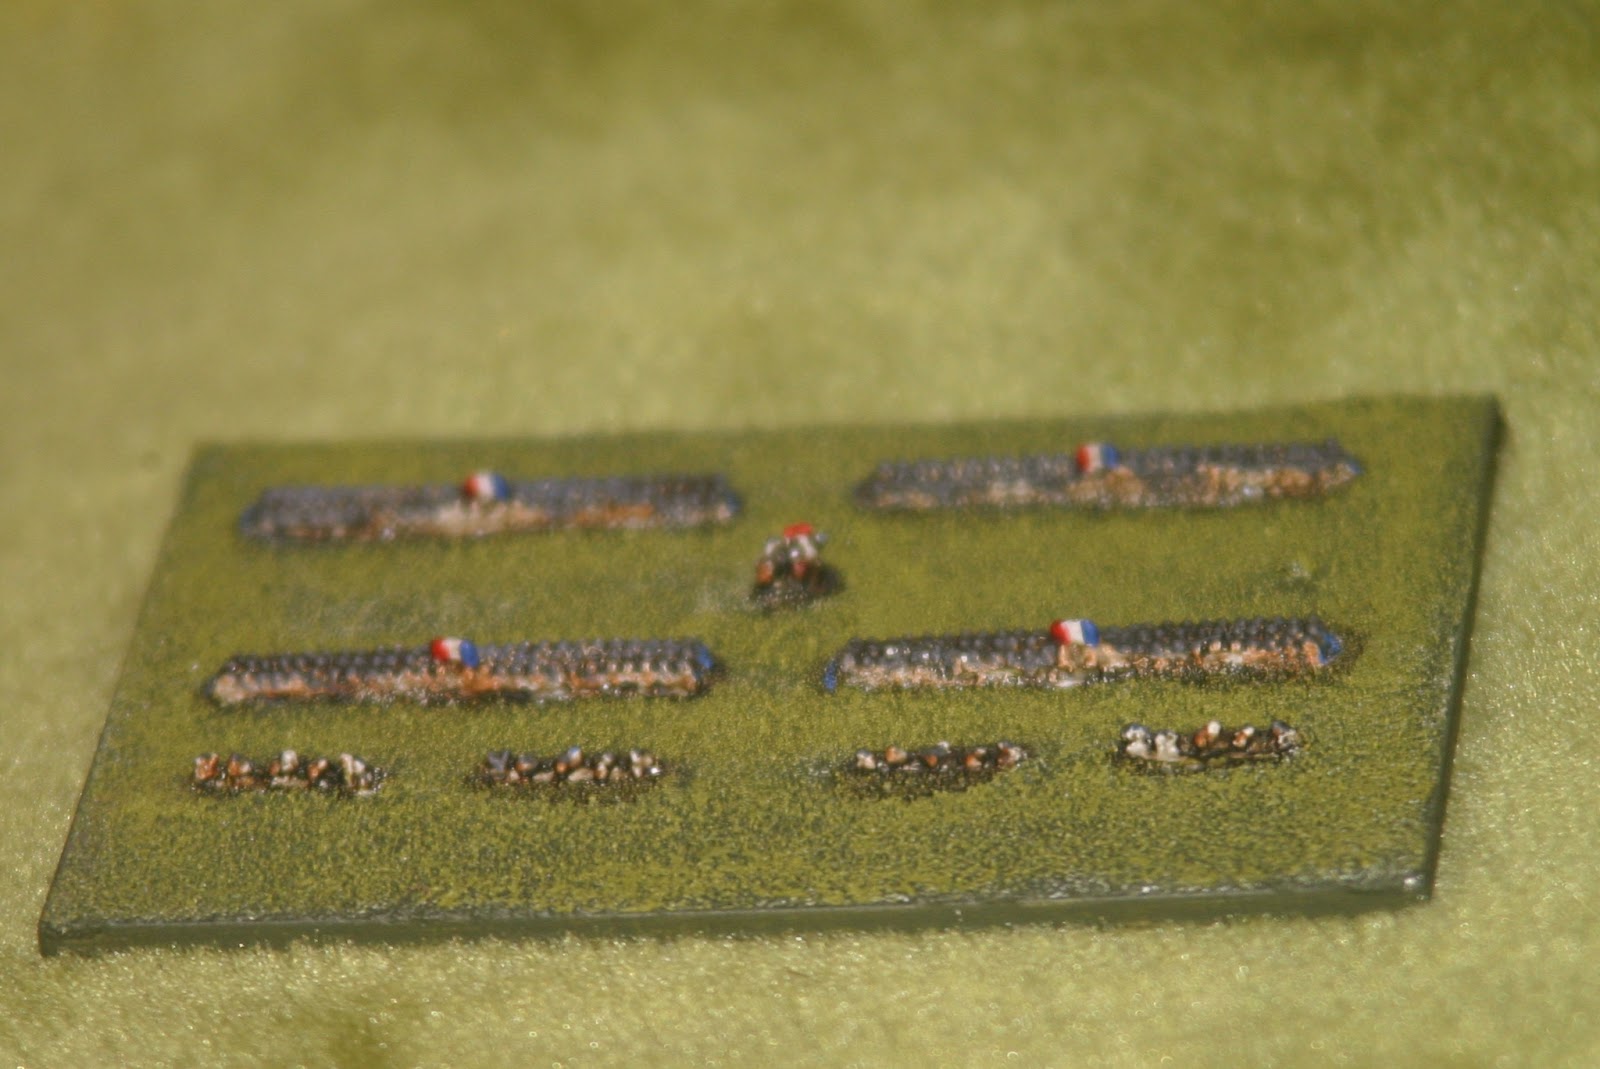
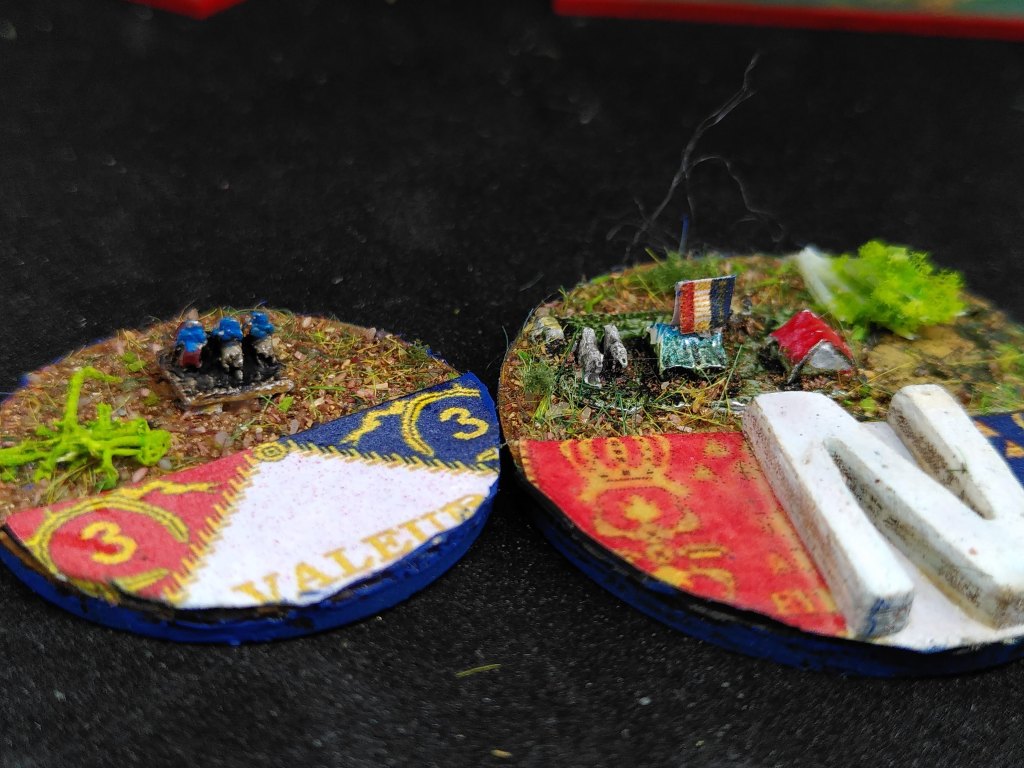
So I checked a colour wheel. French are dark blue. The opposite colour on a colour wheel is khaki. Blue French look fine on a brown/yellow base. Below a complementary scheme. Blue, brown, gold.
You could glue blue French troops on a khaki base. Notice this blue/yellow scheme on the Blücher card, above.
An alternative option is a tricolour-scheme, Blue, green, orange red.

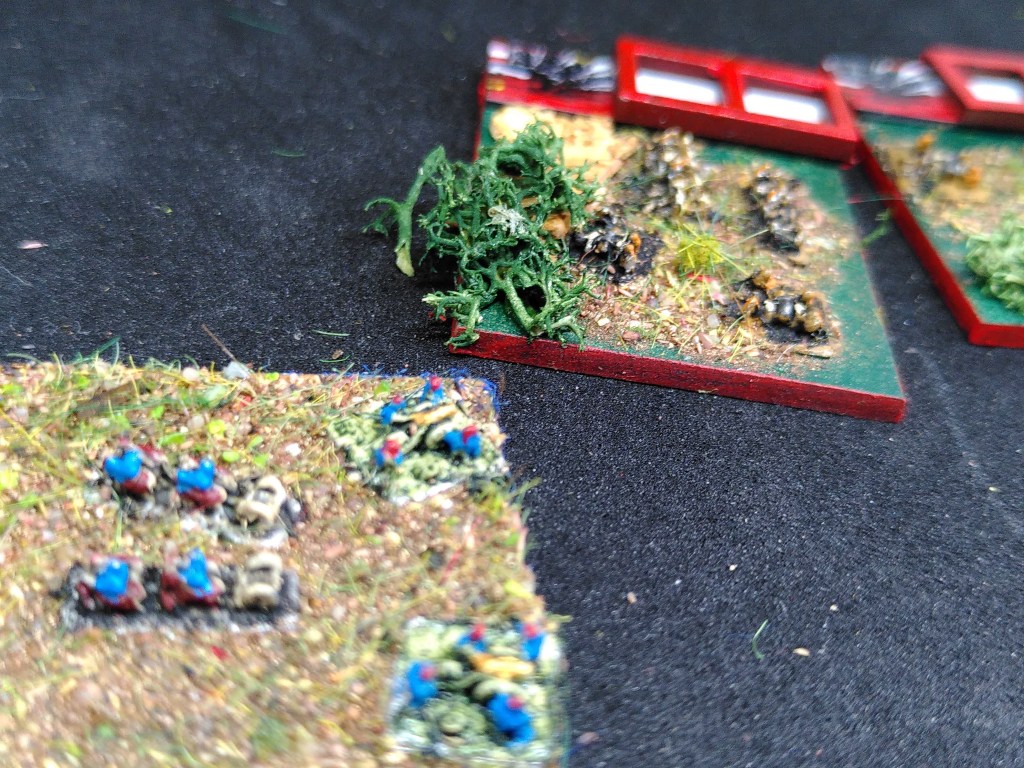
For the French I decided to combine the blue battalions with a mixed chocolate brown and grass green accents.
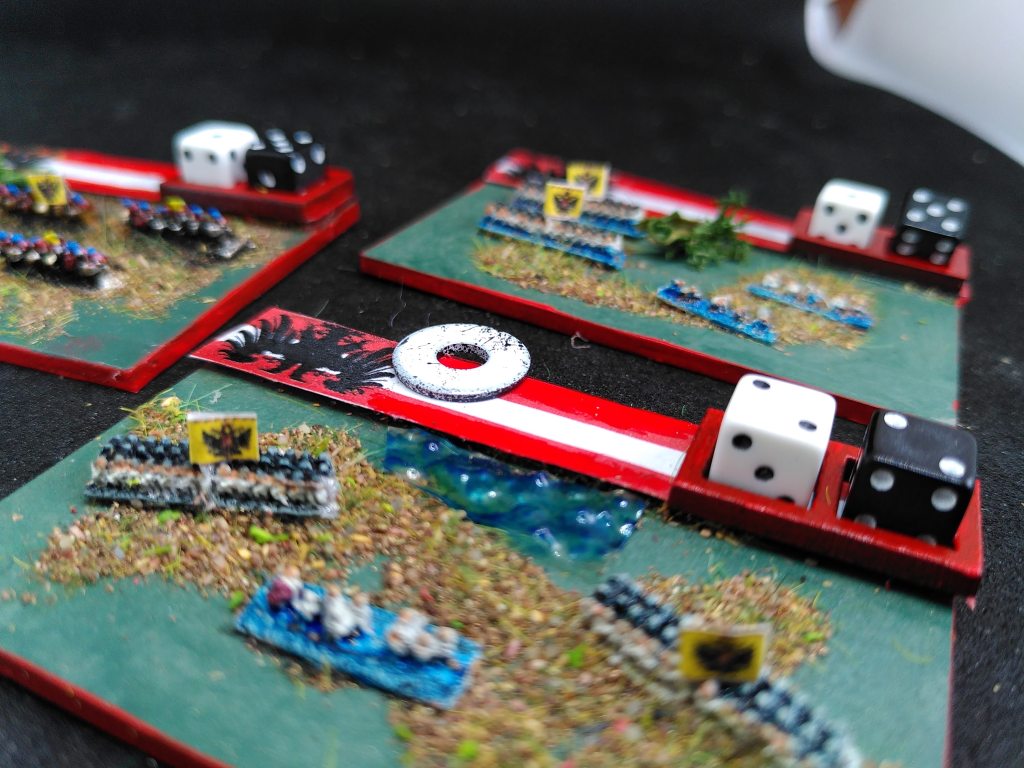
Austrian blood red contrasts with a darker and dimmer green base.

I painted the rims of every base for extra visual effect.
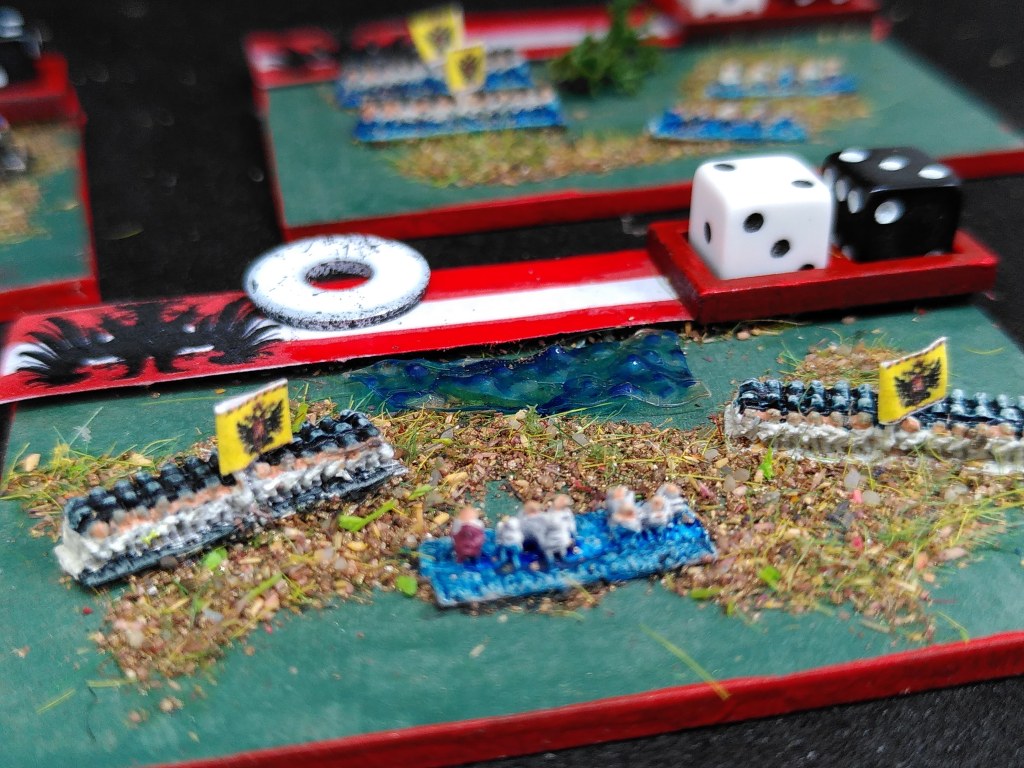
Tip #7: Use Labels, Dice Cells And Magnetic Strips
Sidney Roundwood and Analogue Hobbies printed labels to make their bases more recognizable.
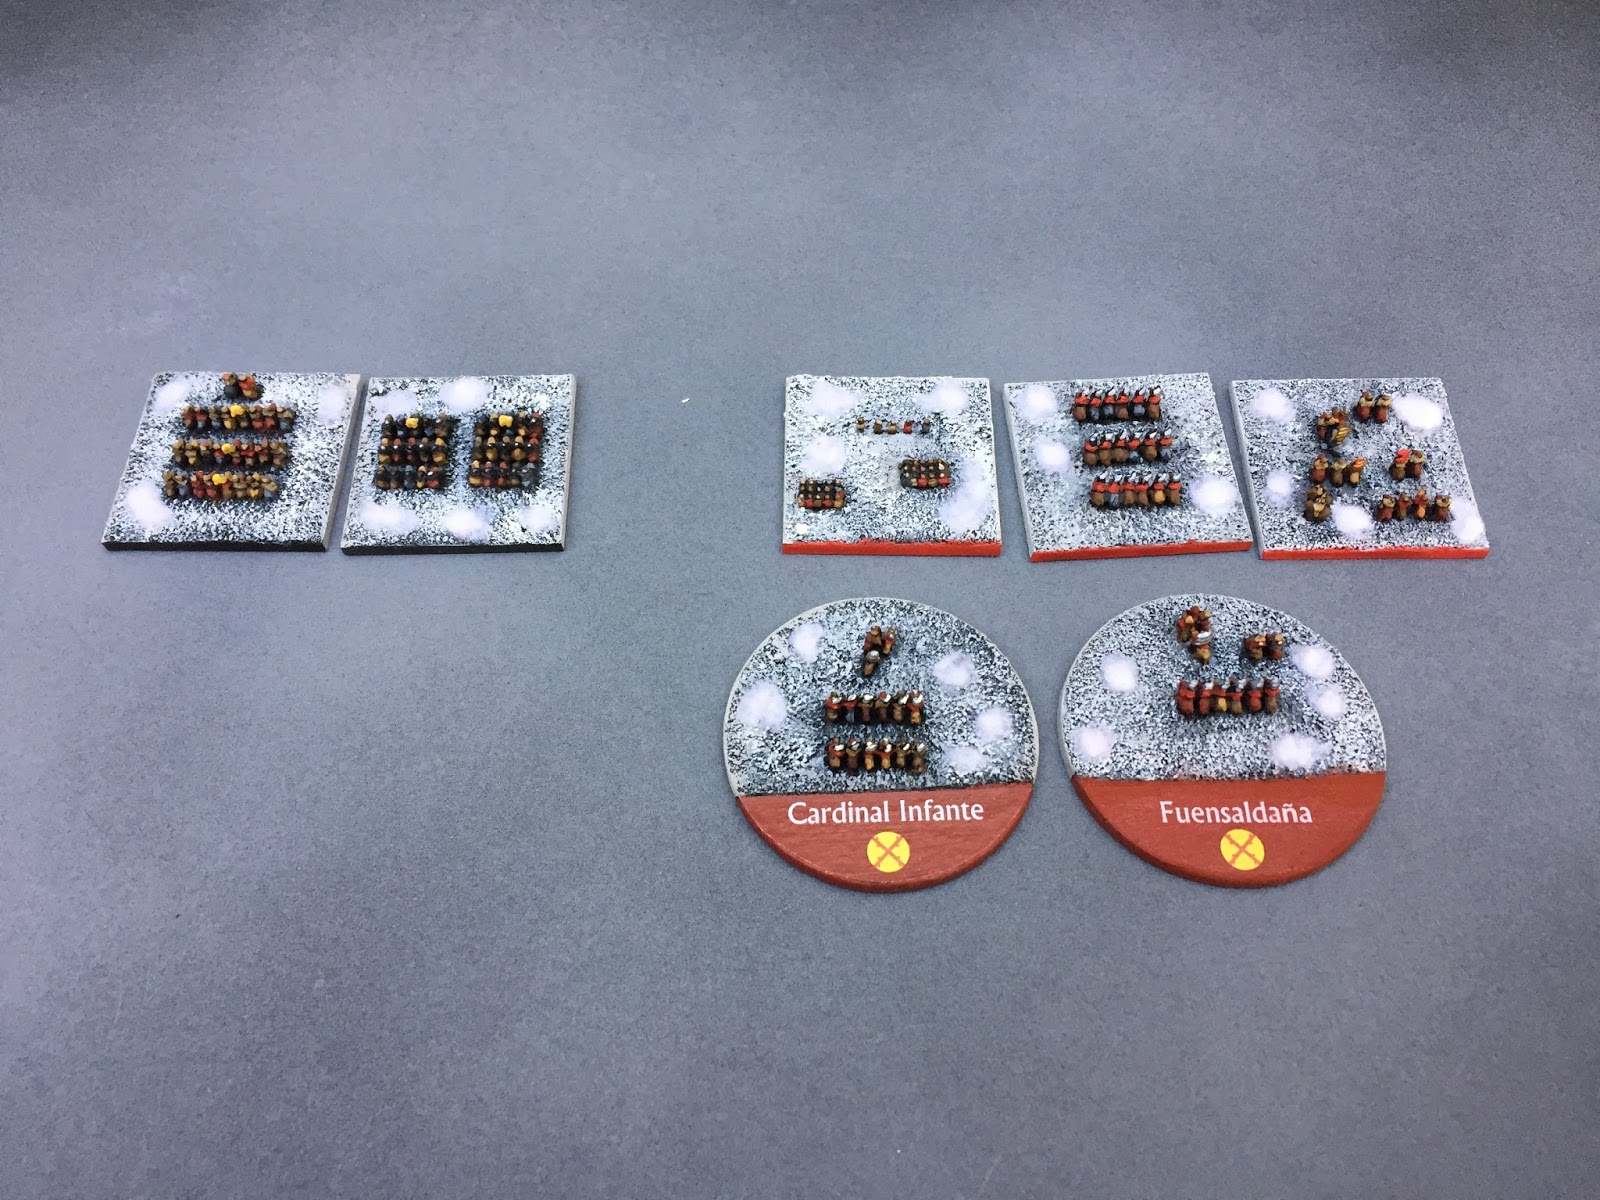
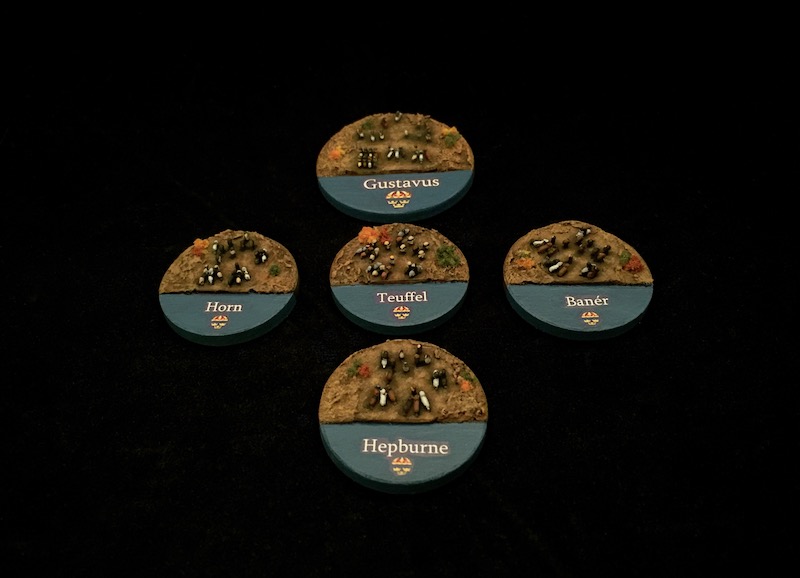
I copied that idea for all bases, not only the commanders. Simple, strong colours work best. Detailed labels distract. I printed my own labels.


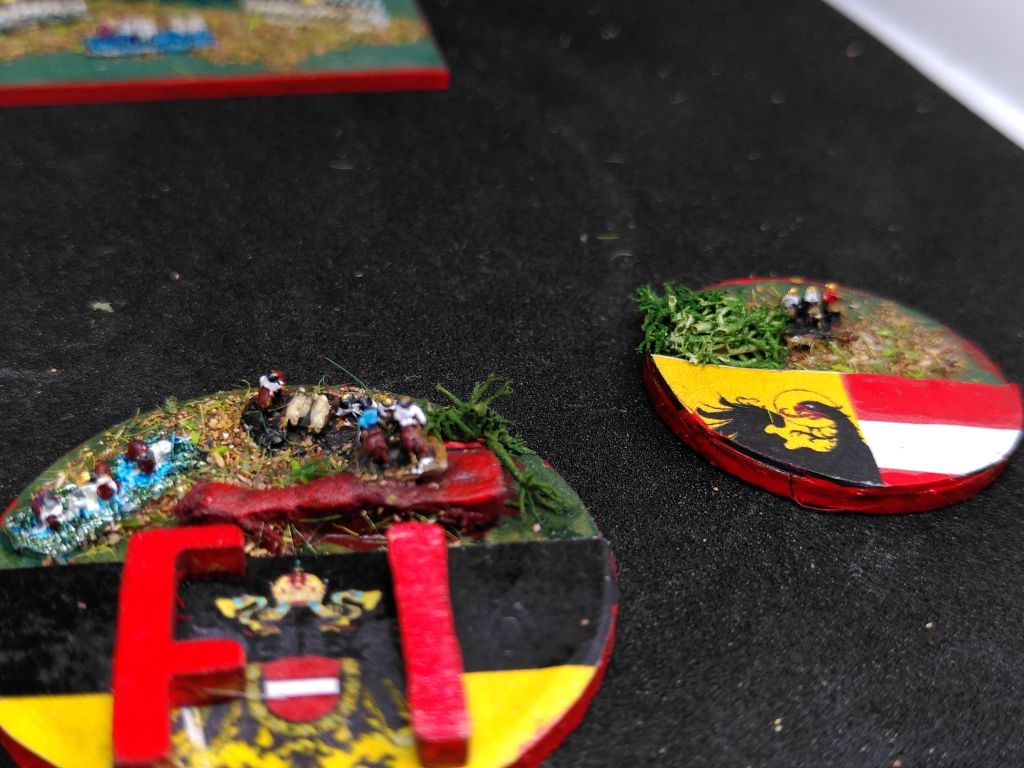
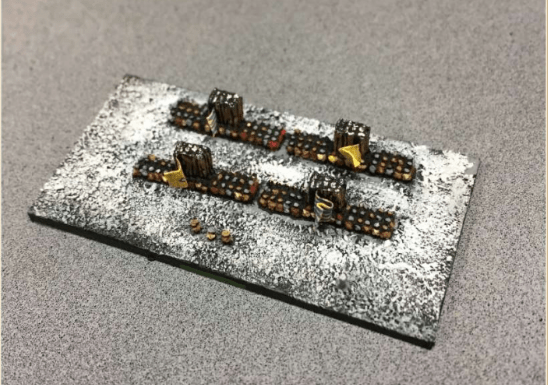
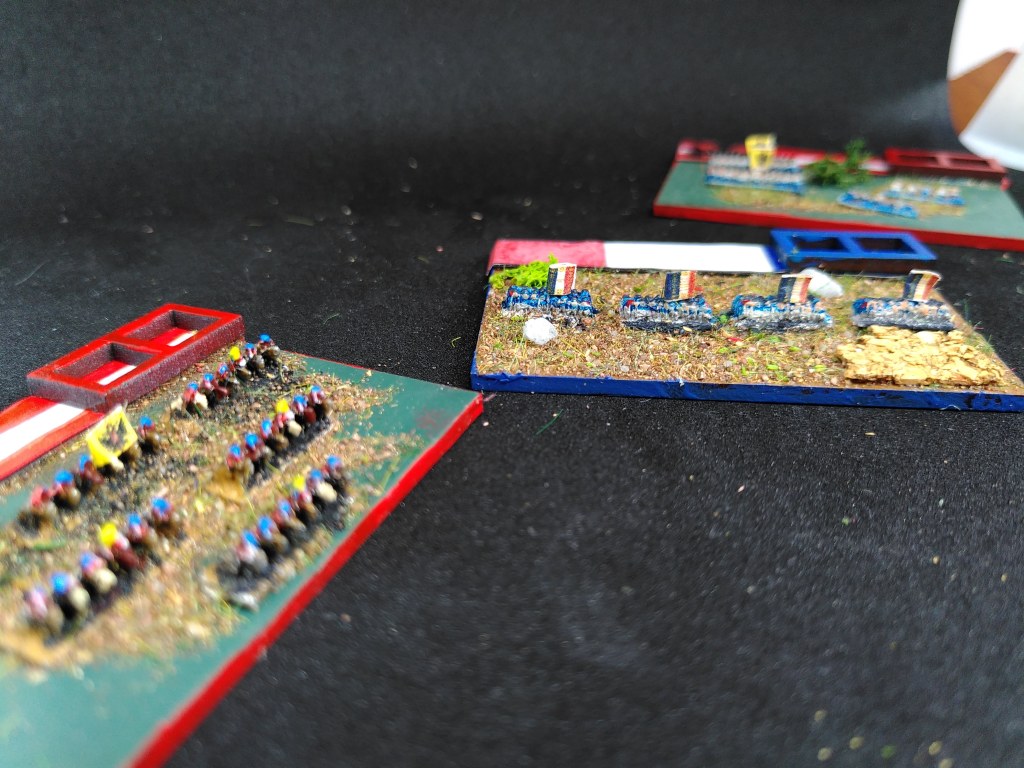
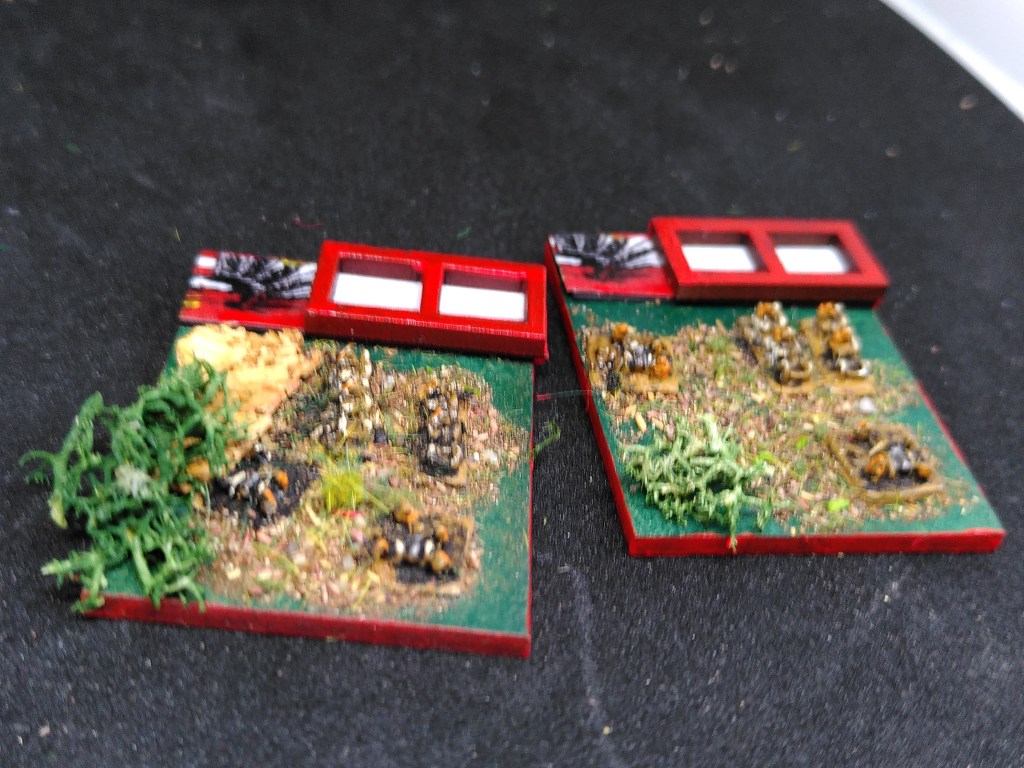
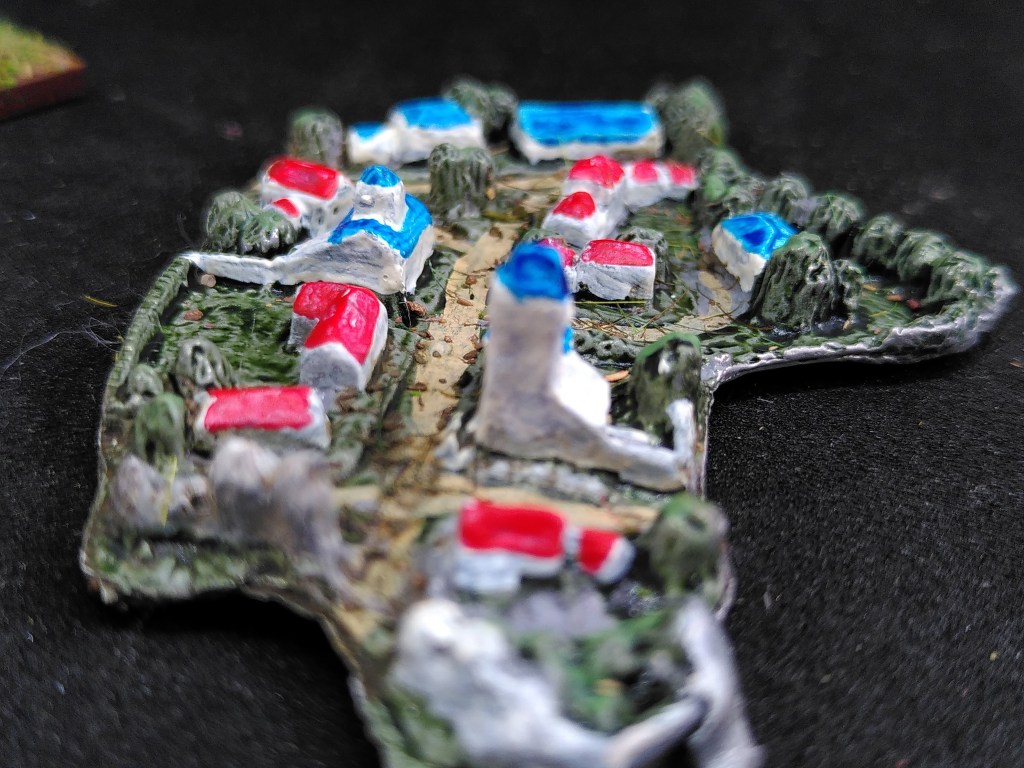
Tip #8: Base With Variation
Many 2mm basing examples I saw online were unimaginative. But Michael Dippel (Bayernkini) made 60x30mm diorama bases.

Lovely. His bases are fuller than mine, but I support the idea. So I varied formations and added small scenic items, like bushes, water, and sometimes a building.
Tip #9: Use Contrast Paint & Circus Colours
- I painted the units after glueing them on an already flocked base. Dead simple. Stickering and magnetizing the base took more work.
- Analogue Hobbies advised: “In order to make the figures better stand out on the base, I outline the formation with a dark brown mixed with a touch of black to create a shadow effect”.
- I used a standard brush. I primed all infantry white, then contrast painted the blocks. GW Contrast paint is perfect for 2mm.
- Next I drybrushed flesh colour lines, Sometimes I added white, red, black or blue dots.
- Cavalry: prime the cavalry brown or khaki, then a Nuln oil wash, then re-higlight the riders white, then contrast paint the rider in the desired colour. Ready. Perfectionists could follow the advice of Lloydian aspects, who blogged that you can give some horses outlandish contrasting colours like reddish brown for some horses. Or white.
- Exaggerate colours. I primed my green Austrian lancers yellow and washed the rider with diluted green contrast paint. The brown Austrian gunner jacket became orange in 2mm. 2mm is circus colours.
Painting 2mm is not more difficult than painting small lines on 28mm miniatures, believe me! And FYI: I’m a nearsighted middle aged men with middle aged eyes.
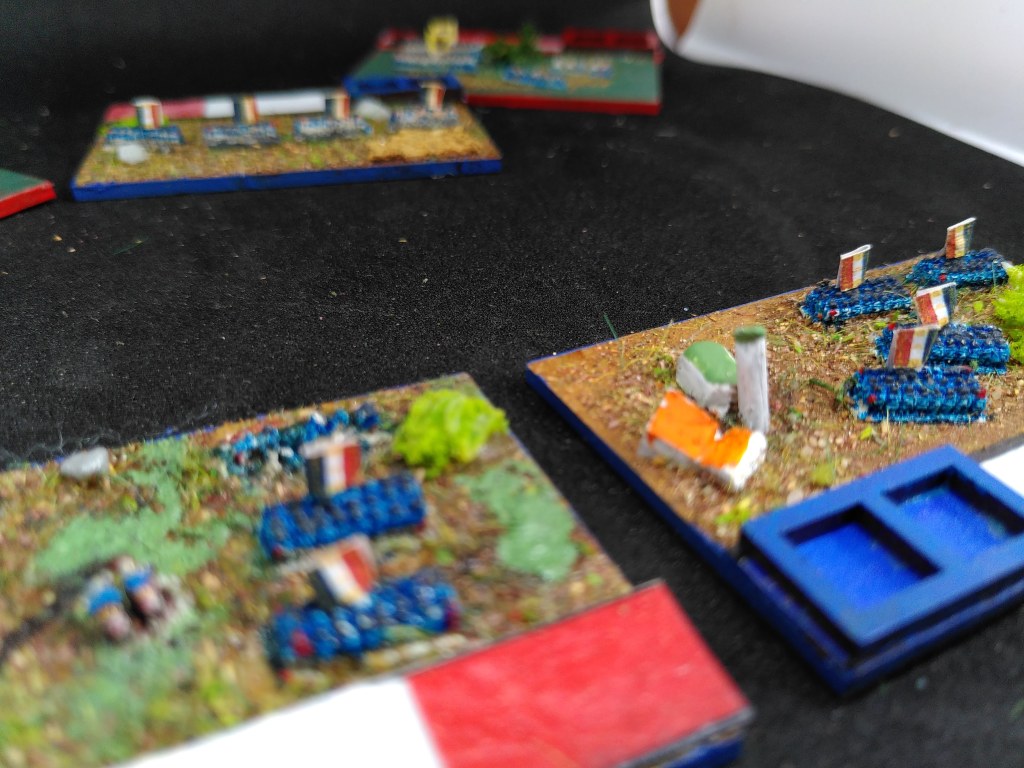
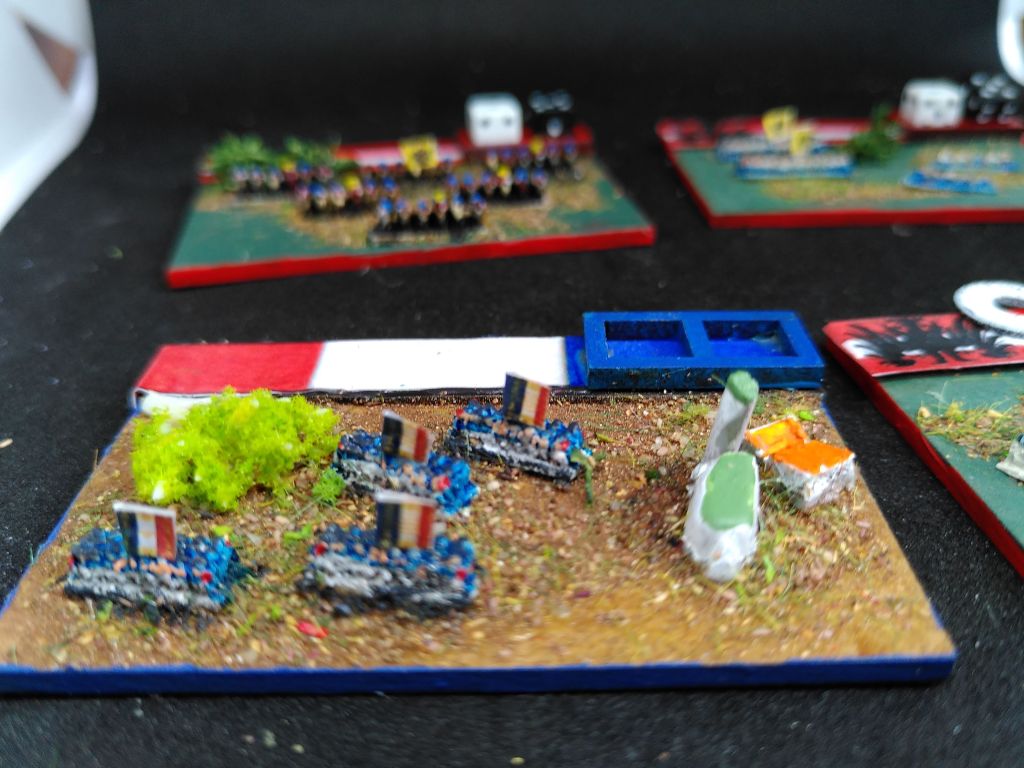
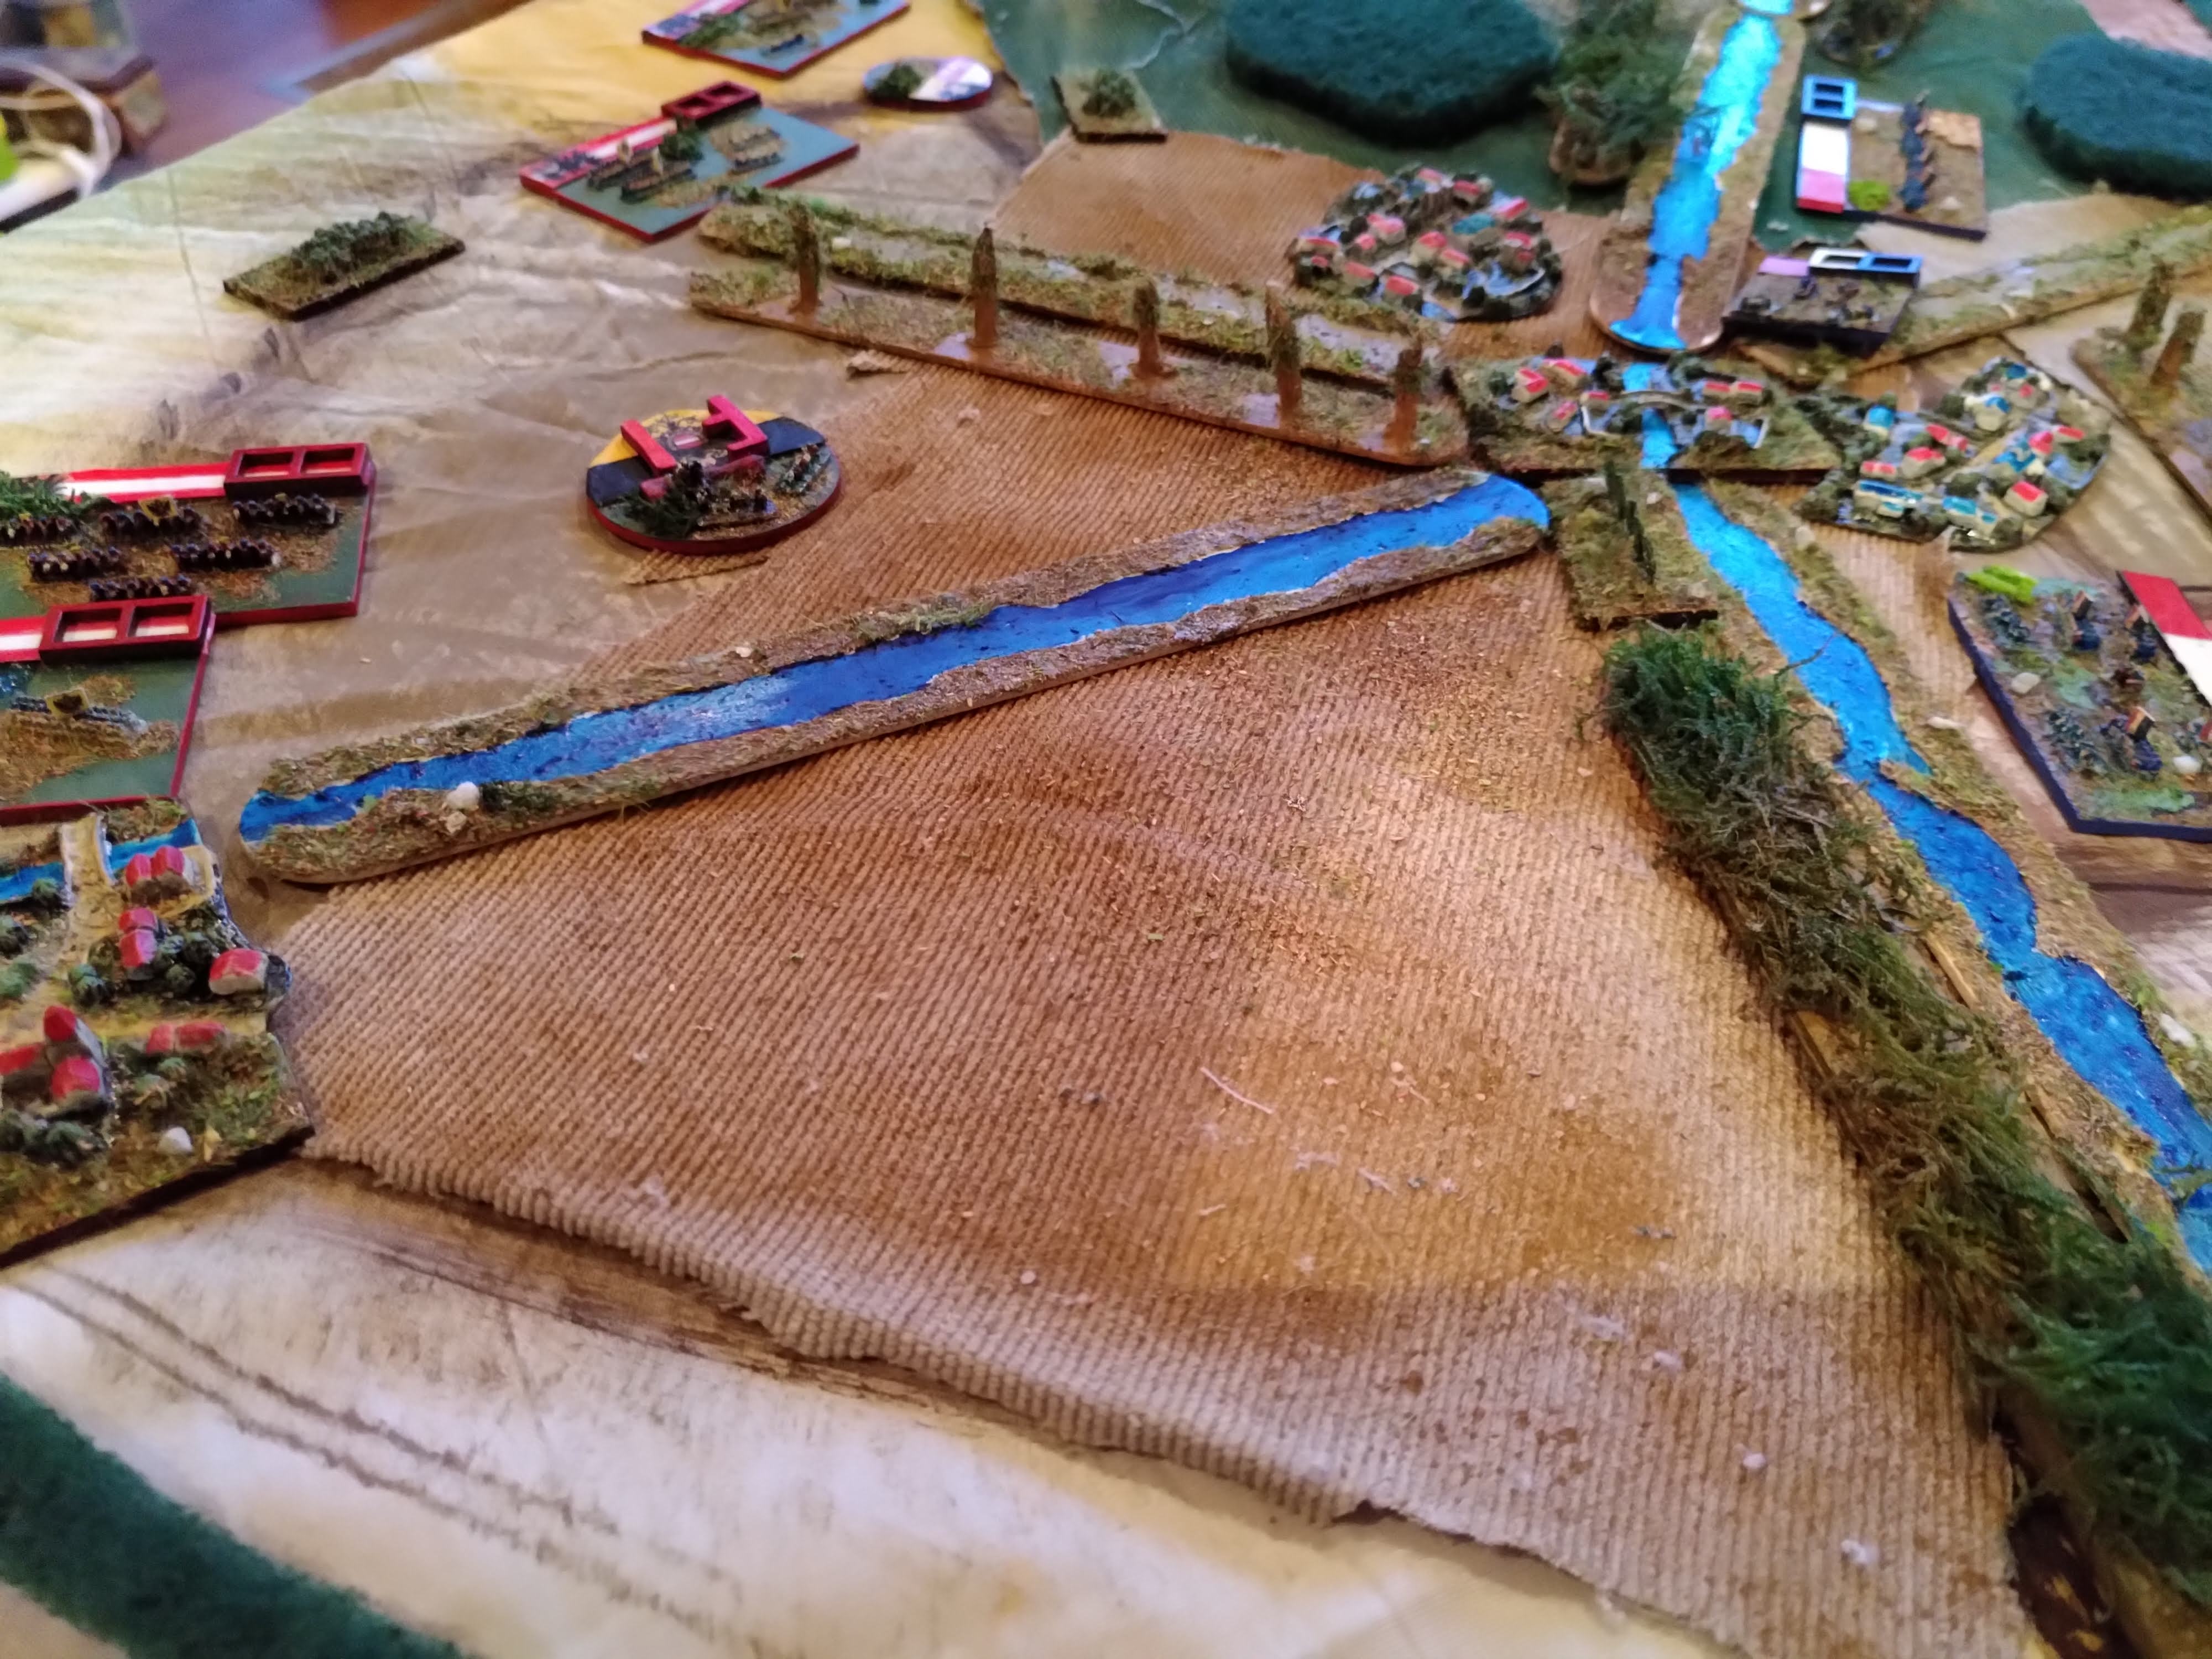
Tip #10: Invest in scenery
The smaller the miniatures, the more important the scenery is. See the three pictures below.
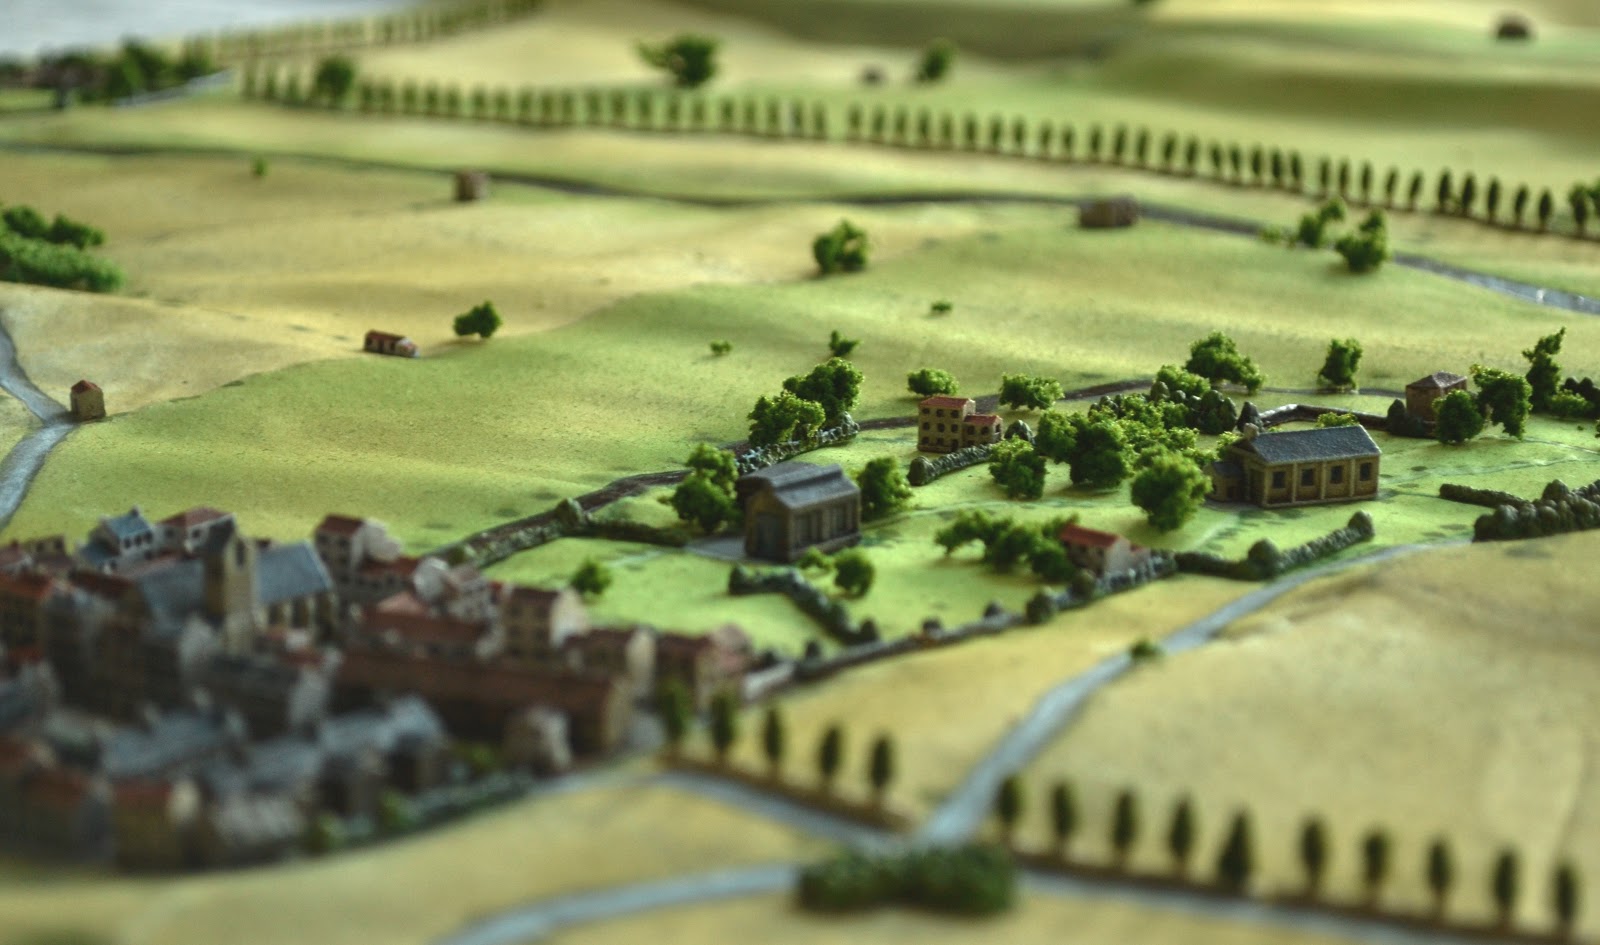
Irregular’s scenery is excellent. Avid 2mm-player Tony Hughes painted them all and placed a catalogue, much better than Irregular’s own catalogue, on his site. Again, I painted them in bright light circus colours.

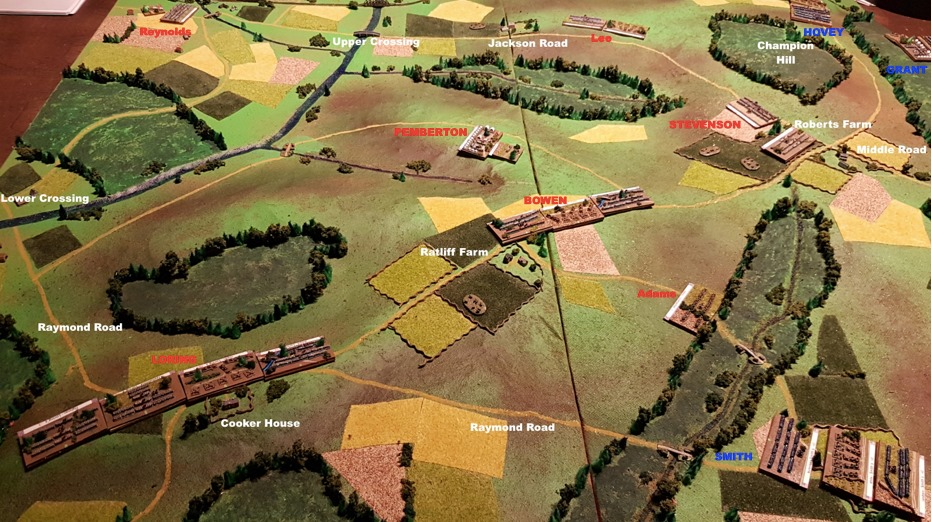
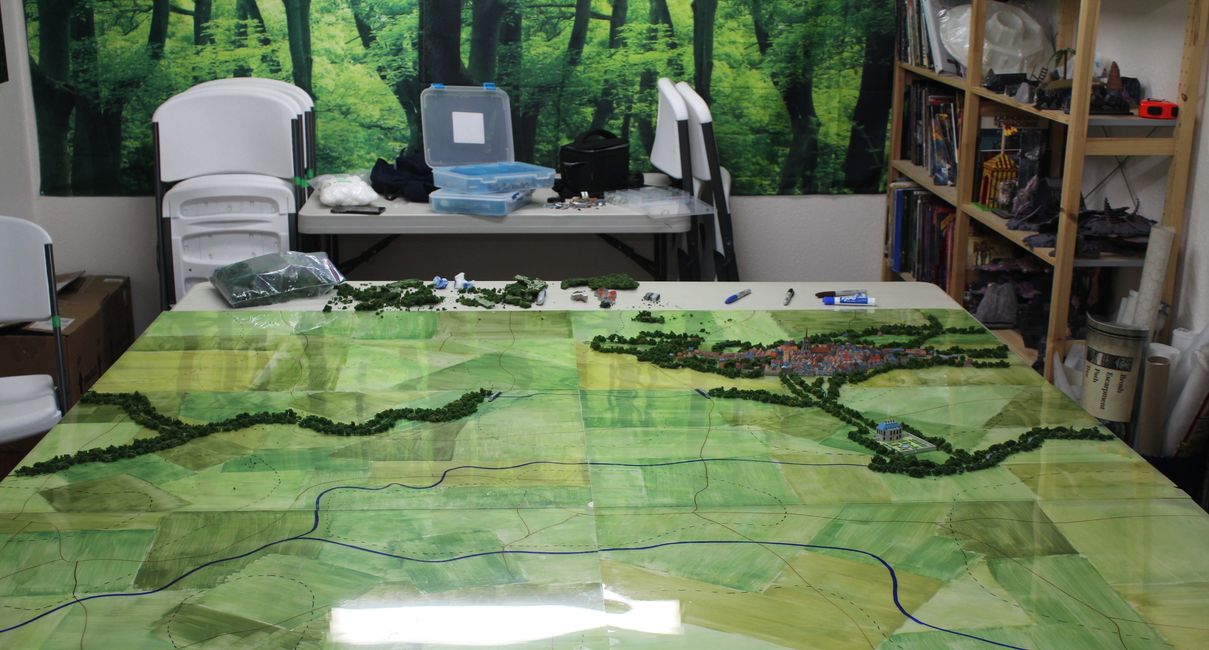
Brigade models BTW have beautiful historical 2mm Waterloo buildings for the true fan. The Forward March blog shows impressive examples how to make quality 2mm battle mats, and a perfect tutorial for large 3D 6×6 plexiglas battlefields. I admire the results, but I wanted a portable wargame, remember? So I stick to my light bring-along-battlemat with a patchwork pattern of fields on it. See below.


Best Forward March tip:
A battlefield in a box
The 51 units and all the scenery fit in a handy 25x35cm toolbox with room for more.

Links and rules
- Some time after my tutorial, Donis Lopatka wrote a 2mm step by step guide on Facebook. I reformatted his useful guide to a blog article on this site, link here, for a different approach. I paint with Contrast Paint, he paints with a chocolate brown undercoat and highlights.
- Sidney Roundwood wrote a very extensive guide. And so did War Depot, Lloydian Aspects and Analogue Hobbies.
- Tim’s Tanks and Nik Harwood made their 2mm Napoleonic Blücher sets. Nik has a wiki.
- If you have a 3D-printer, the$15 Forward March 3D-library with printable battalions and scenery might be a good idea. No shipping, unlimited battalions, the Emperor would envy you!
- I re-layouted the free quickplay 2×2 Napoleonics rules by Rod Humble et al. that are made for 2mm. Review here, by Balagan: “Quite an interesting set of rules and well worth a try. The first volley and pinning of infantry that fires is super elegant. These are also tied to the minimal book keeping necessary; only a single marker (cotton wool) is necessary to represent all status values (…) Movement is super flexible. I kind of like this. And I like the fact the flexible movement applies to everybody (unlike Shako which only allows French to be flexible)” You can download the relayouted rules here.
But I thought you were a 6mm gamer?
I am. 6mm is a joy to paint. I love big battalions on wide tables, I have hundreds of 20x40mm small 6mm strips, and a ton of 6mm scenery, all stored in big boxes at the club for massive battles and multiplayer games with varying systems and basing. So I still carry several overnight bags if I take them to a friend or to a demo game and then I need extra time to sort out the right troops, sabot base them and set up.
This 2mm variant is a portable evening wargame, a battlefield in a shoebox that I can bring to a friend, pile on the kitchen table, ready to play. Better than a card game. Extremely useful in this lockdowned corona year.

Excellent post, very inspiring. I really should get some paint on those 2mm miniatures…
LikeLike
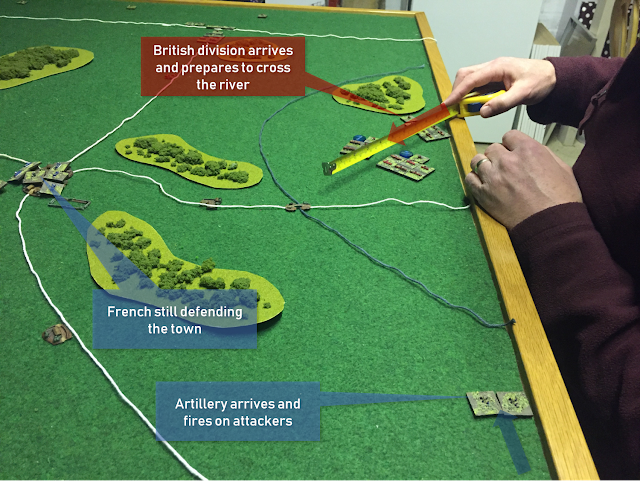
Great post. I can see the attraction when you post pics with dramatic on going small scale battles. The look like moving maps.
Cheers,
Pete.
LikeLike